The Elmer Parallel Demo used ParaView to visualize the results of the simulation. It looks like such a useful tool so I decided to get the source code and build it to learn a little bit about it.
Building on Windows
The building documentation looks thorough. I used a similar directory structure and didn’t need the Git Bash window since I ran all the commands in the VS2019 x64 Native Tools Command Prompt.
Unfortunately, cmake fails on the first try because it cannot find MPI.
-- Check size of uintptr_t
-- Check size of uintptr_t - done
-- Could NOT find MPI_C (missing: MPI_C_LIB_NAMES MPI_C_HEADER_DIR MPI_C_WORKS)
-- Could NOT find MPI (missing: MPI_C_FOUND C)
CMake Error at VTK/CMake/vtkModule.cmake:4578 (message):
  Could not find the MPI external dependency.
Call Stack (most recent call first):
  VTK/CMake/vtkModule.cmake:5172 (vtk_module_find_package)
  VTK/Utilities/MPI/CMakeLists.txt:1 (vtk_module_third_party_external)
The error log contains a more specific error message:
C:\PROGRA~2\MIB055~1\2019\ENTERP~1\VC\Tools\MSVC\1429~1.301\bin\Hostx64\x64\cl.exe  /nologo   /DWIN32 /D_WINDOWS /bigobj   /Zi /Ob0 /Od /RTC1 -MDd /showIncludes /FoCMakeFiles\cmTC_77827.dir\test_mpi.c.obj /FdCMakeFiles\cmTC_77827.dir\ /FS -c C:\dev\repos\pv\paraview\VTK\CMake\patches\3.22\FindMPI\test_mpi.c

C:\dev\repos\pv\paraview\VTK\CMake\patches\3.22\FindMPI\test_mpi.c(1): fatal error C1083: Cannot open include file: 'mpi.h': No such file or directory
ninja: build stopped: subcommand failed.
Some folks have already run into this before, e.g.
The problem is that I already had Microsoft MPI installed (by Elmer) but I didn’t have the SDK. Gotta take those prerequisites seriously… However, it’s good to know that the Microsoft MPI source code is on GitHub! Weird that I can’t download the MPI SDK by itself. The SDK’s default install path is “C:\Program Files (x86)\Microsoft SDKs\MPI\“
Microsoft MPI SDK Setup Wizard
This addresses that cmake failure but also points out my other dereliction of prerequisite installation…
...
-- Found MPI_C: C:/Program Files (x86)/Microsoft SDKs/MPI/Lib/x64/msmpi.lib (found version "2.0")
-- Found MPI: TRUE (found version "2.0") found components: C
...
CMake Warning at VTK/CMake/vtkModule.cmake:4572 (find_package):
  By not providing "FindQt5.cmake" in CMAKE_MODULE_PATH this project has
  asked CMake to find a package configuration file provided by "Qt5", but
  CMake did not find one.

  Could not find a package configuration file provided by "Qt5" (requested
  version 5.9) with any of the following names:

    Qt5Config.cmake
    qt5-config.cmake

  Add the installation prefix of "Qt5" to CMAKE_PREFIX_PATH or set "Qt5_DIR"
  to a directory containing one of the above files.  If "Qt5" provides a
  separate development package or SDK, be sure it has been installed.
Call Stack (most recent call first):
  VTK/GUISupport/Qt/CMakeLists.txt:43 (vtk_module_find_package)


CMake Error at VTK/CMake/vtkModule.cmake:4578 (message):
  Could not find the Qt5 external dependency.
Call Stack (most recent call first):
  VTK/GUISupport/Qt/CMakeLists.txt:43 (vtk_module_find_package)
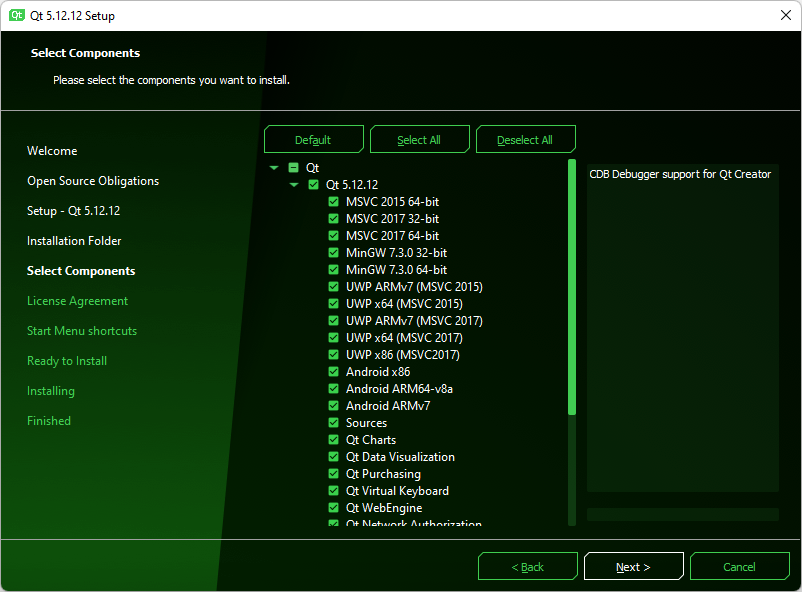
Unfortunately, I don’t see an MSVC 2019 component! Could this be why they require 5.15.3?
Qt 5.12.12 Setup Dialog – Component Selection
Even more unfortunate is the discovery that the reason I can’t find 5.15 installers is because they need a commercial license. Here’s the linked to blog post: Qt offering changes 2020. Interestingly, there was pushback against the account requirement a while back too – Changing Qt Account to be Optional in the Online Installer. I had been considering learning more about Qt and perhaps porting some code to Qt but this level of friction has me reconsidering doing anything with Qt. For now, I’m setting aside the Windows platform to see what the situation is on Linux.
I hadn’t really thought much about what TBB is until cmake failed with this error:
-- Could NOT find TBB (missing: TBB_DIR)
CMake Error at VTK/CMake/vtkModule.cmake:4578 (message):
  Could not find the TBB external dependency.
Call Stack (most recent call first):
  VTK/Common/Core/vtkSMPSelection.cmake:42 (vtk_module_find_package)
  VTK/Common/Core/CMakeLists.txt:51 (include)
Searching through the source code for VTK_SMP_IMPLEMENTATION_TYPE leads me to the VTK build instructions, which list all the possible values. For now, I’ll just remove this define from the cmake command line.
This fails because MPI cannot be found (just like on Windows).
CMake Error at VTK/CMake/vtkModule.cmake:4578 (message):
  Could not find the MPI external dependency.
Call Stack (most recent call first):
  VTK/CMake/vtkModule.cmake:5172 (vtk_module_find_package)
  VTK/Utilities/MPI/CMakeLists.txt:1 (vtk_module_third_party_external)
Installing Open MPI using brew addresses this.
brew install openmpi
The next error is about Qt5 missing:
CMake Warning at VTK/CMake/vtkModule.cmake:4572 (find_package):
  By not providing "FindQt5.cmake" in CMAKE_MODULE_PATH this project has
  asked CMake to find a package configuration file provided by "Qt5", but
  CMake did not find one.

  Could not find a package configuration file provided by "Qt5" (requested
  version 5.9) with any of the following names:

    Qt5Config.cmake
    qt5-config.cmake

  Add the installation prefix of "Qt5" to CMAKE_PREFIX_PATH or set "Qt5_DIR"
  to a directory containing one of the above files.  If "Qt5" provides a
  separate development package or SDK, be sure it has been installed.
Call Stack (most recent call first):
  VTK/GUISupport/Qt/CMakeLists.txt:43 (vtk_module_find_package)


CMake Error at VTK/CMake/vtkModule.cmake:4578 (message):
  Could not find the Qt5 external dependency.
Call Stack (most recent call first):
  VTK/GUISupport/Qt/CMakeLists.txt:43 (vtk_module_find_package)
Install it using the command from https://formulae.brew.sh/formula/qt@5
brew install qt@5
The summary contains more information than the ninja or Open MPI installations did.
==> Summary
🍺  /opt/homebrew/Cellar/qt@5/5.15.5_1: 10,846 files, 344.2MB
==> Running `brew cleanup qt@5`...
Disable this behaviour by setting HOMEBREW_NO_INSTALL_CLEANUP.
Hide these hints with HOMEBREW_NO_ENV_HINTS (see `man brew`).
==> Caveats
==> qt@5
We agreed to the Qt open source license for you.
If this is unacceptable you should uninstall.

qt@5 is keg-only, which means it was not symlinked into /opt/homebrew,
because this is an alternate version of another formula.

If you need to have qt@5 first in your PATH, run:
  echo 'export PATH="/opt/homebrew/opt/qt@5/bin:$PATH"' >> ~/.zshrc

For compilers to find qt@5 you may need to set:
  export LDFLAGS="-L/opt/homebrew/opt/qt@5/lib"
  export CPPFLAGS="-I/opt/homebrew/opt/qt@5/include"
The same Qt error is displayed though. I use the approach from https://github.com/Cockatrice/Cockatrice/issues/205#issuecomment-48705334
Below is a video from the Elmer folks demonstrating how to use parallelization to improve the performance of Elmer. I followed along on Windows with the publicly downloadable Elmer installation. I’m listing the commands in this post for easy reference.
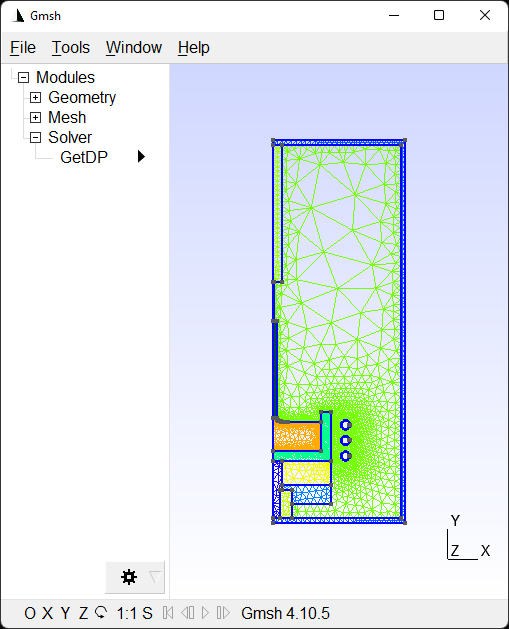
We first clone the demo repository then open the geo file that serves as the basis for the demo in gmsh. I ran these commands in a Windows command prompt and used full paths to the gmsh and elmer executables.
git clone https://github.com/tzwinger/elmer_parallel_demo
cd elmer_parallel_demo

# Open the geo file in gmsh as a background job
gmsh.exe elmer_flow.geo &

# Create elmer_flow.msh
gmsh.exe -3 elmer_flow.geo

ElmerGrid 14 2 elmer_flow.msh -autoclean
The ElmerGrid command is used to create partitions from the mesh input file. Running it without any arguments displays the available options. The options used in the example are highlighted below.
This program can create simple 2D structured meshes consisting of
linear, quadratic or cubic rectangles or triangles. The meshes may
also be extruded and revolved to create 3D forms. In addition many
mesh formats may be imported into Elmer software. Some options have
not been properly tested. Contact the author if you face problems.

The program has two operation modes
A) Command file mode which has the command file as the only argument
   'ElmerGrid commandfile.eg'

B) Inline mode which expects at least three input parameters
   'ElmerGrid 1 3 test'

The first parameter defines the input file format:
1)  .grd      : ElmerGrid file format
2)  .mesh.*   : Elmer input format
3)  .ep       : Elmer output format
4)  .ansys    : Ansys input format
5)  .inp      : Abaqus input format by Ideas
6)  .fil      : Abaqus output format
7)  .FDNEUT   : Gambit (Fidap) neutral file
8)  .unv      : Universal mesh file format
9)  .mphtxt   : Comsol Multiphysics mesh format
10) .dat      : Fieldview format
11) .node,.ele: Triangle 2D mesh format
12) .mesh     : Medit mesh format
13) .msh      : GID mesh format
14) .msh      : Gmsh mesh format
15) .ep.i     : Partitioned ElmerPost format
16) .2dm      : 2D triangular FVCOM format

The second parameter defines the output file format:
1)  .grd      : ElmerGrid file format
2)  .mesh.*   : ElmerSolver format (also partitioned .part format)
3)  .ep       : ElmerPost format
4)  .msh      : Gmsh mesh format
5)  .vtu      : VTK ascii XML format

The third parameter is the name of the input file.
If the file does not exist, an example with the same name is created.
The default output file name is the same with a different suffix.

There are several additional in-line parameters that are
taken into account only when applicable to the given format.
-out str             : name of the output file
-in str              : name of a secondary input file
-decimals            : number of decimals in the saved mesh (eg. 8)
...
-removeintbcs        : remove internal boundaries if they are not needed
-removelowdim        : remove boundaries that are two ranks lower than highest dim
-removeunused        : remove nodes that are not used in any element
-bulkorder           : renumber materials types from 1 so that every number is used
-boundorder          : renumber boundary types from 1 so that every number is used
-autoclean           : this performs the united action of the four above
...

Keywords are related to mesh partitioning for parallel ElmerSolver runs:
...
-metiskway int       : mesh will be partitioned with Metis using graph Kway routine

-metisrec int        : mesh will be partitioned with Metis using graph Recursive routine
-metiscontig         : enforce that the metis partitions are contiguous
-metisseed int       : random number generator seed for Metis algorithms
-partdual            : use the dual graph in partition method (when available)
...
Now the solver can be invoked. The demo first does a serial run using the ElmerSolver command.
ElmerSolver elmer_flow_gcr.sif
This took just over 6 minutes on my machine. The wall clock time is the 2nd time (highlighted below) according to the demo video.
...
MAIN: Version: 9.0 (Rev: Release, Compiled: 2020-11-10)
MAIN:  Running one task without MPI parallelization.
MAIN:  Running with just one thread per task.
MAIN:  Lua interpreted linked in.
...
ResultOutputSolver: Saving in unstructured VTK XML (.vtu) format
ResultOutputSolver: -------------------------------------
ElmerSolver: *** Elmer Solver: ALL DONE ***
ElmerSolver: The end
SOLVER TOTAL TIME(CPU,REAL):       369.31      369.31
ELMER SOLVER FINISHED AT: 2022/07/27 01:23:45
To increase parallelism, the demo continues with the serial mesh but uses OpenMP in multithreading mode by setting the OMP_NUM_THREADS environment variable. This does not appear to be sufficient to increase the number of threads it uses in my Windows setup so I need to get to the bottom of why OMP_NUM_THREADS is not being respected.
set OMP_NUM_THREADS=4
# setx /M OMP_NUM_THREADS 4
ElmerSolver elmer_flow_gcr.sif
Using 4 processes on my box takes 150s and increasing the processes to 6 drops the time to 121s.
MAIN: Version: 9.0 (Rev: Release, Compiled: 2020-11-10)
MAIN:  Running in parallel using 4 tasks.
MAIN:  Running with just one thread per task.
...
ResultOutputSolver: Saving in unstructured VTK XML (.vtu) format
ResultOutputSolver: -------------------------------------
ElmerSolver: *** Elmer Solver: ALL DONE ***
ElmerSolver: The end
SOLVER TOTAL TIME(CPU,REAL):       148.65      148.65
Visualization
The demo does not explicitly discuss how to visualize the results. However, this was covered in the Parallel Computing with Elmer talk.
Parallel Computing with Elmer
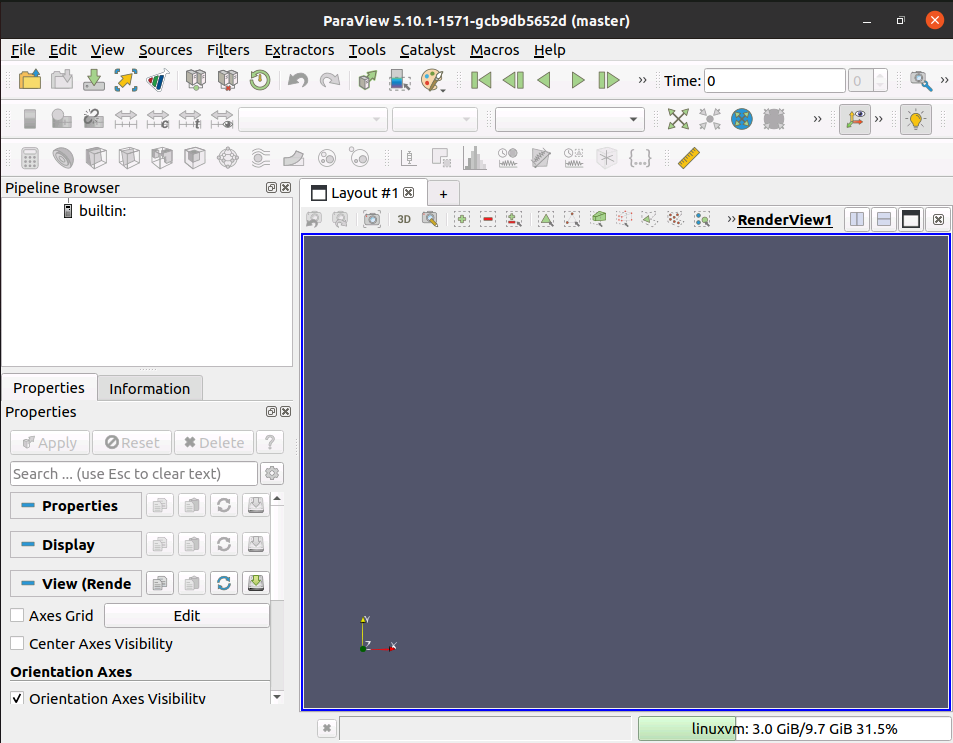
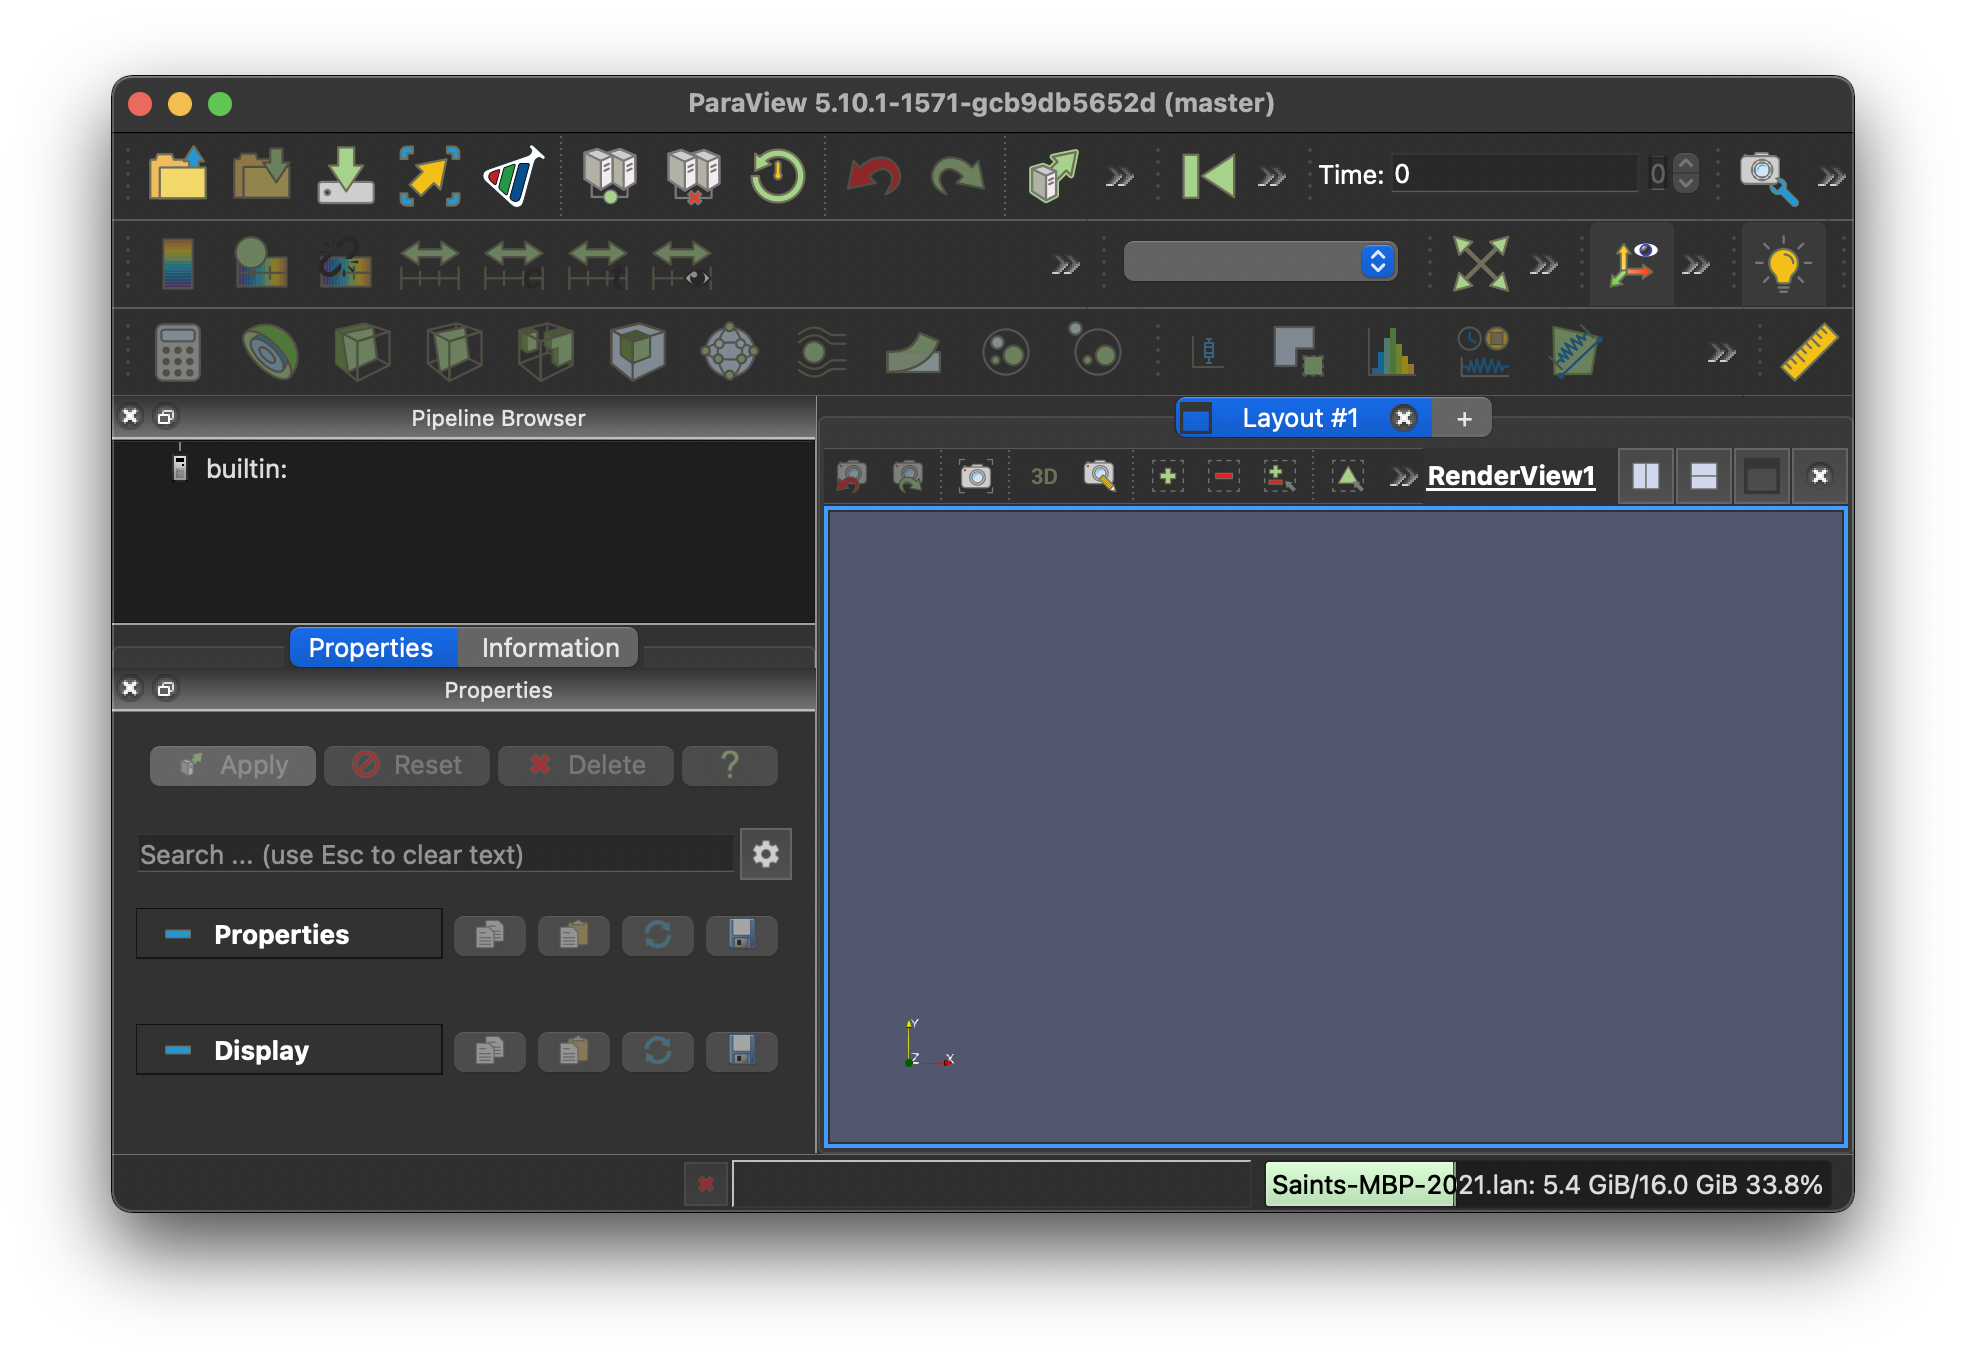
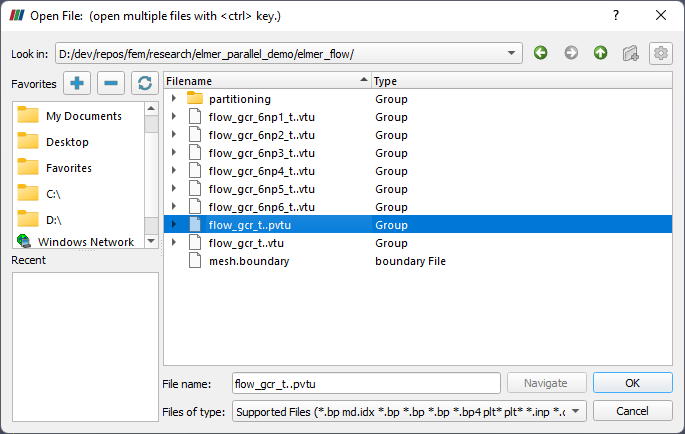
ParaView needs to be installed. Looks like they need to fix their installation dialog to not cut off text – or better yet, replace that long string with a user-friendly one. To visualize the ElmerSolver results, launch ParaView then open the parallel vtu file (*.pvtu).
Opening the Parallel VTU File
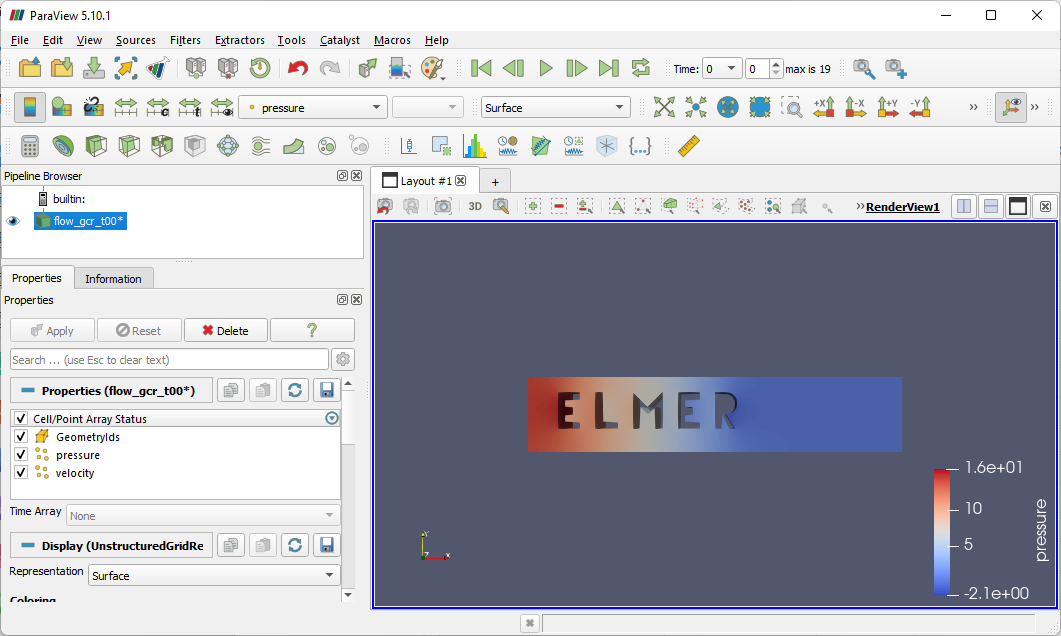
When the file opens, click on the green Apply button in the Properties panel. Notice that the pressure variable is preselected in the dropdown on the toolbar.
Visualizing Pressure in ParaView
Switching to the velocity variable shows all all blue rendering due to the 0 velocity. To see the animated visualization:
Click on the slice button (4th from left in screenshot).
Click on “Z Normal” in the Plane Parameters section on the Properties pane.
Click on Apply.
Click on the play button on the toolbar to see the animation of the flow.
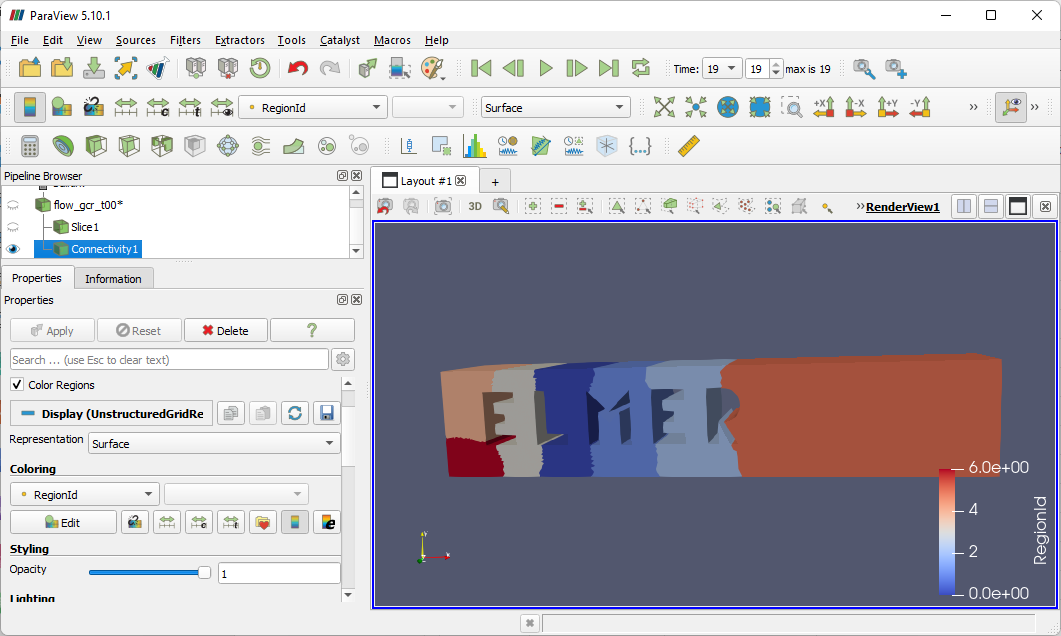
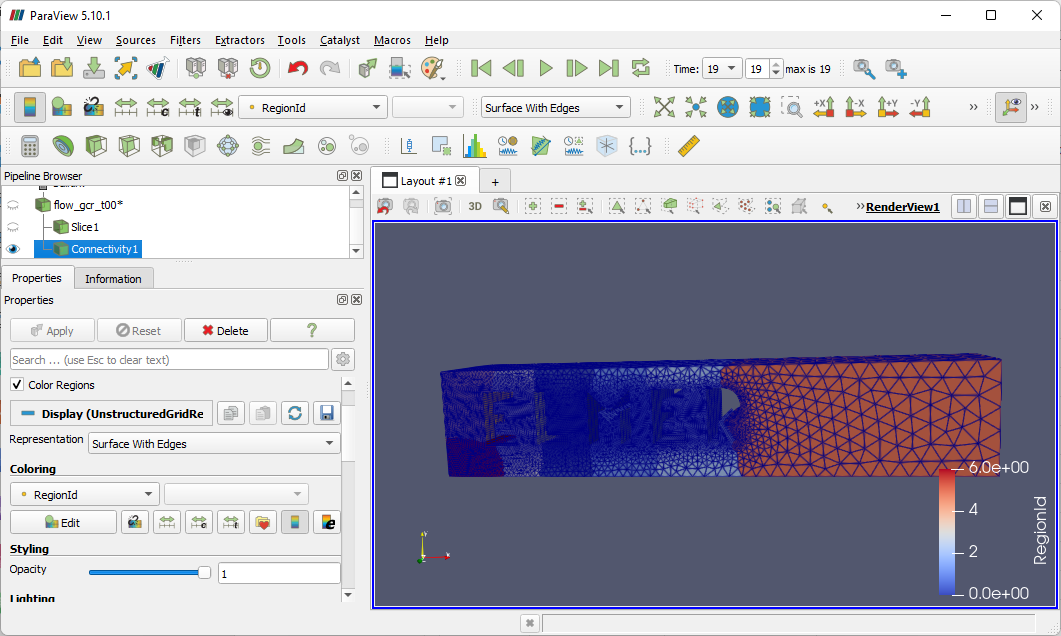
The last part of the demo shows how to view the partitions in the mesh:
Deselect the eye on Slice1 in the Pipeline Browser.
Select the eye on “flow_gcr_t00” in the Pipeline Browser.
Go to the Filter menu > Alphabetic > Connectivity.
Click on the Apply button.
Change the selection in the combobox in the representation toolbar from from Surface to Surface with Edges to see how the partition seems to be based on the number of elements involved.
After completing the mesh generation in Crystal Growth Simulation – Part 1, I decided to investigate how to run the actual crystal growth simulation using Elmer. On Windows, Elmer needs to either be installed into “Program Files“ or be present in the path to avoid this error:
$ python run.py
crucible
melt
crystal
inductor
...
using material steel-1.4541 from self.materials_dict
using material vacuum from self.materials_dict
Wrote sif-file.
Starting simulation  ./simdata/2022-07-25_13-17_ss_test-cz-induction_vacuum  ...
Traceback (most recent call last):
  File "D:\dev\repos\fem\research\test-cz-induction\run.py", line 32, in <module>
    sim.execute()
  File "d:\dev\repos\fem\research\opencgs\opencgs\sim.py", line 182, in execute
    run_elmer_grid(self.sim_dir, "case.msh")
  File "C:\Python310\lib\site-packages\pyelmer\execute.py", line 28, in run_elmer_grid
    subprocess.run(args, cwd=sim_dir, stdout=f, stderr=f)
  File "C:\Python310\lib\subprocess.py", line 501, in run
    with Popen(*popenargs, **kwargs) as process:
  File "C:\Python310\lib\subprocess.py", line 966, in __init__
    self._execute_child(args, executable, preexec_fn, close_fds,
  File "C:\Python310\lib\subprocess.py", line 1435, in _execute_child
    hp, ht, pid, tid = _winapi.CreateProcess(executable, args,
FileNotFoundError: [WinError 2] The system cannot find the file specified
I tried installing a locally built Elmer – see How to Build Elmer on Windows. Unfortunately, the layout created by setup defaulted to “C:\Program Files\Elmer 9.0-1b8e4f7ec” (ending with the hash of the commit I built, instead of “Release”). Worse still, it didn’t launch because of missing DLLs. I need to take a closer look at how NSIS is creating the setup executable, and also figure out how to set up the publisher so that a certificate is displayed with the UAC prompt. I ended up installing the publicly downloadable Elmer then retrying the python script.
using material steel-1.4541 from self.materials_dict
using material vacuum from self.materials_dict
Wrote sif-file.
Starting simulation  ./simdata/2022-07-25_17-23_ss_test-cz-induction_vacuum_1  ...
['ERROR:: systemc: Command exit status was 1'] [] {}
Finished simulation  ./simdata/2022-07-25_17-23_ss_test-cz-induction_vacuum_1  .
Post processing...
Traceback (most recent call last):
  File "D:\dev\repos\fem\research\test-cz-induction\run.py", line 32, in <module>
    sim.execute()
  File "d:\dev\repos\fem\research\opencgs\opencgs\sim.py", line 189, in execute
    self._postprocessing_probes()
  File "d:\dev\repos\fem\research\opencgs\opencgs\sim.py", line 139, in _postprocessing_probes
    names_data = self._read_names_file(self.sim_dir + "/results/probes.dat.names")
  File "d:\dev\repos\fem\research\opencgs\opencgs\sim.py", line 129, in _read_names_file
    with open(names_file) as f:
FileNotFoundError: [Errno 2] No such file or directory: './simdata/2022-07-25_17-23_ss_test-cz-induction_vacuum_1/02_simulation/results/probes.dat.names'
A dialog popped up asking whether I wanted to grant some elmer process access to the domain network or private, etc, and I’m not sure if I took too long to answer it but the script continued with the above failure. This looks like a bug in opencgs – why continue post processing when the simulation has failed – I filed this issue to let the author know: Do not start post-processing when simulation fails · Issue #2 · nemocrys/opencgs (github.com).
I had no idea why the simulation is failing so I used Process Explorer to see which command line was being used to invoke ElmerGrid and ElmerSolver. I was able to then manually invoke ElmerSolver and notice a segmentation fault!
ELMER SOLVER (v 9.0) STARTED AT: 2022/07/25 17:23:13
ParCommInit:  Initialize #PEs:            1
MAIN:
MAIN: =============================================================
MAIN: ElmerSolver finite element software, Welcome!
...
MAIN: Reading Model: case.sif
 Caught LUA error:[string "loadfile("C:/Program Files (x86)/Elmer/shar..."]:1: attempt to call a nil value
 Caught LUA error:[string "loadstring(readsif("case.sif"))()"]:1: attempt to call global 'readsif' (a nil value)
LoadInputFile: Scanning input file: case.sif
LoadInputFile: Scanning only size info
...
OptimizeBandwidth: Half bandwidth after optimization: 1447
OptimizeBandwidth: ---------------------------------------------------------
'ViewFactors' is not recognized as an internal or external command,
operable program or batch file.
ERROR:: systemc: Command exit status was 1
RadiationFactors: Message
RadiationFactors: All done time (s)                      4.9000E-02
...
      60 0.2041E-08
      61 0.3710E-09
ComputeChange: NS (ITER=11) (NRM,RELC): ( 0.17032920E-04 0.41334346E-05 ) :: statmagsolver
StatMagSolve: Convergence after 11 iterations
StatMagSolve: Joule Heating (W):      4.1375E+01
StatMagSolve: All done, exiting
StatMagSolve: ------------------------------------------------
ComputeChange: SS (ITER=1) (NRM,RELC): ( 0.17032920E-04  2.0000000     ) :: statmagsolver
HeatSolve:  Found Control Point at distance:   0.0000000000000000
HeatSolve:  Control Point Index:           0
HeatSolve: Using Steady-state Heater Control
HeatSolve:
HeatSolve:
HeatSolve: -------------------------------------
HeatSolve:  TEMPERATURE ITERATION           1
HeatSolve: -------------------------------------
HeatSolve:
HeatSolve: Starting Assembly...

Program received signal SIGSEGV: Segmentation fault - invalid memory reference.

Backtrace for this error:
#0  0xffffffff
#1  0xffffffff
#2  0xffffffff
...
#19  0xffffffff
#20  0xffffffff
Looking at the simulation folders such as “simdata\2022-07-25_22-52_ss_test-cz-induction_vacuum_1\02_simulation” revealed that there are ElmerGrid and ElmerSolver log files present with this info, so I didn’t even need Process Explorer! At this point, I have to save the SIGSEGV investigation for another day.
Ever since I read chapter 2 of Fabrication Engineering at the Micro- and Nanoscale, I have been interested in simulating crystal growth, primarily because of the multi-discplinary nature of this problem: finite element modeling software, modeling using high performance computing, the physics of the problem (governing laws and equations), and visualization techniques. I had run across Elmer when looking up crystal growth examples a while back. About two weeks ago, I was watching this Elmer demo in which they used gmsh to show the geometry for the simulation.
I wanted to learn more about Gmsh and how it is used, so I took a detour into this Gmsh introductory video. It was an excellent tour of Gmsh and its features.
Thankfully, the code in this paper is open source. I already had python installed so the first thing I tried was executing run.py in Git bash
$ git clone https://github.com/nemocrys/test-cz-induction
$ cd test-cz-induction
$ python run.py
Traceback (most recent call last):
  File "D:\dev\repos\fem\research\test-cz-induction\run.py", line 5, in <module>
    import opencgs.control as ctrl
ModuleNotFoundError: No module named 'opencgs'
Without using my brain, I decided to install pyelmer since I knew it was a dependency (from the talk).
$ pip install pyelmer
Collecting pyelmer
  Downloading pyelmer-1.0.0-py3-none-any.whl (27 kB)
Collecting gmsh
  Downloading gmsh-4.10.5-py2.py3-none-win_amd64.whl (38.4 MB)
     |████████████████████████████████| 38.4 MB 285 kB/s
Collecting pyyaml
  Downloading PyYAML-6.0-cp310-cp310-win_amd64.whl (151 kB)
     |████████████████████████████████| 151 kB ...
Collecting matplotlib
  Downloading matplotlib-3.5.2-cp310-cp310-win_amd64.whl (7.2 MB)
     |████████████████████████████████| 7.2 MB 6.4 MB/s
Collecting pillow>=6.2.0
  Downloading Pillow-9.2.0-cp310-cp310-win_amd64.whl (3.3 MB)
     |████████████████████████████████| 3.3 MB ...
Collecting cycler>=0.10
  Downloading cycler-0.11.0-py3-none-any.whl (6.4 kB)
Collecting numpy>=1.17
  Downloading numpy-1.23.1-cp310-cp310-win_amd64.whl (14.6 MB)
     |████████████████████████████████| 14.6 MB 6.4 MB/s
Collecting packaging>=20.0
  Downloading packaging-21.3-py3-none-any.whl (40 kB)
     |████████████████████████████████| 40 kB 2.5 MB/s
Collecting python-dateutil>=2.7
  Downloading python_dateutil-2.8.2-py2.py3-none-any.whl (247 kB)
     |████████████████████████████████| 247 kB ...
Collecting kiwisolver>=1.0.1
  Downloading kiwisolver-1.4.4-cp310-cp310-win_amd64.whl (55 kB)
     |████████████████████████████████| 55 kB 1.6 MB/s
Collecting pyparsing>=2.2.1
  Downloading pyparsing-3.0.9-py3-none-any.whl (98 kB)
     |████████████████████████████████| 98 kB 6.8 MB/s
Collecting fonttools>=4.22.0
  Downloading fonttools-4.34.4-py3-none-any.whl (944 kB)
     |████████████████████████████████| 944 kB 6.4 MB/s
Collecting six>=1.5
  Downloading six-1.16.0-py2.py3-none-any.whl (11 kB)
Installing collected packages: six, pyparsing, python-dateutil, pillow, packaging, numpy, kiwisolver, fonttools, cycler, pyyaml, matplotlib, gmsh, pyelmer
  WARNING: Failed to write executable - trying to use .deleteme logic
ERROR: Could not install packages due to an OSError: [WinError 2] The system cannot find the file specified: 'C:\\Python310\\Scripts\\f2py.exe' -> 'C:\\Python310\\Scripts\\f2py.exe.deleteme'

WARNING: You are using pip version 21.2.4; however, version 22.2 is available.
You should consider upgrading via the 'C:\Python310\python.exe -m pip install --upgrade pip' command.
Looks like I need to run this as an administrator.
C:\dev>pip install pyelmer
Collecting pyelmer
  Using cached pyelmer-1.0.0-py3-none-any.whl (27 kB)
Collecting pyyaml
  Using cached PyYAML-6.0-cp310-cp310-win_amd64.whl (151 kB)
Collecting gmsh
  Using cached gmsh-4.10.5-py2.py3-none-win_amd64.whl (38.4 MB)
Collecting matplotlib
  Using cached matplotlib-3.5.2-cp310-cp310-win_amd64.whl (7.2 MB)
Requirement already satisfied: python-dateutil>=2.7 in c:\python310\lib\site-packages (from matplotlib->pyelmer) (2.8.2)
Requirement already satisfied: packaging>=20.0 in c:\python310\lib\site-packages (from matplotlib->pyelmer) (21.3)
Requirement already satisfied: fonttools>=4.22.0 in c:\python310\lib\site-packages (from matplotlib->pyelmer) (4.34.4)
Requirement already satisfied: kiwisolver>=1.0.1 in c:\python310\lib\site-packages (from matplotlib->pyelmer) (1.4.4)
Requirement already satisfied: pillow>=6.2.0 in c:\python310\lib\site-packages (from matplotlib->pyelmer) (9.2.0)
Requirement already satisfied: pyparsing>=2.2.1 in c:\python310\lib\site-packages (from matplotlib->pyelmer) (3.0.9)
Requirement already satisfied: numpy>=1.17 in c:\python310\lib\site-packages (from matplotlib->pyelmer) (1.23.1)
Collecting cycler>=0.10
  Using cached cycler-0.11.0-py3-none-any.whl (6.4 kB)
Requirement already satisfied: six>=1.5 in c:\python310\lib\site-packages (from python-dateutil>=2.7->matplotlib->pyelmer) (1.16.0)
Installing collected packages: cycler, pyyaml, matplotlib, gmsh, pyelmer
Successfully installed cycler-0.11.0 gmsh-4.10.5 matplotlib-3.5.2 pyelmer-1.0.0 pyyaml-6.0
WARNING: You are using pip version 21.2.4; however, version 22.2 is available.
You should consider upgrading via the 'C:\Python310\python.exe -m pip install --upgrade pip' command.
Installing pyelmer is not sufficient to avoid the “No module named ‘opencgs’” error. The solution is to clone the opencgs repo and use pip to install (as administrator) from that repo.
git clone https://github.com/nemocrys/opencgs
cd opencgs
D:\...\research\opencgs>pip install -e .
Obtaining file:///D:/dev/repos/fem/research/opencgs
Collecting meshio
  Using cached meshio-5.3.4-py3-none-any.whl (167 kB)
Collecting pandas
  Using cached pandas-1.4.3-cp310-cp310-win_amd64.whl (10.5 MB)
Requirement already satisfied: pyyaml in c:\python310\lib\site-packages (from opencgs==0.3.1) (6.0)
Requirement already satisfied: pyelmer in c:\python310\lib\site-packages (from opencgs==0.3.1) (1.0.0)
Collecting rich
  Using cached rich-12.5.1-py3-none-any.whl (235 kB)
Requirement already satisfied: numpy in c:\python310\lib\site-packages (from meshio->opencgs==0.3.1) (1.23.1)
Requirement already satisfied: python-dateutil>=2.8.1 in c:\python310\lib\site-packages (from pandas->opencgs==0.3.1) (2.8.2)
Collecting pytz>=2020.1
  Using cached pytz-2022.1-py2.py3-none-any.whl (503 kB)
Requirement already satisfied: six>=1.5 in c:\python310\lib\site-packages (from python-dateutil>=2.8.1->pandas->opencgs==0.3.1) (1.16.0)
Requirement already satisfied: matplotlib in c:\python310\lib\site-packages (from pyelmer->opencgs==0.3.1) (3.5.2)
Requirement already satisfied: gmsh in c:\python310\lib\site-packages (from pyelmer->opencgs==0.3.1) (4.10.5)
Requirement already satisfied: kiwisolver>=1.0.1 in c:\python310\lib\site-packages (from matplotlib->pyelmer->opencgs==0.3.1) (1.4.4)
Requirement already satisfied: pyparsing>=2.2.1 in c:\python310\lib\site-packages (from matplotlib->pyelmer->opencgs==0.3.1) (3.0.9)
Requirement already satisfied: cycler>=0.10 in c:\python310\lib\site-packages (from matplotlib->pyelmer->opencgs==0.3.1) (0.11.0)
Requirement already satisfied: pillow>=6.2.0 in c:\python310\lib\site-packages (from matplotlib->pyelmer->opencgs==0.3.1) (9.2.0)
Requirement already satisfied: fonttools>=4.22.0 in c:\python310\lib\site-packages (from matplotlib->pyelmer->opencgs==0.3.1) (4.34.4)
Requirement already satisfied: packaging>=20.0 in c:\python310\lib\site-packages (from matplotlib->pyelmer->opencgs==0.3.1) (21.3)
Collecting commonmark<0.10.0,>=0.9.0
  Using cached commonmark-0.9.1-py2.py3-none-any.whl (51 kB)
Requirement already satisfied: pygments<3.0.0,>=2.6.0 in c:\python310\lib\site-packages (from rich->meshio->opencgs==0.3.1) (2.12.0)
Installing collected packages: commonmark, rich, pytz, pandas, meshio, opencgs
  Running setup.py develop for opencgs
Successfully installed commonmark-0.9.1 meshio-5.3.4 opencgs-0.3.1 pandas-1.4.3 pytz-2022.1 rich-12.5.1
WARNING: You are using pip version 21.2.4; however, version 22.2 is available.
You should consider upgrading via the 'C:\Python310\python.exe -m pip install --upgrade pip' command.
Trying to run gives an error about a missing module named objectgmsh. My assumption was the installing pyelmer was supposed to bring in all such modules.
D:\dev\repos\fem\research\test-cz-induction>python run.py
Traceback (most recent call last):
  File "D:\dev\repos\fem\research\test-cz-induction\run.py", line 5, in <module>
    import opencgs.control as ctrl
  File "d:\dev\repos\fem\research\opencgs\opencgs\__init__.py", line 3, in <module>
    import opencgs.geo
  File "d:\dev\repos\fem\research\opencgs\opencgs\geo.py", line 1, in <module>
    from objectgmsh import *
ModuleNotFoundError: No module named 'objectgmsh'
I notice while reviewing the paper yet again that it mentions the setup being in a Dockerfile. Sure enough, objectgmsh is a separate package that needs to be installed using pip. I upgrade pip for good measure since those warnings are getting annoying.
I have been toying around with the idea of doing a fluid dynamics or crystal growth simulation using nVidia CUDA. I decided to try out nVidia’s cuda samples to see what their approach looks like, in particular when rendering using OpenGL. I am using Visual Studio 2022 so I simply cloned the cuda samples repo, opened the fluidsGL_vs2022.sln solution, right click on the fluidsGL project, then selected Build.
Build started...
1>------ Build started: Project: fluidsGL, Configuration: Debug x64 ------
1>D:\dev\...\cuda-samples\Samples\5_Domain_Specific\fluidsGL\fluidsGL_vs2022.vcxproj(37,5): error MSB4019: The imported project "C:\Program Files\Microsoft Visual Studio\2022\Enterprise\MSBuild\Microsoft\VC\v170\BuildCustomizations\CUDA 11.6.props" was not found. Confirm that the expression in the Import declaration "C:\Program Files\Microsoft Visual Studio\2022\Enterprise\MSBuild\Microsoft\VC\v170\\BuildCustomizations\CUDA 11.6.props" is correct, and that the file exists on disk.
1>Done building project "fluidsGL_vs2022.vcxproj" -- FAILED.
========== Build: 0 succeeded, 1 failed, 0 up-to-date, 0 skipped ==========
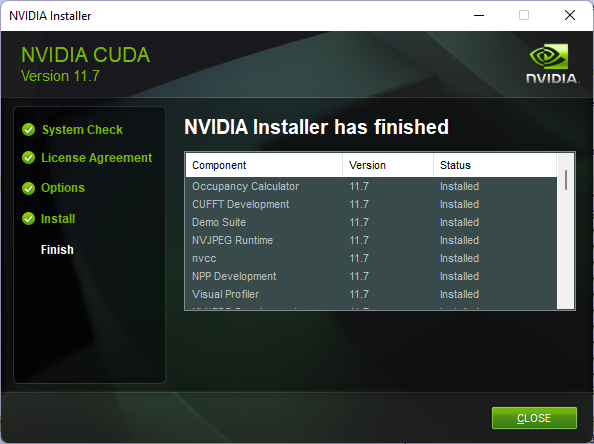
The prerequisites section does mention that the CUDA Toolkit 11.6 is required, so I close VS and install it. I end up with version 11.7 though:
When reopening the fluidsGL solution, I still get the same error about CUDA 11.6.props not being found. A quick look at the directory this file is expected to be in reveals that this is a simple version mismatch problem – see the hard coded version in the fluidsGL.vcxproj file. Instead of fixing every example .vcxproj file to match CUDA 11.7, we can patch the VS folder by running these commands from an admin command prompt:
The code now builds in Visual Studio and I can now oooh, aaaah over the demo. Visual Studio does seem a bit sluggish at opening the entire samples solution though… I get this information about my device in the console window after the demo launches:
GPU Device 0: "Pascal" with compute capability 6.1

CUDA device [Quadro P1000] has 5 Multi-Processors
Elmer is the first codebase that I have dug into that has a substantial (or really any) amount of Fortran code. I used GFortran to build it but went digging around for a clang based compiler. I found llvm-project/flang and since I had been building LLVM earlier this year, I figured it should be straightforward to build flang and perhaps explore it in a debugger.
My first attempt to build flang (on Windows, my primary OS) resulted in many build errors. Unfortunately, I was using a preview Visual Studio build, so I didn’t want to compare the errors with those from a different machine because it wasn’t the same compiler version in use. I decided to use an RTM Visual Studio compiler (VS 17.2.5) to avoid possible compiler bugs present only in VS preview builds since most people would not be using preview VS builds anyway.
Without giving it much thought, my suspicion was that any build failures probably arose from not using the correct C++ version. The source code I was trying to build (commit c0702ac0) states that it uses C++17. I set this in CMake by defining the CXX_STANDARD property. Here is the full cmake command line I used to set up the build.
cd llvm-project
mkdir build
cd build

cmake \
  -G Ninja \
  ../llvm \
  -DCMAKE_BUILD_TYPE=Release \
  -DFLANG_ENABLE_WERROR=On \
  -DLLVM_ENABLE_ASSERTIONS=ON \
  -DLLVM_TARGETS_TO_BUILD=host \
  -DCMAKE_INSTALL_PREFIX=../install
  -DLLVM_LIT_ARGS=-v \
  -DLLVM_ENABLE_PROJECTS="clang;mlir;flang" \
  -DLLVM_ENABLE_RUNTIMES="compiler-rt" \
  -DCXX_STANDARD=17

# Shown here without \ to be executable in cmd.exe
cmake -G Ninja ../llvm -DCMAKE_BUILD_TYPE=Release -DFLANG_ENABLE_WERROR=On -DLLVM_ENABLE_ASSERTIONS=ON -DLLVM_TARGETS_TO_BUILD=host -DCMAKE_INSTALL_PREFIX=../install -DLLVM_LIT_ARGS=-v -DLLVM_ENABLE_PROJECTS="clang;mlir;flang" -DLLVM_ENABLE_RUNTIMES="compiler-rt" -DCXX_STANDARD=17
That took about 2 minutes on my machine after which I ran ninja to start the build
ninja
Unfortunately, the build failed! The first error I encountered was in fold-real.cpp. Here is the command line used to invoke the compiler (shown with newlines to simplify interpretation, see Compiler options listed alphabetically | Microsoft Docs for the complete list of compiler options).
I tried manually creating a repro for this compiler issue by creating a new Visual C++ project in Visual Studio and recreating the structure of the code failing to build. One of the questions I had was how to set conformance mode in a Visual Studio Cmake project. I still haven’t yet figured this out. However, one of the issues I ran into was that my cmake project was building the code without the /permissive- flag! I ended up switching to a regular Visual C++ project (.vcxproj) since I knew how to change the compiler options reliably for such projects. After struggling with recreating the code, I realized that I would make more progress removing code from flang’s fold-real.cpp instead. Here are some of the other searches and concepts I had to look up to understand the code while trying to create a minimal repro of the build failure.
I was eventually able to create a simpler test case showing that the flang code could not build with my RTM compiler.
cl /std:c++17 /permissive- flang-msvc-clang-test.cpp

Microsoft (R) C/C++ Optimizing Compiler Version 19.32.31332 for x64
Copyright (C) Microsoft Corporation.  All rights reserved.

flang-msvc-clang-test.cpp
flang-msvc-clang-test.cpp(159): error C2065: 'T': undeclared identifier
flang-msvc-clang-test.cpp(48): note: see reference to function template instantiation 'auto FoldIntrinsicFunction::<lambda_1>::operator ()<_First>(const _T1 &) const' being compiled
        with
        [
            _First=Expr<Type<TypeCategory::Real,1>>,
            _T1=Expr<Type<TypeCategory::Real,1>>
        ]
flang-msvc-clang-test.cpp(171): note: see reference to function template instantiation 'Expr<Type<TypeCategory::Real,2>> FoldIntrinsicFunction<2>(FoldingContext &,FunctionRef<Type<TypeCategory::Real,2>> &&)' being compiled
flang-msvc-clang-test.cpp(159): error C2923: 'Scalar': 'T' is not a valid template type argument for parameter 'T'
flang-msvc-clang-test.cpp(159): note: see declaration of 'T'
So after all that, the RTM LTS Visual C++ compiler turned out to have a bug. Turns out the Visual C++ folks had already fixed this issue so the way to unblock myself was to switch to the preview Visual Studio build :(! The irony…
Suppressing Warnings
Armed with a preview build that correctly compiled the test case, the next obstacle in the build process was a set of warnings that were treated as errors: C4661 and C4101.
FAILED: tools/flang/lib/Evaluate/CMakeFiles/obj.FortranEvaluate.dir/fold.cpp.obj
C:\...\cl.exe ... -c D:\dev\repos\llvm-project\flang\lib\Evaluate\fold.cpp
D:\dev\repos\llvm-project\flang\include\flang\Evaluate\expression.h(101): error C2220: the following warning is treated as an error
D:\dev\repos\llvm-project\flang\include\flang\Evaluate\expression.h(101): warning C4661: 'std::optional<Fortran::evaluate::DynamicType> Fortran::evaluate::ExpressionBase<Fortran::evaluate::SomeDerived>::GetType(void) const': no suitable definition provided for explicit template instantiation request
...
FAILED: tools/flang/lib/Evaluate/CMakeFiles/obj.FortranEvaluate.dir/fold-complex.cpp.obj
C:\...\cl.exe ... -c D:\dev\repos\llvm-project\flang\lib\Evaluate\fold-complex.cpp
D:\dev\repos\llvm-project\flang\lib\Evaluate\fold-implementation.h(1583): error C2220: the following warning is treated as an error
D:\dev\repos\llvm-project\flang\lib\Evaluate\fold-implementation.h(1583): warning C4101: 'buffer': unreferenced local variable
I tried to suppressed them to keep marching forward:
Defining CXX_FLAGS like that did not work so I end up looking around for how to disable warnings in cmake. This was when I discovered that CMAKE_CXX_STANDARD is not necessary on the command line because flang/CMakeLists.txt already requires C++17. Trying to append the warning disable option /wdXXXX to that file didn’t work either. However, the comment on line 329 made me explore HandleLLVMOptions.cmake. There, I discovered support for setting the number of parallel jobs (via /MP for Visual C++). This file also contained the code that sets up most of the compiler options used when building! Closer to the task at hand is the discover of the LLVM_ENABLE_WARNINGS option and the hard-coded list of MSVC warning flags! I therefore made this change (before running cmake and ninja) to get the warning flags to be respected:
diff --git a/llvm/cmake/modules/HandleLLVMOptions.cmake b/llvm/cmake/modules/HandleLLVMOptions.cmake
index 56d05f5b5fce..589281b232f1 100644
--- a/llvm/cmake/modules/HandleLLVMOptions.cmake
+++ b/llvm/cmake/modules/HandleLLVMOptions.cmake
@@ -648,6 +648,8 @@ if (MSVC)
           # v15.8.8. Re-evaluate the usefulness of this diagnostic when the bug
           # is fixed.
       -wd4709 # Suppress comma operator within array index expression
+      -wd4101  # Suppress ...
+      -wd4661  # Suppress ...

       # Ideally, we'd like this warning to be enabled, but even MSVC 2019 doesn't
       # support the 'aligned' attribute in the way that clang sources requires (for
By this point, I knew that simplifying the function containing the error was the fastest path to a repro. One of the little problems I ran into was how to figure out the type of fptr since it is declared using the auto keyword. I ended up assigning it to a new temporary variable of a different type, e.g. char et voila!
D:\dev\repos\llvm-project\flang\lib\Evaluate\fold-integer.cpp(505): error C2440: 'initializing': cannot convert from 'int (__cdecl Fortran::evaluate::value::Integer<8,true,8,unsigned char,unsigned short>::* )(void) const' to 'char'
I then removed the temporary assignment and explicitly specified this type as the type of fptr:
using T2 = int (__cdecl Fortran::evaluate::value::Integer<8,true,8,unsigned char,unsigned short>::* )(void) const;

T2 fptr{&Scalar<TI>::LEADZ};
The build then failed because the function pointer types are not the same, which was really confusing given that I had just checked the type of fptr.
I switched the type of fptr and got a different error:
D:\dev\repos\llvm-project\flang\include\flang\Evaluate\integer.h(66): error C2607: static assertion failed
D:\dev\repos\llvm-project\flang\lib\Evaluate\fold-integer.cpp(490): note: see reference to class template instantiation 'Fortran::evaluate::value::Integer<16,true,16,unsigned char,unsigned short>' being compiled
Here is a different change I tried:
using T2 = int (__cdecl Fortran::evaluate::value::Integer<8>::* )(void) const;

T2 fptr{&Scalar<TI>::LEADZ};
It was at this point that I realized that it was time to learn a bit more about decay. What is decay and array-to-pointer conversion? | C++ FAQ (64.github.io) had a good explanation of why the term decay is used. Perhaps a reexamination of std::decay – cppreference.com might lead to some insight. I wasn’t sure what Result referred to in the statement using TI = typename std::decay_t<decltype(n)>::Result; One idea I got was to append a number to the typename and examine the compiler error. Here’s the new line 752 of llvm-project/fold-integer.cpp and the resulting compiler error showing that this name cannot be arbitrary.
using TI = typename std::decay_t<decltype(n)>::Result3;


C:\dev\repos\llvm-project\flang\lib\Evaluate\fold-integer.cpp(502): error C2039: 'Result3': is not a member of 'Fortran::evaluate::Expr<Fortran::evaluate::Type<Fortran::common::TypeCategory::Integer,1>>'
template <int KIND>
class Expr<Type<TypeCategory::Integer, KIND>>
    : public ExpressionBase<Type<TypeCategory::Integer, KIND>> {
public:
  using Result = Type<TypeCategory::Integer, KIND>;

...
The problematic lambda is therefore expecting a Scalar<Type<TypeCategory::Integer, KIND>>. Scalar is defined using decay and Type<TypeCategory::Integer, KIND>::Scalar is defined in llvm-project/type.h as the type value::Integer<8 * KIND>. This is when I see the reason for the previous build errors about mismatched Integer sizes no matter which size I picked – the fixed type I was using didn’t allow for the different template instantiations! Note that the problematic lambda is defined as a ScalarFunc.
By this point, I had a self-contained repro of the compiler bug, which ironically, compiled successfully on the RTM C++ compiler so I could use neither the preview nor the RTM to build the flang code.
This compiler invocation gives the same error seen when compiling the flang code:
Microsoft (R) C/C++ Optimizing Compiler Version 19.33.31627.1 for x64
Copyright (C) Microsoft Corporation.  All rights reserved.

flang-msvc-clang-test-02.cpp
flang-msvc-clang-test-02.cpp(193): error C2672: 'invoke': no matching overloaded function found
C:\Program Files\Microsoft Visual Studio\2022\Preview\VC\Tools\MSVC\14.34.31721\include\type_traits(1552): note: could be 'unknown-type std::invoke(_Callable &&,_Ty1 &&,_Types2 &&...) noexcept(<expr>)'
flang-msvc-clang-test-02.cpp(193): note: Failed to specialize function template 'unknown-type std::invoke(_Callable &&,_Ty1 &&,_Types2 &&...) noexcept(<expr>)'
mkdir investigate
cd investigate
git clone https://github.com/openjdk/jdk11u

# Download jtreg 6
curl -Lo jtreg-6+1.tar.gz https://ci.adoptopenjdk.net/view/Dependencies/job/dependency_pipeline/lastSuccessfulBuild/artifact/jtreg/jtreg-6+1.tar.gz

tar xzfv jtreg-6+1.tar.gz

cd jdk11u
We switch the current directory to the root of jdk11u repo so that test paths are relative to the repo root. I will assume that we’re in the jdk11u repo root directory and are using the directory structure generated by the commands above. To see a detailed list of all the jtreg options, run this command:
../jtreg/bin/jtreg -help all
Now let us try to run a jtreg test, specifically AmazonCA.java:
There are some failure messages but it looks like a test ran.
failed to get value for vm.hasJFR
java.lang.UnsatisfiedLinkError: 'boolean sun.hotspot.WhiteBox.isJFRIncludedInVmBuild()'
	at sun.hotspot.WhiteBox.isJFRIncludedInVmBuild(Native Method)
	at requires.VMProps.vmHasJFR(VMProps.java:343)
	at requires.VMProps$SafeMap.put(VMProps.java:72)
	at requires.VMProps.call(VMProps.java:107)
	at requires.VMProps.call(VMProps.java:60)
	at com.sun.javatest.regtest.agent.GetJDKProperties.run(GetJDKProperties.java:80)
	at com.sun.javatest.regtest.agent.GetJDKProperties.main(GetJDKProperties.java:54)
failed to get value for vm.aot.enabled
java.lang.UnsatisfiedLinkError: 'int sun.hotspot.WhiteBox.aotLibrariesCount()'
	at sun.hotspot.WhiteBox.aotLibrariesCount(Native Method)
	at requires.VMProps.vmAotEnabled(VMProps.java:408)
	at requires.VMProps$SafeMap.put(VMProps.java:72)
	at requires.VMProps.call(VMProps.java:112)
	at requires.VMProps.call(VMProps.java:60)
	at com.sun.javatest.regtest.agent.GetJDKProperties.run(GetJDKProperties.java:80)
	at com.sun.javatest.regtest.agent.GetJDKProperties.main(GetJDKProperties.java:54)
.
.
.
Test results: passed: 1
Report written to /Users/saint/repos/java/jdk11u/JTreport/html/report.html
Results written to /Users/saint/repos/java/jdk11u/JTwork
Are these failure messages concerning given that the test passed? Reviewing the test report suggests not. The report keywords mention bug 8233223, which must be Bug ID: JDK-8233223 Add Amazon Root CA certificates (java.com). From the look of things, the java.lang.UnsatisfiedLinkErrors can be safely ignored (for this test anyway). That said, let us dig into these errors to ensure we understand what is happening.
The immediate cause of these errors is the failure to get the values for the SafeMap in VMProps.java. This raises the question of which JDK is being used by jtreg? My MacBook has both JDK11 and JDK17. The default java version is:
java -version
openjdk version "17.0.1" 2021-10-19 LTS
OpenJDK Runtime Environment Microsoft-28056 (build 17.0.1+12-LTS)OpenJDK 64-Bit Server VM Microsoft-28056 (build 17.0.1+12-LTS, mixed mode)
Let’s ensure jtreg is using JDK11 by setting JTREG_JAVA.
JTREG_JAVA=/Library/Java/JavaVirtualMachines/microsoft-11.jdk/Contents/Home

$JTREG_JAVA/bin/java -version

openjdk version "11.0.14" 2022-01-18 LTS
OpenJDK Runtime Environment Microsoft-30257 (build 11.0.14+9-LTS)
OpenJDK 64-Bit Server VM Microsoft-30257 (build 11.0.14+9-LTS, mixed mode)

../jtreg/bin/jtreg test/jdk/security/infra/java/security/cert/CertPathValidator/certification/AmazonCA.java
We still see the same warnings though so let us explicitly use the -jdk option:
We now get an interesting error message indicating that the -jdk option was using the newer JDK17.
Exception while calling user-specified class: requires.VMProps
java.lang.UnsupportedClassVersionError: requires/VMProps has been compiled by a more recent version of the Java Runtime (class file version 61.0), this version of the Java Runtime only recognizes class file versions up to 55.0
	at java.base/java.lang.ClassLoader.defineClass1(Native Method)
	...
	at java.base/java.lang.ClassLoader.loadClass(ClassLoader.java:522)
	at java.base/java.lang.Class.forName0(Native Method)
	at java.base/java.lang.Class.forName(Class.java:315)
	at com.sun.javatest.regtest.agent.GetJDKProperties.run(GetJDKProperties.java:78)
	at com.sun.javatest.regtest.agent.GetJDKProperties.main(GetJDKProperties.java:54)
failed to get JDK properties for /Library/Java/JavaVirtualMachines/microsoft-11.jdk/Contents/Home/bin/java ; exit code 1
Error: failed to get JDK properties for /Library/Java/JavaVirtualMachines/microsoft-11.jdk/Contents/Home/bin/java ; exit code 1
On my machine, I can remove these files as follows:
ls -l /Users/saint/repos/java/jdk11u/JTwork/extraPropDefns/classes/requires

rm -fr /Users/saint/repos/java/jdk11u/JTwork/extraPropDefns/classes/requires
Rerunning the test now results in a single (different) UnsatisfiedLinkError AND a test failure! However, we now have a properly set up environment since we control the JDK version tested by jtreg.
jdk11u % ../jtreg/bin/jtreg -jdk:$JTREG_JAVA test/jdk/security/infra/java/security/cert/CertPathValidator/certification/AmazonCA.java

failed to get value for vm.musl
java.lang.UnsatisfiedLinkError: 'java.lang.String sun.hotspot.WhiteBox.getLibcName()'
	at sun.hotspot.WhiteBox.getLibcName(Native Method)
	at requires.VMProps.isMusl(VMProps.java:514)
	at requires.VMProps$SafeMap.put(VMProps.java:72)
	at requires.VMProps.call(VMProps.java:122)
	at requires.VMProps.call(VMProps.java:60)
	at com.sun.javatest.regtest.agent.GetJDKProperties.run(GetJDKProperties.java:80)
	at com.sun.javatest.regtest.agent.GetJDKProperties.main(GetJDKProperties.java:54)
Test results: failed: 1
Report written to /Users/saint/repos/java/jdk11u/JTreport/html/report.html
Results written to /Users/saint/repos/java/jdk11u/JTwork
Error: Some tests failed or other problems occurred.
Now here’s an interesting question: why doesn’t this approach yield identical result to setting the -jdk flag to this same JTREG_JAVA path?
The outcome of the experiment so far though is that the AmazonCA test appears to fail when run with JDK11 and pass when run with JDK17 (of the respective versions). To convince ourselves that the infrastructure is fine, we can run this test with JDK11 (which is our focus) after exporting JTREG_JAVA.
This test passes, despite the single UnsatisfiedLinkError printed out.
failed to get value for vm.musl
java.lang.UnsatisfiedLinkError: 'java.lang.String sun.hotspot.WhiteBox.getLibcName()'
	at sun.hotspot.WhiteBox.getLibcName(Native Method)
	at requires.VMProps.isMusl(VMProps.java:514)
	at requires.VMProps$SafeMap.put(VMProps.java:72)
	at requires.VMProps.call(VMProps.java:122)
	at requires.VMProps.call(VMProps.java:60)
	at com.sun.javatest.regtest.agent.GetJDKProperties.run(GetJDKProperties.java:80)
	at com.sun.javatest.regtest.agent.GetJDKProperties.main(GetJDKProperties.java:54)
Test results: passed: 1
Report written to /Users/saint/repos/java/jdk11u/JTreport/html/report.html
Results written to /Users/saint/repos/java/jdk11u/JTwork
An Interesting Test
The above experimentation was inspired by AotInvokeDynamic2AotTest.java. The first time I tried to run this test, I used this command line.
We first set of 5 UnsatisfiedLinkError failures in the previous experiment were displayed but no tests were executed.
...
Test results: no tests selected
Report written to /Users/saint/repos/java/jdk11u/JTreport/html/report.html
This was happening while jtreg was using JDK17 and one of the values that could not be get()ed vm.aot.enabled. Could that be why there were no selected tests? Ignoring that rabbit hole for now sine jdk11u is our focus. We can now run the test with JTREG_JAVA exported. The test is now run but fails with this message in JTreport/text/summary.txt:
compiler/aot/calls/fromAot/AotInvokeDynamic2AotTest.java Failed. Execution failed: `main' threw exception: java.lang.RuntimeException: Expected to get exit value of [0]
To see more details about the test failure, use the -verbose flag:
Once this command completes (and fails), a file named AotInvokeDynamic2AotTest.so.o exists on disk. The format of the ld command can be deduced from Linker.java:101. The ld command can then be directly invoked to see the actual failure:
% ld -dylib -o AotInvokeDynamic2AotTest.so AotInvokeDynamic2AotTest.so.o
ld: dynamic main executables must link with libSystem.dylib for architecture x86_64
To build Gmsh on Windows, launch MSYS via the “MSYS2 MinGW x64” shortcut then run these commands:
git clone https://gitlab.onelab.info/gmsh/gmsh.git
cd gmsh
mkdir build
cd build
cmake .. -G "MSYS Makefiles" -DENABLE_FLTK:BOOL=TRUE -DCMAKE_INSTALL_PREFIX=../install

make install
Background
The build instructions for the Gmsh repo require the make command to build the code. The build instructions do not seem particularly specific for Windows. At the very least, they imply a Cygwin environment. I ended up using the environment I configured for building Elmer. Interestingly, the Ninja system is selected (not Visual Studio).
git clone https://gitlab.onelab.info/gmsh/gmsh.git
cd gmsh
mkdir build
cd build
cmake .. -DCMAKE_INSTALL_PREFIX=../install
-- Building for: Ninja
-- The CXX compiler identification is GNU 12.1.0
-- The C compiler identification is GNU 12.1.0
...
Compiler for Shipped Gmsh
Out of curiosity, I used a text editor to open the gmsh.exe binary I downloaded. I was curious to see if I could determine which compiler was used to generate it. The data in gmsh.exe was so much richer than I could have expected – there is information about not just the compiler, but also the compilation flags! Granted, I’m not yet 100% sure that this metadata is describing the gmsh.exe binary.
General Information:
-------------------
                   HDF5 Version: 1.10.5
                  Configured on: Mon May 17 05:00:08 PDT 2021
                  Configured by: geuzaine@DESKTOP-BH6899J
                    Host system: x86_64-unknown-cygwin
              Uname information: CYGWIN_NT-10.0 DESKTOP-BH6899J 3.2.0(0.340/5/3) 2021-03-29 08:42 x86_64 Cygwin
                       Byte sex: little-endian
             Installation point: /usr/local

Compiling Options:
------------------
                     Build Mode: production
              Debugging Symbols: no
                        Asserts: no
                      Profiling: no
             Optimization Level: high

Linking Options:
----------------
                      Libraries: static
  Statically Linked Executables:
                        LDFLAGS:
                     H5_LDFLAGS:
                     AM_LDFLAGS:
                Extra libraries: -lm
                       Archiver: ar
                       AR_FLAGS: cr
                         Ranlib: ranlib

Languages:
----------
                              C: yes
                     C Compiler: /usr/bin/x86_64-w64-mingw32-gcc ( x86_64-w64-mingw32-gcc (GCC) 10.2.0)
                       CPPFLAGS:
                    H5_CPPFLAGS:   -DNDEBUG -UH5_DEBUG_API
                    AM_CPPFLAGS: -D_FILE_OFFSET_BITS=64
                        C Flags:
                     H5 C Flags:   -pedantic -Wall -Wextra -Wbad-function-cast -Wc++-compat -Wcast-align -Wcast-qual -Wconversion -Wdeclaration-after-statement -Wdisabled-optimization -Wfloat-equal -Wformat=2 -Winit-self -Winvalid-pch -Wmissing-declarations -Wmissing-include-dirs -Wmissing-prototypes -Wnested-externs -Wold-style-definition -Wpacked -Wpointer-arith -Wredundant-decls -Wshadow -Wstrict-prototypes -Wswitch-default -Wswitch-enum -Wundef -Wunused-macros -Wunsafe-loop-optimizations -Wwrite-strings -finline-functions -s -Wno-inline -Wno-aggregate-return -Wno-missing-format-attribute -Wno-missing-noreturn -O
                     AM C Flags:
               Shared C Library: no
               Static C Library: yes


                        Fortran: no

                            C++: no

                           Java: no


Features:
---------
                   Parallel HDF5: no
Parallel Filtered Dataset Writes: no
              Large Parallel I/O: no
              High-level library: yes
                    Threadsafety: no
             Default API mapping: v110
  With deprecated public symbols: yes
          I/O filters (external):
                             MPE: no
                      Direct VFD: no
                         dmalloc: no
  Packages w/ extra debug output: none
                     API tracing: no
            Using memory checker: no
 Memory allocation sanity checks: no
          Function stack tracing: no
       Strict file format checks: no
    Optimization instrumentation: no
Preceding this info was the substring SUMMARY OF THE HDF5 CONFIGURATION. It’s only now that I’m learning about HDF. Reviewing the cmake output also shows that cmake searched for HDF5 (output from CMakeLists.txt):
...
-- Could NOT find HDF5 (missing: HDF5_LIBRARIES HDF5_INCLUDE_DIRS) (found version "")
-- HDF5 not found
...
Finding Program Entry Point via GDB
Which GUI does Gmsh use? This was the simple question I wanted to answer. Looking around the tree I wasn’t sure where the program entry point was. Ended up searching for the regex main([^)] and there are still so many results (looks like benchmarks). Hmm, I could just launch it under the debugger and see which main function is being invoked. Finding instructions for this took longer than I expected (because I ignored the GDB manual). I eventually stumbled into debugging – GDB is not stopping at the first machine code instruction with break _start or info files Entry point address – Stack Overflow, which had the very useful info file command for showing the program’s entry point.
gdb gmsh.exe
GNU gdb (GDB) 12.1
Copyright (C) 2022 Free Software Foundation, Inc.
...
For help, type "help".
Type "apropos word" to search for commands related to "word"...
Reading symbols from gmsh.exe...
(gdb) b main
Function "main" not defined.
...
(gdb) b winmain
Function "winmain" not defined.
...
(gdb) step 1
The program is not being run.
(gdb) info file
Symbols from "D:\dev\repos\other\gmsh\build\gmsh.exe".
Local exec file:
        `D:\dev\repos\other\gmsh\build\gmsh.exe', file type pei-x86-64.
         Entry point: 0x100014f0
        0x0000000010001000 - 0x0000000010d73100 is .text
        0x0000000010d74000 - 0x0000000010dcb700 is .data
...
(gdb) b 0x100014f0
Function "0x100014f0" not defined.
Make breakpoint pending on future shared library load? (y or [n]) [answered N; input not from terminal]
(gdb) b *0x100014f0
Breakpoint 1 at 0x100014f0: file C:/M/mingw-w64-crt-git/src/mingw-w64/mingw-w64-crt/crt/crtexe.c, line 196.
Running the program runs it to termination but by this point in time, I had already found what I was pretty sure was the program’s entry point (by browsing the sources in VSCode). Sure enough, relaunching gdb is now seamless:
(gdb) b wmain
Breakpoint 1 at 0x10001550: file D:/dev/repos/other/gmsh/src/common/Main.cpp, line 34.
(gdb) b GmshMainBatch
Breakpoint 2 at 0x10002fc0: file D:/dev/repos/other/gmsh/src/common/GmshGlobal.cpp, line 486.
(gdb) c
Continuing.

Thread 1 hit Breakpoint 2, GmshMainBatch (argc=1, argv=0x209707c5a90) at D:/dev/repos/other/gmsh/src/common/GmshGlobal.cpp:486
486     {
The GDB User Manual has a section on Starting your Program, which mentions that the starti command “does the equivalent of setting a temporary breakpoint at the first instruction of a program’s execution and then invoking the ‘run’ command.” This is probably closest to what I’ve been looking for.
Building with FLTK
In the midst of the chaos of trying to find the program’s entry point, I read a little bit about FLTK and discovered that it’s the GUI system Gmsh is using. Here’s the new cmake command to build the GUI-enabled Gmsh.
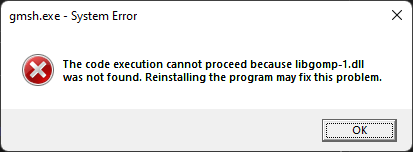
Not only is the newly built gmsh.exe binary is a whooping 674MB, it also can’t start:
Unable to start gmsh.exe because libgomp-1.dll is missing
Same error is displayed for libgomp-10.dll when you click OK. Well, let’s try the install target – presumably that should create a usable installation:
$ make install
make: *** No rule to make target 'install'.  Stop.
Turns out there is no makefile in my build folder – I used ninja! As per the ninja manual, this command should list all available targets:
ninja -t targets all
After verifying that there is indeed an install target, run it using ninja:
ninja install
This is not sufficient to address the resulting missing DLL errors – perhaps additional components need to be statically linked into the produced binary. A work-around for now:
Running gmesh now outputs the program’s usage info and exits. Still need to try it on some examples to ensure it works. There is also the unresolved question of why the GUI didn’t pop up.
Building using Makefiles
Since I used ninja for everything so far, I decided to use the makefiles generator and see what happens.
cmake .. -G "MSYS Makefiles" -DENABLE_FLTK:BOOL=TRUE -DCMAKE_INSTALL_PREFIX=../install

make install
There is no “Building for Ninja” line at the beginning of the cmake output. This time, the newly built gmsh.exe can run without the other DLLs I manually had to copy. Why doesn’t the GUI show up? Read the cmake output carefully:
-- Could NOT find FLTK (missing: FLTK_LIBRARIES FLTK_INCLUDE_DIR)
$ pacman -Ss fltk
...
mingw64/mingw-w64-x86_64-fltk 1.3.7-2
    C++ user interface toolkit (mingw-w64)
...

$ pacman -S --noconfirm --needed mingw64/mingw-w64-x86_64-fltk
Now running cmake finds FLTK:
-- Found FLTK: D:/dev/Software/msys64/mingw64/lib/libfltk_images.a;D:/dev/Software/msys64/mingw64/lib/libfltk_gl.a;opengl32;D:/dev/Software/msys64/mingw64/lib/libfltk.a
-- Found Fltk
And that’s it! Launching Gmsh from the install folder now launches the GUI application.
Outstanding Questions
Why does using the Makefiles generator produce a build that doesn’t require additional DLLs?
One of the key lessons from reading about oxidation was that Si has a key advantage over other semiconductors – it oxidizes much more readily thereby simplifying the development of insulation. I was looking up videos on the Deal-Grove oxidation model law when I stumbled into these videos by Chris Mack from a microfabrication course at the University of Texas at Austin using the same Microfabrication book I’m reading! It’s amazing how much free content there is out there.