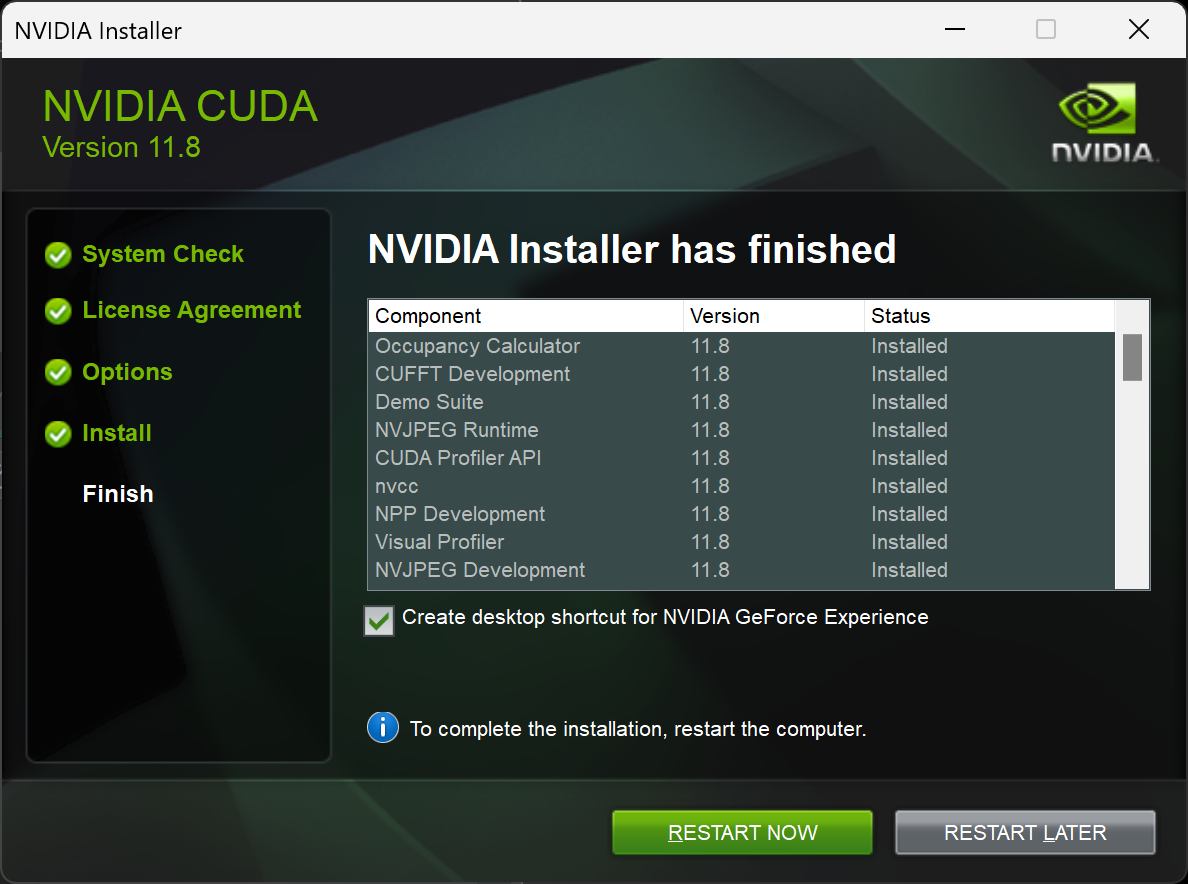
I had previously installed the 11.1 toolkit on my Surface Book so I started by uninstalling all apps that showed up when searching for “nvidia” under “Installed Apps” except NVIDIA Graphics Driver 461 and NVIDIA Update 38.0.2.0. I then got the new installer from Installation Guide Windows :: CUDA Toolkit Documentation (nvidia.com) and installed every component presented by the installer. Note that older builds can be found at the CUDA Toolkit Archive.
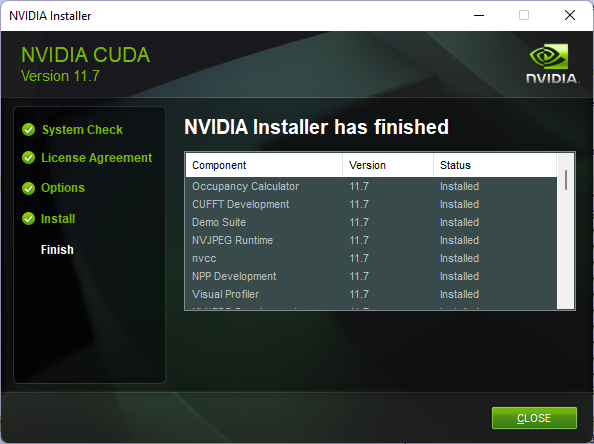
Installed NVIDIA CUDA Components
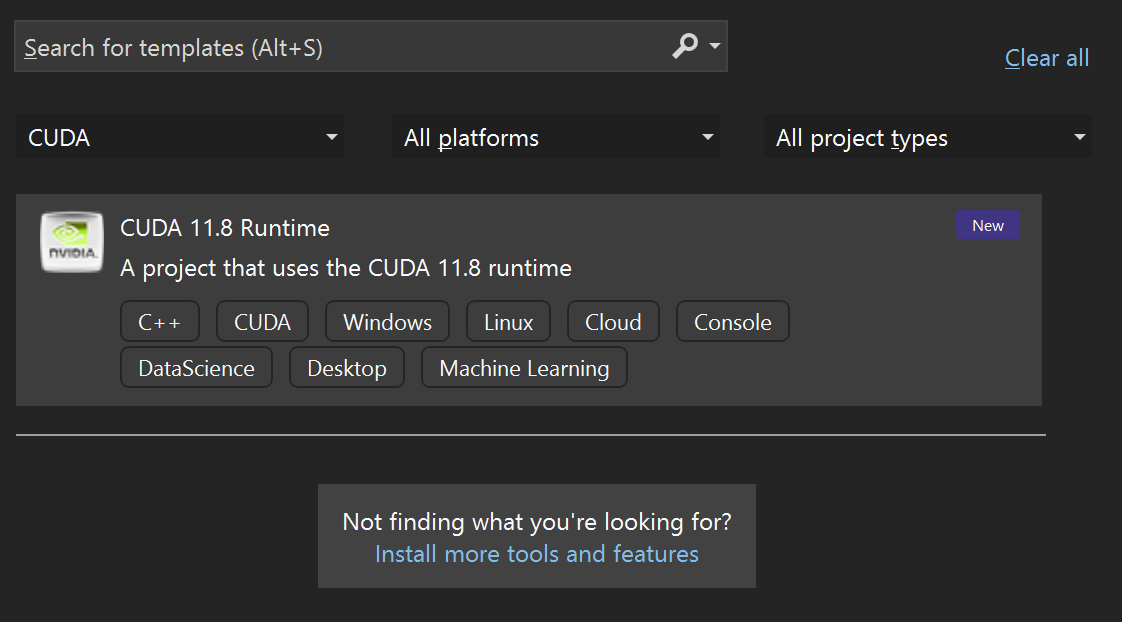
You can now create a new CUDA project in Visual Studio:
Visual Studio’s Create New Project Dialog
Surface Book 2 CUDA Issues
Creating and running a CUDA 11.8 Runtime project on my Surface Book 2 fails with the error cudaSetDevice failed! Do you have a CUDA-capable GPU installed?addWithCuda failed! A search for using nvidia GPU on surface book 2 leads to suggestions that involve the NVIDIA Control Panel. Unfortunately, it doesn’t start on my laptop. A peek at the event viewer reveals why:
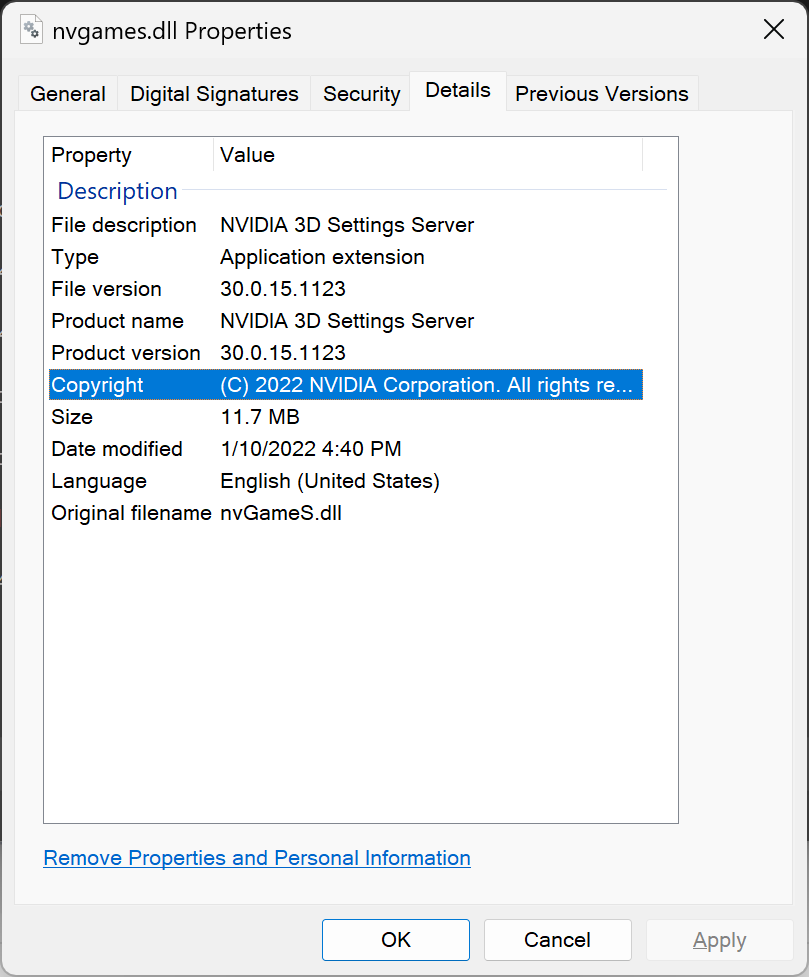
Opening the dump file in Visual Studio to see what’s going on is not helpful because there are no symbols available for the NVIDIA binaries. The NVIDIA Driver Symbol Server even says that it does not have PDBs (even though that’s for drivers) so this is not an optimistic path. The trimmed callstack of the main thread from the dump is shown below though. The paths to the NVIDIA binaries are C:\Program Files\WindowsApps\NVIDIACorp.NVIDIAControlPanel_8.1.962.0_x64__56jybvy8sckqj\nvcplui.exe and C:\Windows\System32\DriverStore\FileRepository\nvmsoui.inf_amd64_8fd9664c41d93f19\nvgames.dll
>	nvcplui.exe!00007ff756d547f5	Unknown
 	nvcplui.exe!00007ff756d529c7	Unknown
 	nvcplui.exe!00007ff756d09f57	Unknown
 	KERNELBASE.dll!UnhandledExceptionFilter	C
 	[Inline Frame] ntdll.dll!RtlpThreadExceptionFilter	C
...
 	ntdll.dll!RtlRaiseException	C
 	[External Code]
 	nvgames.dll!00007ffd372ba7d2	Unknown
...
 	nvgames.dll!00007ffd36ffd59f	Unknown
 	combase.dll!???::CreateInstance	C++
...
 	[Inline Frame] combase.dll!CoCreateInstanceEx	C++
 	combase.dll!CoCreateInstance	C++
 	nvcplui.exe!00007ff756afdf63	Unknown
...
 	nvcplui.exe!00007ff756d08f63	Unknown
 	kernel32.dll!BaseThreadInitThunk	C
 	ntdll.dll!RtlUserThreadStart	C
Launching it again errors with a dialog claiming that an NVIDIA graphics card was not detected in my system. Check out the language too…
Sure enough, device manager no long shows the GTX 1060 in the list of display adapters.
Rebooting restores the GTX 1060 but doesn’t address the crash in the NVIDIA Control Panel so I decide to move to my workstation and everything is much smoother there. The new Visual Studio CUDA project runs to completion so I turn my attention back to the CUDA installer to work on resolving the Surface Book 2 issues. The first thing I notice is that the installer is not keyboard accessible, so here’s a detour…
NVIDIA Installer Accessibility Issues
Is the NVIDIA Installer narrator-friendly? Narrator informs me that there are new natural voices available so I install them (Microsoft Aria, Guy, and Jenny).
CUDA 11.6 Driver Components
Looks like narrator works with the installer. However, the installer cannot be used via keyboard alone due to these issues:
You cannot TAB out of the NVIDIA software license agreement.
Narrator doesn’t read the captions below the Express and Custom radio buttons on the Installation Options page.
You cannot TAB into the components tree to select them via keyboard.
Keyboard navigation works after clicking on a component but the focus goes back to the NEXT button after using ALT+TAB to switch to another program then back.
Narrator reads the individual components, e.g. “NSight Systems, Selected” regardless of whether the checkbox is ticked or not. How does one know it’s a checkbox?
The custom installation components columns are not resizable (Component, New Version, and Current Version). For example, what NVIDIA GeForce Experience compo…
Why isn’t it resizable?
A general usability issue: why do all the NVIDIA components need to be uninstalled individually instead of having an option to remove everything?
Outstanding Questions
How do we figure out which component installed the NVIDIA Control Panel? One approach is to uninstall the existing components until the control panel binary from the dump file is deleted on disk. Removing NVIDIA NSight Systems 2022.4.2 removed the C:\Program Files\WindowsApps\NVIDIACorp.NVIDIAControlPanel_8.1.962.0_x64__56jybvy8sckqj\ directory. However, installing only this component in 11.6 did not bring back the NVIDIA control panel!
The installer asks for a path to a temp directory to unpack setup file into. Could examining that folder help determine where the control panel is coming from?
Was this installer generated by NSIS?
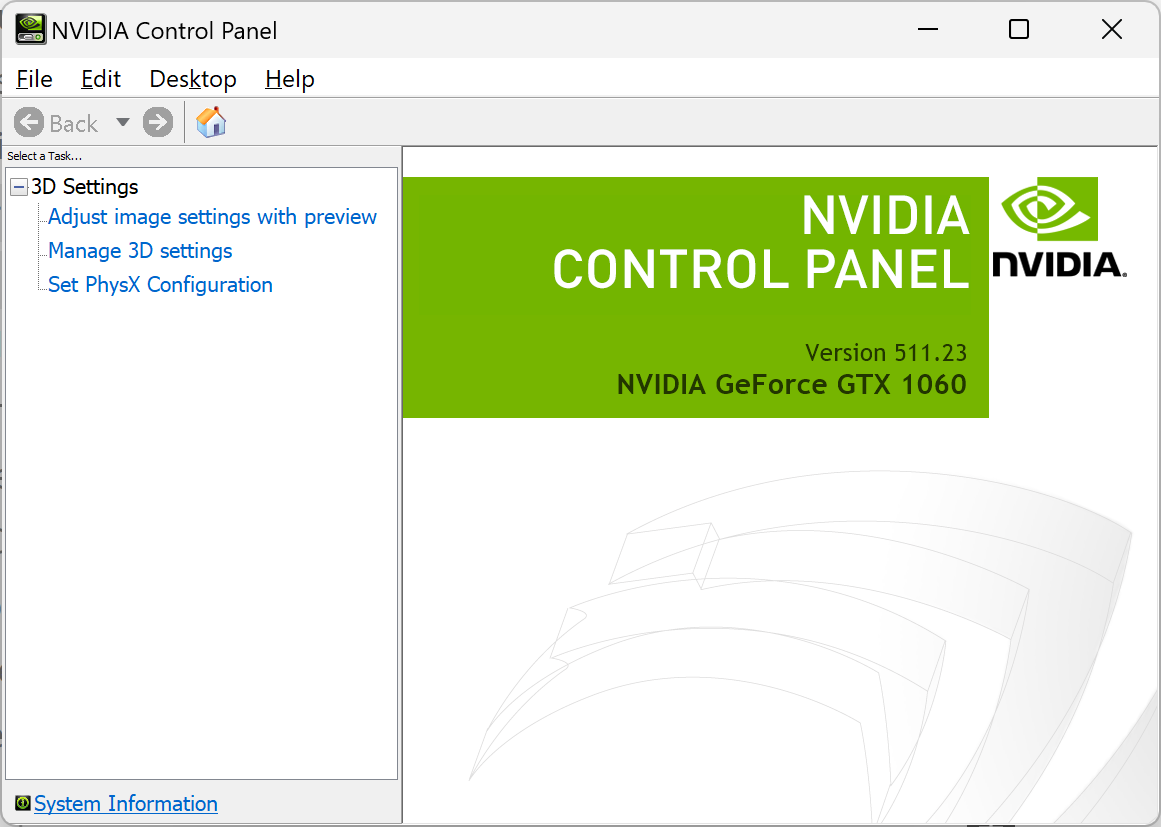
Resolution
I end up uninstalling all “nvidia” components on the Installed Apps page except NVIDIA Graphics Driver 461.40 then installing all components from CUDA 11.6. This finally has a working control panel!
NVIDIA Control Panel from CUDA 11.6 Installer
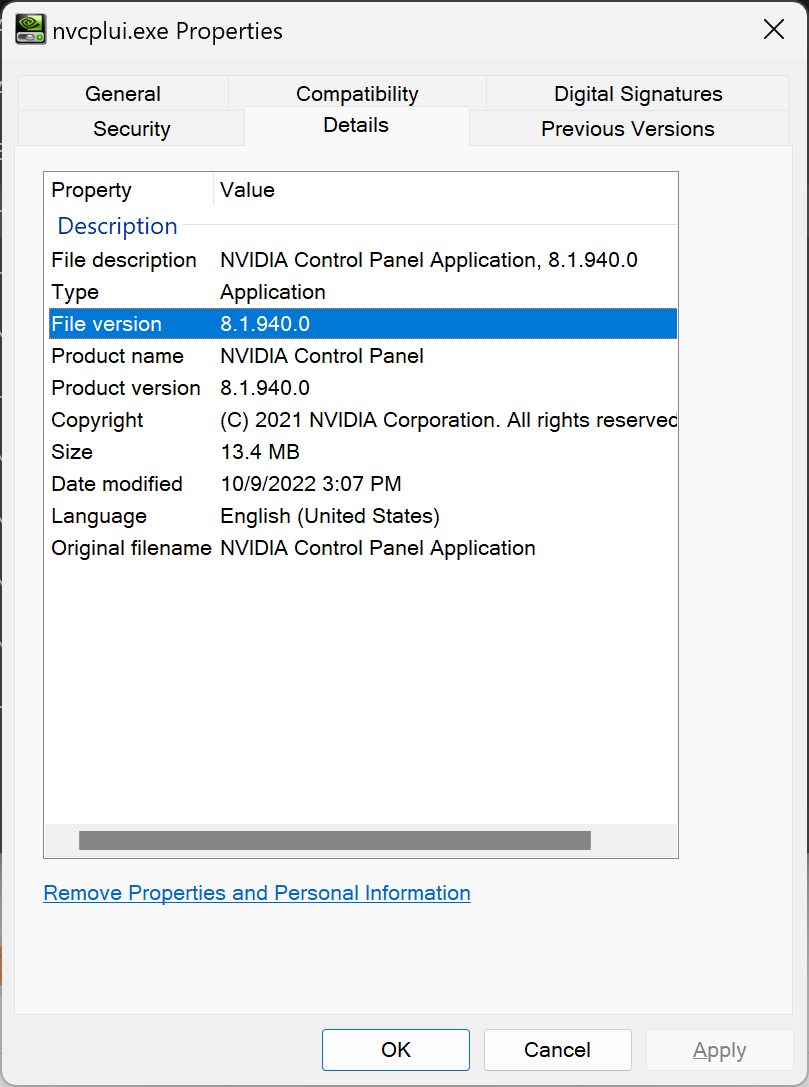
Surprisingly, this executable is in C:\Program Files\WindowsApps\NVIDIACorp.NVIDIAControlPanel_8.1.962.0_x64__56jybvy8sckqj, the same directory as 11.8! This must not have been the buggy component! Here is the version info for the 2 NVIDIA binaries in the earlier crash dump (nvgames.dll is now in C:\Windows\System32\DriverStore\FileRepository\nvmsoui.inf_amd64_ed4d74dfae95b5e6):
nvcplui.exe Properties
Visual Studio 2022 does not have the new CUDA project option though. However, changing the paths (in the .vcxproj) for my new project created using the 11.8 tools on my VS 2022 desktop makes the program work. Looks like I need to use 11.7 instead so I uninstall all the “nvidia” components except the NVIDIA Control Panel and the NVIDIA Graphics Driver 511.23 before installing 11.7. Thankfully, 11.7 works just fine!
Once these are installed, run the commands below in a Visual Studio 2022 Developer Command Prompt to build zlib for Windows. The x64 directory will contain zlibwapi.dll, which can be renamed to zlib.dll according to zlib/readme.txt (from the latest commit as of this post).
Unfortunately (or maybe fortunately?), I didn’t see any binaries at zlib. There is a link to the zlib GitHub repo though and zlib/DLL_FAQ.txt at master · madler/zlib (github.com) says to review the zlib site for an alternative download location. Sure enough, it does have a link to zlib for Windows 9x/NT/2000/XP/2003 (DLL version, plus related utilities). That doesn’t inspire much confidence in the binaries though… Might as well build them myself.
Investigating How to Build zlib
Open a Visual Studio Developer Command Prompt then build the project I saw in the docs:
git clone https://github.com/madler/zlib
cd zlib/contrib/vstudio/vc14
msbuild zlibvc.vcxproj
There are other prereqs, apparently:
MSBuild version 17.3.1+2badb37d1 for .NET Framework
Build started 9/29/2022 11:01:01 AM.
Project "D:\dev\repos\zlib\contrib\vstudio\vc14\zlibvc.vcxproj" on node 1 (default targets).
C:\Program Files\Microsoft Visual Studio\2022\Enterprise\MSBuild\Microsoft\VC\v170\Microsoft.CppBuild.targets(460,5): error MSB8020: The build tools for Visual Studio 2015 (Platform Toolset = 'v140') cannot b
e found. To build using the v140 build tools, please install Visual Studio 2015 build tools.  Alternatively, you may upgrade to the current Visual Studio tools by selecting the Project menu or right-click the
 solution, and then selecting "Retarget solution". [D:\dev\repos\zlib\contrib\vstudio\vc14\zlibvc.vcxproj]
Done Building Project "D:\dev\repos\zlib\contrib\vstudio\vc14\zlibvc.vcxproj" (default targets) -- FAILED.


Build FAILED.
D:\dev\repos\zlib\contrib\vstudio\vc14> msbuild zlibvc.vcxproj
MSBuild version 17.3.1+2badb37d1 for .NET Framework
Build started 9/29/2022 11:23:13 AM.
Project "D:\dev\repos\zlib\contrib\vstudio\vc14\zlibvc.vcxproj" on node 1 (default targets).
C:\Program Files (x86)\MSBuild\Microsoft.Cpp\v4.0\V140\Platforms\Win32\PlatformToolsets\v140\Toolset.targets(34,5): error MSB8036: The Windows SDK version 8.1 was not found. Install the required version of Wi
ndows SDK or change the SDK version in the project property pages or by right-clicking the solution and selecting "Retarget solution". [D:\dev\repos\zlib\contrib\vstudio\vc14\zlibvc.vcxproj]
Done Building Project "D:\dev\repos\zlib\contrib\vstudio\vc14\zlibvc.vcxproj" (default targets) -- FAILED.


Build FAILED.
D:\dev\repos\zlib\contrib\vstudio\vc14> msbuild zlibvc.vcxproj
MSBuild version 17.3.1+2badb37d1 for .NET Framework
Build started 9/29/2022 11:51:10 AM.
Project "D:\dev\repos\zlib\contrib\vstudio\vc14\zlibvc.vcxproj" on node 1 (default targets).
PrepareForBuild:
  Creating directory "x86\ZlibDllDebug\Tmp\".
  Creating directory "x86\ZlibDllDebug\Tmp\zlibvc.tlog\".
InitializeBuildStatus:
  Creating "x86\ZlibDllDebug\Tmp\zlibvc.tlog\unsuccessfulbuild" because "AlwaysCreate" was specified.
PreBuildEvent:
  cd ..\..\masmx86
  bld_ml32.bat
  :VCEnd
  The system cannot find the path specified.
  'bld_ml32.bat' is not recognized as an internal or external command,
  operable program or batch file.
C:\Program Files (x86)\MSBuild\Microsoft.Cpp\v4.0\V140\Microsoft.CppCommon.targets(123,5): error MSB3073: The command "cd ..\..\masmx86 [D:\dev\repos\zlib\contrib\vstudio\vc14\zlibvc.vcxproj]
C:\Program Files (x86)\MSBuild\Microsoft.Cpp\v4.0\V140\Microsoft.CppCommon.targets(123,5): error MSB3073: bld_ml32.bat [D:\dev\repos\zlib\contrib\vstudio\vc14\zlibvc.vcxproj]
C:\Program Files (x86)\MSBuild\Microsoft.Cpp\v4.0\V140\Microsoft.CppCommon.targets(123,5): error MSB3073: :VCEnd" exited with code 9009. [D:\dev\repos\zlib\contrib\vstudio\vc14\zlibvc.vcxproj]
Done Building Project "D:\dev\repos\zlib\contrib\vstudio\vc14\zlibvc.vcxproj" (default targets) -- FAILED.


Build FAILED.
This looks like really bad development on the zlib repo. Removing scripts without removing outdated documentation, much less documenting the new way to build. This is Please fix 1.2.12 compile · Issue #631 · madler/zlib (github.com). Instead of using the workarounds there, just build 1.2.11 and let the zlib folks deal with that mess.
git switch --detach v1.2.11
cd zlib/contrib/vstudio/vc14
msbuild zlibvc.vcxproj
hsdis is a plugin for disassembling code dynamically generated by the Java Virtual Machine. On Linux & MacOS, it uses GNU binutils. Support for the LLVM disassembly backend was recently added to hsdis in https://github.com/openjdk/jdk/pull/7531. This was motivated by the fact that GNU binutils is not distributed with the JDK (due to licensing reasons mentioned at https://github.com/openjdk/jdk/pull/5920#issuecomment-942398786) and the LLVM disassembly may be preferrable in certain circumstances. Unfortunately, the official Windows LLVM distribution does not have the header files necessary to build the hotspot disassembler. This prevents Windows developers from easily using the LLVM disassembler backend because they now have to build LLVM themselves as well – see hsdis LLVM backend for Windows ARM64 and Building LLVM for Windows ARM64, for example. In this post, we investigate why the LLVM Windows build does not have the necessary header files. The llvm-c directory in Windows build contains these 2 files only:
C:\Program Files\LLVM\include\llvm-c>dir
 Volume in drive C is OSDisk
 Volume Serial Number is c070-2ac0

 Directory of C:\Program Files\LLVM\include\llvm-c

01/08/2022  11:54 AM    <DIR>          .
01/08/2022  11:54 AM    <DIR>          ..
09/24/2021  10:18 AM            29,760 lto.h
09/24/2021  10:18 AM             9,632 Remarks.h
               2 File(s)         39,392 bytes
               2 Dir(s)  62,273,200,128 bytes free
I created a local LLVM build (see Building LLVM with CMake) and confirmed that it has all the header files.
C:\dev\repos\llvm-project\build_llvm\install_local\include\llvm-c>dir /w
 Volume in drive C is OSDisk
 Volume Serial Number is 0087-4c48

 Directory of C:\dev\repos\llvm-project\build_llvm\install_local\include\llvm-c

[.]                   [..]                  Analysis.h
BitReader.h           BitWriter.h           blake3.h
Comdat.h              Core.h                DataTypes.h
DebugInfo.h           Deprecated.h          Disassembler.h
DisassemblerTypes.h   Error.h               ErrorHandling.h
ExecutionEngine.h     ExternC.h             Initialization.h
IRReader.h            Linker.h              LLJIT.h
lto.h                 Object.h              Orc.h
OrcEE.h               Remarks.h             Support.h
Target.h              TargetMachine.h       [Transforms]
Types.h
              28 File(s)        382,361 bytes
               3 Dir(s)  59,158,138,880 bytes free
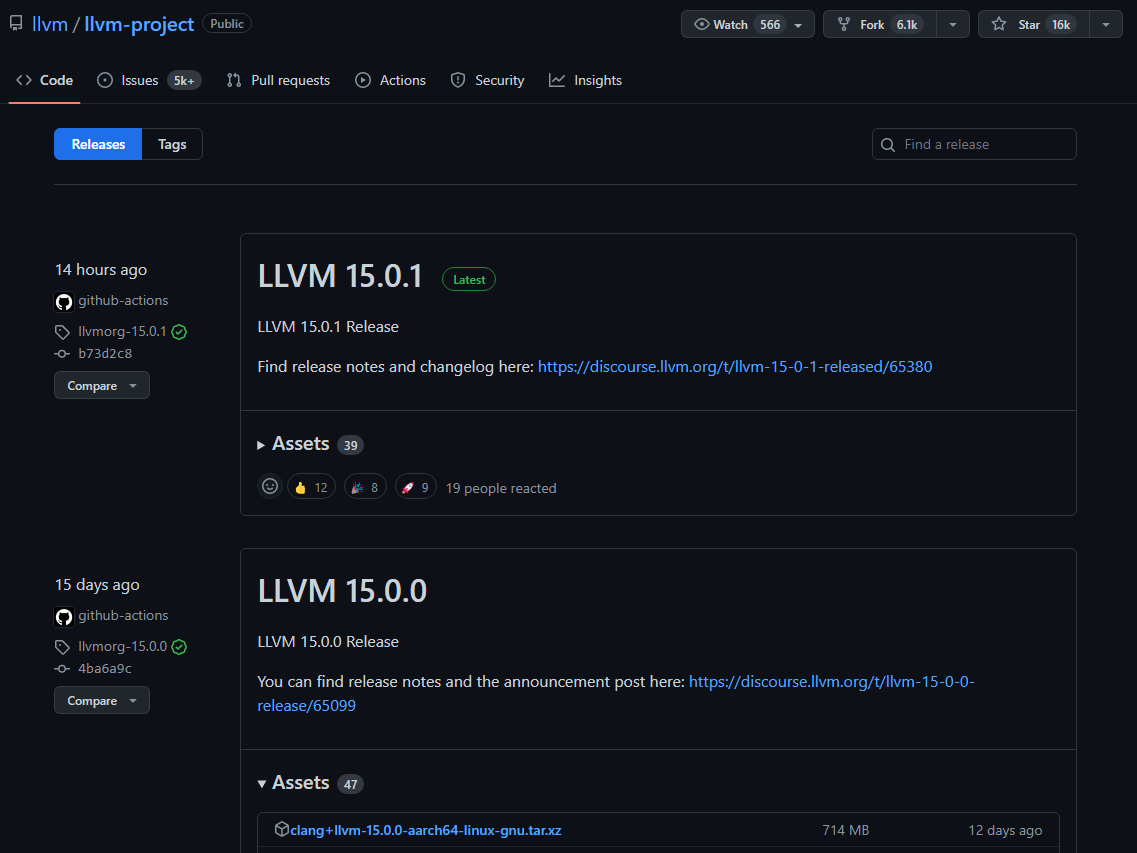
Does this problem still exist in the latest Windows LLVM release? I went to Releases · llvm/llvm-project (github.com) to find the latest LLVM installer for Windows but couldn’t find it. Turns out it’s because the 15.0.1 release is only 14 hours old so some of the assets probably haven’t been uploaded. Notice that 15.0.0 has 47 assets. I can successfully download and install LLVM-15.0.0-win64.exe and see that the header files are still missing.
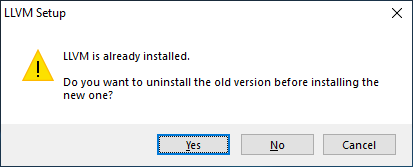
Interestingly, trying to install LLVM-15.0.0-win32.exe before uninstalling LLVM-15.0.0-win64.exe gives this dialog and clicking Yes uninstalls before the actual installation of the 32-bit build starts!
LLVM is already installed.
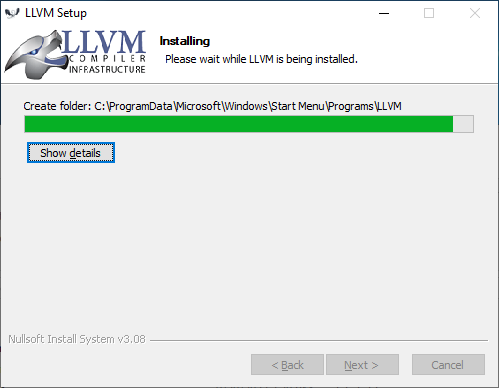
I assumed that would happen at this stage:
All the same, these dialogs have strings that can lead us to the sources that create the installer! The installer looks very similar to the one from Building the Elmer Install Folder so searching the llvm codebase for “ncis ” gives only a handful of hits leading to the key discovery of build_llvm_release.bat! (later learn that this needs to be executed in a (2019) developer command prompt so that the ninja command can be found). That script requires 7zip though. The script fails on my machine because it can’t find 7zip. Failure seems to be coming from the for-statement (see for | Microsoft Learn for usage). The for command uses the escape character (^) as explained at set | Microsoft Learn.
C:\dev\repos\llvm-project\llvm\utils\release> build_llvm_release.bat 15.0.0
Check 7-zip version and/or administrator permissions.
'7z.exe' is not recognized as an internal or external command,
operable program or batch file.
You need to modify the paths below:
Revision: llvmorg-15.0.0
Package version: 15.0.0
Build dir: C:\dev\repos\llvm-project\llvm\utils\release\llvm_package_15.0.0

Press any key to continue . . .
-- Looking for CrashReporterClient.h
-- Looking for CrashReporterClient.h - not found
-- Looking for pfm_initialize in pfm
-- Looking for pfm_initialize in pfm - not found
-- Could NOT find ZLIB (missing: ZLIB_LIBRARY ZLIB_INCLUDE_DIR)
CMake Error at C:/Program Files/Microsoft Visual Studio/2022/Preview/Common7/IDE/CommonExtensions/Microsoft/CMake/CMake/share/cmake-3.24/Modules/FindPackageHandleStandardArgs.cmake:230 (message):
  Could NOT find LibXml2 (missing: LIBXML2_INCLUDE_DIR)
Call Stack (most recent call first):
  C:/Program Files/Microsoft Visual Studio/2022/Preview/Common7/IDE/CommonExtensions/Microsoft/CMake/CMake/share/cmake-3.24/Modules/FindPackageHandleStandardArgs.cmake:594 (_FPHSA_FAILURE_MESSAGE)
  C:/Program Files/Microsoft Visual Studio/2022/Preview/Common7/IDE/CommonExtensions/Microsoft/CMake/CMake/share/cmake-3.24/Modules/FindLibXml2.cmake:108 (FIND_PACKAGE_HANDLE_STANDARD_ARGS)
  cmake/config-ix.cmake:156 (find_package)
  CMakeLists.txt:774 (include)


-- Configuring incomplete, errors occurred!
See also "C:/dev/repos/llvm-project/llvm/utils/release/llvm_package_15.0.0/build32_stage0/CMakeFiles/CMakeOutput.log".
See also "C:/dev/repos/llvm-project/llvm/utils/release/llvm_package_15.0.0/build32_stage0/CMakeFiles/CMakeError.log".
Looking through FindPackageHandleStandardArgs.cmake leads me to the simple realization that the wrong define is being used on the command line. Could this be because I’m using a newer CMake? I’ve been using the VS 2022 Preview Developer Command Prompt thus far. My VS 2019 (16.11.19) installation uses CMake 3.20. Both FindLibXml2.cmake in 3.20 and FindLibXml2.cmake in 3.24 require the LIBXML2_INCLUDE_DIR variable. However, they also claim (at the top) to set these variables.
in my build folder (build_llvm), there is a CPackConfig.cmake file that sets variables like CPACK_PACKAGE_FILE_NAME and CPACK_NSIS_DISPLAY_NAME. Since it is NSIS Wiki (sourceforge.io) in use, I wonder about running the package target myself in a manner similar to that used to create my local build. I switch back to a previous build directory (created without the build_llvm_release.bat) and run:
cmake --build . --config Release --target package
The resulting failure below indicates that NSIS is required.
MSBuild version 17.4.0-preview-22466-03+48ab5664b for .NET Framework
  PipSqueak.vcxproj -> C:\dev\repos\llvm-project\build_llvm\unittests\Support\DynamicLibrary\Release\PipSqueak.dll
  SecondLib.vcxproj -> C:\dev\repos\llvm-project\build_llvm\unittests\Support\DynamicLibrary\Release\SecondLib.dll
  obj.llvm-tblgen.vcxproj -> C:\dev\repos\llvm-project\build_llvm\utils\TableGen\obj.llvm-tblgen.dir\Release\obj.llvm-tblgen.lib
  LLVMDemangle.vcxproj -> C:\dev\repos\llvm-project\build_llvm\Release\lib\LLVMDemangle.lib
...
  verify-uselistorder.vcxproj -> C:\dev\repos\llvm-project\build_llvm\Release\bin\verify-uselistorder.exe
  yaml-bench.vcxproj -> C:\dev\repos\llvm-project\build_llvm\Release\bin\yaml-bench.exe
  yaml2obj.vcxproj -> C:\dev\repos\llvm-project\build_llvm\Release\bin\yaml2obj.exe
EXEC : CPack error : Cannot find NSIS compiler makensis: likely it is not installed, or not in your PATH [C:\dev\repos\llvm-project\build_llvm\package.vcxproj]
EXEC : CPack error : Could not read NSIS registry value. This is usually caused by NSIS not being installed. Please install NSIS from http://nsis.sourceforge.net [C:\dev\repos\llvm-proje
ct\build_llvm\package.vcxproj]
EXEC : CPack error : Cannot initialize the generator NSIS [C:\dev\repos\llvm-project\build_llvm\package.vcxproj]
After installing NSIS, the previous command successfully creates an LLVM for Windows installer.
...
  verify-uselistorder.vcxproj -> C:\dev\repos\llvm-project\build_llvm\Release\bin\verify-uselistorder.exe
  yaml-bench.vcxproj -> C:\dev\repos\llvm-project\build_llvm\Release\bin\yaml-bench.exe
  yaml2obj.vcxproj -> C:\dev\repos\llvm-project\build_llvm\Release\bin\yaml2obj.exe
  CPack: Create package using NSIS
  CPack: Install projects
  CPack: - Install project: LLVM [Release]
  CMake Warning (dev) at C:/Program Files/Microsoft Visual Studio/2022/Preview/Common7/IDE/CommonExtensions/Microsoft/CMake/CMake/share/cmake-3.24/Modules/GNUInstallDirs.cmake:243 (messa
  ge):
    Unable to determine default CMAKE_INSTALL_LIBDIR directory because no
    target architecture is known.  Please enable at least one language before
    including GNUInstallDirs.
  Call Stack (most recent call first):
    C:/dev/repos/llvm-project/llvm/cmake/modules/LLVMInstallSymlink.cmake:5 (include)
    C:/dev/repos/llvm-project/build_llvm/tools/llvm-ar/cmake_install.cmake:48 (include)
    C:/dev/repos/llvm-project/build_llvm/tools/cmake_install.cmake:39 (include)
    C:/dev/repos/llvm-project/build_llvm/cmake_install.cmake:71 (include)
  This warning is for project developers.  Use -Wno-dev to suppress it.

  CPack: Create package
  CPack: - package: C:/dev/repos/llvm-project/build_llvm/LLVM-16.0.0git-win64.exe generated.
This installer generates the LLVM includes on disk as expected. The issue must therefore be confined to the installer generated by the script.
Reviewing Ninja NSIS Packaging
At this point, I ran build_llvm_release.bat to create an installer. Once packaging is complete, the install_manifest.txt file can be used to determine which files are in the installer. The batch file also runs lots of tests and this was annoying when trying to generate installers. Once the tests failed on the build I was creating and I had CTRL+C’d a couple of times, I ran ninja package myself (taken from the batch file)
C:\dev\repos\llvm-project\llvm\utils\release\llvm_package_15.0.0\build32_stage0>ninja package
[0/1] Run CPack packaging tool...CPack: Create package using NSIS
CPack: Install projects
CPack: - Install project: LLVM []
CMake Warning (dev) at C:/Program Files/Microsoft Visual Studio/2022/Preview/Common7/IDE/CommonExtensions/Microsoft/CMake/CMake/share/cmake-3.24/Modules/GNUInstallDirs.cmake:243 (message):
  Unable to determine default CMAKE_INSTALL_LIBDIR directory because no
  target architecture is known.  Please enable at least one language before
  including GNUInstallDirs.
Call Stack (most recent call first):
  C:/dev/repos/llvm-project/llvm/utils/release/llvm_package_15.0.0/llvm-project/llvm/cmake/modules/LLVMInstallSymlink.cmake:5 (include)
  C:/dev/repos/llvm-project/llvm/utils/release/llvm_package_15.0.0/build32_stage0/tools/llvm-ar/cmake_install.cmake:40 (include)
  C:/dev/repos/llvm-project/llvm/utils/release/llvm_package_15.0.0/build32_stage0/tools/cmake_install.cmake:39 (include)
  C:/dev/repos/llvm-project/llvm/utils/release/llvm_package_15.0.0/build32_stage0/cmake_install.cmake:114 (include)
This warning is for project developers.  Use -Wno-dev to suppress it.

CPack: Create package
CPack: - package: C:/dev/repos/llvm-project/llvm/utils/release/llvm_package_15.0.0/build32_stage0/LLVM-15.0.0-win32.exe generated.
I then try to find a package target in build.ninja. Search for CMakeFiles\package.util.+ include since we’re interested in include files. There are some interesting differences in the include directories of the build created manually from the local install and the one created by the script, e.g.
Try searching in build.ninja for the 2 header files the installer creates in the (broken) shipping LLVM for Windows build. Nothing there but searching the file system for remarks.h gives interesting results, e.g. the existence of an NSIS project file: project.nsi. Looks like there are some tutorials showing how to create .nsi files at Invoking NSIS run-time commands on compile-time – NSIS (sourceforge.io). The way NSIS is used with CPack when building is documented at Packaging With CPack — Mastering CMake
… but I completely missed the fact that the 2nd didn’t have these lines from the first.
if(CMAKE_INSTALL_COMPONENT STREQUAL "llvm-headers" OR NOT CMAKE_INSTALL_COMPONENT)
  file(INSTALL DESTINATION "${CMAKE_INSTALL_PREFIX}/include" TYPE DIRECTORY FILES
    "C:/dev/repos/llvm-project/llvm/include/llvm"
    "C:/dev/repos/llvm-project/llvm/include/llvm-c"
    FILES_MATCHING REGEX "/[^/]*\\.def$" REGEX "/[^/]*\\.h$" REGEX "/[^/]*\\.td$" REGEX "/[^/]*\\.inc$" REGEX "/license\\.txt$")
endif()

if(CMAKE_INSTALL_COMPONENT STREQUAL "llvm-headers" OR NOT CMAKE_INSTALL_COMPONENT)
  file(INSTALL DESTINATION "${CMAKE_INSTALL_PREFIX}/include" TYPE DIRECTORY FILES
    "C:/dev/repos/llvm-project/build_llvm/include/llvm"
    "C:/dev/repos/llvm-project/build_llvm/include/llvm-c"
    FILES_MATCHING REGEX "/[^/]*\\.def$" REGEX "/[^/]*\\.h$" REGEX "/[^/]*\\.gen$" REGEX "/[^/]*\\.inc$" REGEX "/cmakefiles$" EXCLUDE REGEX "/config\\.h$" EXCLUDE)
endif()
Search the codebase for “llvm-headers” and find the llvm-header component definition. That whole code block is gated by the LLVM_INSTALL_TOOLCHAIN_ONLY variable! This is explicitly turned off in build_llvm_release.bat! I rerun the batch file and see tests failing after the build succeeds. CTRL+C to kill the processes so that I can get to the root issue: does turning off that flag fix the includes? makensis fails, probably because I killed the build and some things might still have been in use?
C:\dev\repos\llvm-project\llvm\utils\release\llvm_package_15.0.0\build32_stage0>ninja package
[0/1] Run CPack packaging tool...CPack: Create package using NSIS
CPack: Install projects
CPack: - Install project: LLVM []
CMake Warning (dev) at C:/Program Files/Microsoft Visual Studio/2022/Preview/Common7/IDE/CommonExtensions/Microsoft/CMake/CMake/share/cmake-3.24/Modules/GNUInstallDirs.cmake:243 (message):
  Unable to determine default CMAKE_INSTALL_LIBDIR directory because no
  target architecture is known.  Please enable at least one language before
  including GNUInstallDirs.
Call Stack (most recent call first):
  C:/dev/repos/llvm-project/llvm/utils/release/llvm_package_15.0.0/llvm-project/llvm/cmake/modules/LLVMInstallSymlink.cmake:5 (include)
  C:/dev/repos/llvm-project/llvm/utils/release/llvm_package_15.0.0/build32_stage0/tools/llvm-ar/cmake_install.cmake:40 (include)
  C:/dev/repos/llvm-project/llvm/utils/release/llvm_package_15.0.0/build32_stage0/tools/cmake_install.cmake:39 (include)
  C:/dev/repos/llvm-project/llvm/utils/release/llvm_package_15.0.0/build32_stage0/cmake_install.cmake:128 (include)
This warning is for project developers.  Use -Wno-dev to suppress it.

CPack: Create package
CPack Error: Problem running NSIS command: "C:/Program Files (x86)/NSIS/makensis.exe" "C:/dev/repos/llvm-project/llvm/utils/release/llvm_package_15.0.0/build32_stage0/_CPack_Packages/win32/NSIS/project.nsi"
Please check C:/dev/repos/llvm-project/llvm/utils/release/llvm_package_15.0.0/build32_stage0/_CPack_Packages/win32/NSIS/NSISOutput.log for errors
CPack Error: Problem compressing the directory
CPack Error: Error when generating package: LLVM

FAILED: CMakeFiles/package.util
cmd.exe /C "cd /D C:\dev\repos\llvm-project\llvm\utils\release\llvm_package_15.0.0\build32_stage0 && "C:\Program Files\Microsoft Visual Studio\2022\Preview\Common7\IDE\CommonExtensions\Microsoft\CMake\CMake\bin\cpack.exe" --config ./CPackConfig.cmake"
ninja: build stopped: subcommand failed.
NSISOutput.log failed due to an “Internal compiler error #12345: error mmapping datablock to 17235001.” However, the include files are now present in the source directory being packaged by NSIS.
Turning Off Tests
There are many tests that the build script runs and some of them are failing. Testing is not on my critical path since all I need is to generate installers so I modify the scripts to enable me to package the build without running all the tests. I then start my build without tests and go to bed only to wake up the next morning to find that I need to rerun it because there are no running programs when I log in. Event Viewer doesn’t show any reboot-related events and sure enough, Task Manager shows over 9 days of uptime still. Turns out the Desktop Window Manager crashed (C:\WINDOWS\system32\dwm.exe)! Curse you dwmcore.dll. Well, time to install those updates I’ve been putting off and reboot before jumping back in. Now on the new Windows 10.0.22621.521. The build still fails:
-- LLVM host triple: i686-pc-windows-msvc
-- LLVM default target triple: i686-pc-windows-msvc
-- Using Release VC++ CRT: MD
-- Looking for os_signpost_interval_begin
-- Looking for os_signpost_interval_begin - not found
CMake Error at C:/Program Files (x86)/Microsoft Visual Studio/2019/Enterprise/Common7/IDE/CommonExtensions/Microsoft/CMake/CMake/share/cmake-3.20/Modules/FindPackageHandleStandardArgs.cmake:230 (message):
  Could NOT find Python3 (missing: Python3_EXECUTABLE Interpreter) (Required
  is at least version "3.6")

      Reason given by package:
          Interpreter: Cannot use the interpreter "C:/Python310/python.exe"

Call Stack (most recent call first):
  C:/Program Files (x86)/Microsoft Visual Studio/2019/Enterprise/Common7/IDE/CommonExtensions/Microsoft/CMake/CMake/share/cmake-3.20/Modules/FindPackageHandleStandardArgs.cmake:594 (_FPHSA_FAILURE_MESSAGE)
  C:/Program Files (x86)/Microsoft Visual Studio/2019/Enterprise/Common7/IDE/CommonExtensions/Microsoft/CMake/CMake/share/cmake-3.20/Modules/FindPython/Support.cmake:3165 (find_package_handle_standard_args)
  C:/Program Files (x86)/Microsoft Visual Studio/2019/Enterprise/Common7/IDE/CommonExtensions/Microsoft/CMake/CMake/share/cmake-3.20/Modules/FindPython3.cmake:485 (include)
  CMakeLists.txt:817 (find_package)


-- Configuring incomplete, errors occurred!
See also "C:/dev/repos/llvm-project/llvm/utils/release/llvm_package_15.0.0/build32_stage0/CMakeFiles/CMakeOutput.log".
See also "C:/dev/repos/llvm-project/llvm/utils/release/llvm_package_15.0.0/build32_stage0/CMakeFiles/CMakeError.log".
When I interrupted the tests before modifying the batch file to skip them, I noticed that they were being run by %LOCALAPPDATA%\Microsoft\WindowsApps\python3.9.exe. This is still present on my machine. Ah, turns out I’m now using the 2019 developer command prompt (and therefore an older CMake). The only difference between CMake 3.20 FindPython3.cmake and CMake 3.24 FindPython3.cmake is a comment about static libraries, so this failure is a mystery.
Diagnosing Build Failures
Since this issue also bit me when I moved to my Surface Book, it is worth understanding why it happens.
Missing CMake in Visual Studio 17.3.4 Developer Command Prompt
Here is the VS 2022 Preview vs VS 2022 Enterprise path to CMake:
C:\Program Files (x86)\Microsoft Visual Studio\Installer> where cmake
C:\Program Files\Microsoft Visual Studio\2022\Preview\Common7\IDE\CommonExtensions\Microsoft\CMake\CMake\bin\cmake.exe

C:\dev\repos\llvm-project\llvm\utils\release> where cmake
INFO: Could not find files for the given pattern(s).
The View Logs link opens the Documents folder under This PC – not particularly useful. Interestingly though, clicking on the Modify button shows a Total space required 1.63 GB. How is there space required before I’ve selected anything? Something similar happens with 16.11.19 though. Without making any individual component selections, I start the install process. CMake gets (re-?)installed as shown below. This fixes the setup warnings as well and cmake is now usable in the VS2022 command prompt.
Missing Python3 in VS 17.3.4 Developer Command Prompt
This is the error I got when trying to build LLVM on my Surface Book 2 in the VS 2022 developer command prompt:
CMake Error at C:/Program Files/CMake/share/cmake-3.17/Modules/FindPackageHandleStandardArgs.cmake:164 (message):
  Could NOT find Python3 (missing: Python3_EXECUTABLE Interpreter) (Required
  is at least version "3.6")

      Reason given by package:
          Interpreter: Cannot use the interpreter "C:/Python310/python.exe"

Call Stack (most recent call first):
  C:/Program Files/CMake/share/cmake-3.17/Modules/FindPackageHandleStandardArgs.cmake:445 (_FPHSA_FAILURE_MESSAGE)
  C:/Program Files/CMake/share/cmake-3.17/Modules/FindPython/Support.cmake:2437 (find_package_handle_standard_args)
  C:/Program Files/CMake/share/cmake-3.17/Modules/FindPython3.cmake:309 (include)
  CMakeLists.txt:817 (find_package)
Uninstalling CMake enables the command line to pick up the CMake distributed with Visual Studio. Python3 is now found successfully in the path below (I’ve shortened it using %LOCALAPPDATA%).
-- Found Python3: %LOCALAPPDATA%/Microsoft/WindowsApps/python3.8.exe (found suitable version "3.8.10", minimum required is "3.6") found components: Interpreter
Missing Python3 in VS 16.11.19 Developer Command Prompt
Interestingly, I still get the same error in VS 2019 despite uninstalling CMake 3.17. My earlier hypothesis is therefore invalid.
CMake Error at C:/Program Files (x86)/Microsoft Visual Studio/2019/Enterprise/Common7/IDE/CommonExtensions/Microsoft/CMake/CMake/share/cmake-3.20/Modules/FindPackageHandleStandardArgs.cmake:230 (message):
  Could NOT find Python3 (missing: Python3_EXECUTABLE Interpreter) (Required
  is at least version "3.6")

      Reason given by package:
          Interpreter: Cannot use the interpreter "C:/Python310/python.exe"

Call Stack (most recent call first):
  C:/Program Files (x86)/Microsoft Visual Studio/2019/Enterprise/Common7/IDE/CommonExtensions/Microsoft/CMake/CMake/share/cmake-3.20/Modules/FindPackageHandleStandardArgs.cmake:594 (_FPHSA_FAILURE_MESSAGE)
  C:/Program Files (x86)/Microsoft Visual Studio/2019/Enterprise/Common7/IDE/CommonExtensions/Microsoft/CMake/CMake/share/cmake-3.20/Modules/FindPython/Support.cmake:3165 (find_package_handle_standard_args)
  C:/Program Files (x86)/Microsoft Visual Studio/2019/Enterprise/Common7/IDE/CommonExtensions/Microsoft/CMake/CMake/share/cmake-3.20/Modules/FindPython3.cmake:485 (include)
  CMakeLists.txt:817 (find_package)
C:/Python310/python.exe -c "import sys; sys.stdout.write('.'.join([str(x) for x in sys.version_info[:3]]))"
I comment out the ERROR_QUIET line to reveal the stdout and stderr output from python since the return code from the python process is causing the CMake error to be raised. Running with --trace-expand --trace-redirect=cmake_trace.txt now reveals the root cause (paths below cleaned up using %LOCALAPPDATA%):
Python path configuration:
  PYTHONHOME = '%LOCALAPPDATA%\Programs\Python\Python310-32'
  PYTHONPATH = (not set)
  program name = 'C:/Python310/python.exe'
  isolated = 0
  environment = 1
  user site = 1
  import site = 1
  sys._base_executable = 'C:\\Python310\\python.exe'
  sys.base_prefix = '%LOCALAPPDATA%\\Programs\\Python\\Python310-32'
  sys.base_exec_prefix = '%LOCALAPPDATA%\\Programs\\Python\\Python310-32'
  sys.platlibdir = 'lib'
  sys.executable = 'C:\\Python310\\python.exe'
  sys.prefix = '%LOCALAPPDATA%\\Programs\\Python\\Python310-32'
  sys.exec_prefix = '%LOCALAPPDATA%\\Programs\\Python\\Python310-32'
  sys.path = [
    'C:\\Python310\\python310.zip',
    '%LOCALAPPDATA%\\Programs\\Python\\Python310-32\\DLLs',
    '%LOCALAPPDATA%\\Programs\\Python\\Python310-32\\lib',
    'C:\\Python310',
  ]
Fatal Python error: init_fs_encoding: failed to get the Python codec of the filesystem encoding
Python runtime state: core initialized
ModuleNotFoundError: No module named 'encodings'

Current thread 0x00003174 (most recent call first):
  <no Python frame>
django – init_fs_encoding: failed to get the Python codec of the filesystem encoding – Stack Overflow is a hint that the PYTHONHOME is wrong. Sure enough, I didn’t change it in build_llvm_release.bat so the paths in the configuration above do not exist! This now raises another question: how on earth does this work in VS 2022? I notice on my desktop that python.exe does not even appear in the CMake tracing output! The difference in behavior stems from the fact that the find_program command in Modules/FindPython/Support.cmake · v3.20.0 finds python 3.10 first in the VS 2019 environment. This path is then assigned to _Python3_EXECUTABLE, preventing the 3.8 path from being used. One important difference between CMake 3.20 and 3.23 that I notice is FindPython: fix typo error (fff8d5b2) · Commits · CMake / CMake · GitLab (kitware.com). Since the fix for the build_llvm_release.bat script is straightforward and it is clear that there are some CMake implementation differences at work, we no longer need to dig into why this behavior could be happening.
Python Hangs
One of my build attempts successfully completes stage0 but hangs when CMake tries to detect the python version. Manually running the same command (copied from Process Explorer) also hangs. Even %LOCALAPPDATA%/Microsoft/WindowsApps/python3.9.exe --version hangs. Inspecting the full dump created by Task Manager reveals that python3.9.exe made a call to get (what looks like) the Package.InstalledLocation Property (Windows.ApplicationModel) – Windows UWP applications | Microsoft Learn
...
-- Looking for os_signpost_interval_begin
-- Looking for os_signpost_interval_begin - not found
Windows becomes pretty unusable as I investigate this behavior (mouse doesn’t work, changes program in focus but can’t click on anything). A reboot fixes these issues (e.g. version now works). Can’t believe we have to deal with this in 2022???
7z x clang+llvm-15.0.1-aarch64-linux-gnu.tar.xz
7z x clang+llvm-15.0.1-arm64-apple-darwin21.0.tar.xz
7z x clang+llvm-15.0.1-x86_64-apple-darwin.tar.xz

tar xf clang+llvm-15.0.1-aarch64-linux-gnu.tar
tar xf clang+llvm-15.0.1-arm64-apple-darwin21.0.tar
tar xf clang+llvm-15.0.1-x86_64-apple-darwin.tar
Here are the directories in the include folder before the installer is created. There are also 28 include files in the include/llvm-c/ directory as desired.
Directory of llvm\utils\release\llvm_package_15.0.0\build32_stage0\_CPack_Packages\win64\NSIS\LLVM-15.0.0-win64\include
 clang
 clang-c
 clang-tidy
 lld
 lldb
 llvm
 llvm-c
Outstanding Questions
Why does the NSIS project fail to build? Why are there test failures and build errors?
Why does the Linux build have ompt-multiplex.h and the aarch64-unknown-linux-gnu directory?
How is the Windows ARM64 installer generated?
Why doesn’t the Windows build have c++, flang, mlir, mlir-c, and polly?
How do we get symbols to the Python app in the Microsoft Store?
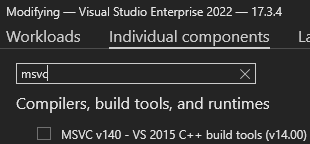
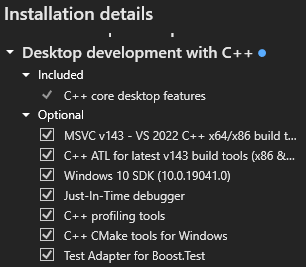
This path C:\Program Files\Microsoft Visual Studio\2022\Enterprise\VC\Auxiliary\Build has various scripts to set up a command window as documented at Use the Microsoft C++ toolset from the command line | Microsoft Docs. If vcvarsx86_arm64.bat and vcvarsamd64_arm64.bat are missing in that folder on your Windows x64 machine, install the MSVC v143 – VS 2022 C++ ARM64 build tools (Latest) component in the Visual Studio 2022 installer.
Selection ARM64 Build Tools in VS Installer
Once it is installed, open a new cmd.exe window and run this command to set up the build environment:
To see the command Visual Studio uses to build the project, create a C++ console application and use the Configuration Manager to change the Active solution platform to ARM64. Next, go to Tools > Options then expand the Projects and Solutions node. Select Build And Run then change the MSBuild project build output verbosity to Detailed. Building the project should now show the full command line used to invoke the compiler, for example here are the command lines used in the Debug and Release configurations respectively.
Notice the /O2 flag (maximize speed) in the release build instead of the /Od flag (no optimizations) above. The debug build also uses the just my code /JMC, runtime error checks /RTC1, and debug multithread-specific version of the run-time library /MDd flags. For our testing purposes, we can ignore most of these flags.
Calling Printf
Here is a simple program, aarch64-abi-test-printf.cpp, which calls printf with a format specifier and 4 additional arguments.
#include <stdio.h>

int main()
{
    int result = printf("%.4f,%.4f,%.4f,%s", 1.2345, 1.2345, 1.2345, "str");
}
In the disassembly generated by dumpbin (printf-abi.asm), notice that all 5 arguments to printf are passed in registers! x0 contains a pointer to the format string, x1-x3 contain the address of the $LN3 label. The 64-bits at that label are the IEEE double floating point representation of 1.2345. x4 contains a pointer to the null-terminated string “str“.
Which are the printf String Arguments?
To determine what symbols in instructions like adrp x8,$SG5571 mean, we use the output of dumpbin /all. The RELOCATIONS section shows $SG5571 to have symbol index 8. The COFF SYMBOL TABLE shows this symbol index 8 to be in SECT3. The raw data for section 3 contains the format string and the single string parameter passed to printf. I’m still not sure how the assembler knows the difference in offsets between these 2 strings?
.
.
.
SECTION HEADER #3
  .rdata name
       0 physical address
       0 virtual address
      1A size of raw data
     31A file pointer to raw data (0000031A to 00000333)
       0 file pointer to relocation table
       0 file pointer to line numbers
       0 number of relocations
       0 number of line numbers
40400040 flags
         Initialized Data
         8 byte align
         Read Only

RAW DATA #3
  00000000: 73 74 72 00 00 00 00 00 25 2E 34 66 2C 25 2E 34  str.....%.4f,%.4
  00000010: 66 2C 25 2E 34 66 2C 25 73 00                    f,%.4f,%s.
.
.
.
RELOCATIONS #4
                                                Symbol    Symbol
 Offset    Type              Applied To         Index     Name
 --------  ----------------  -----------------  --------  ------
 00000008  PAGEBASE_REL21             90000008         8  $SG5571
 0000000C  PAGEOFFSET_12A             91000104         8  $SG5571
 0000001C  PAGEBASE_REL21             90000008         9  $SG5572
 00000020  PAGEOFFSET_12A             91000100         9  $SG5572
 00000024  BRANCH26                   94000000        16  printf
.
.
.
COFF SYMBOL TABLE
000 01057A64 ABS    notype       Static       | @comp.id
001 80010190 ABS    notype       Static       | @feat.00
002 00000000 SECT1  notype       Static       | .drectve
    Section length   62, #relocs    0, #linenums    0, checksum        0
004 00000000 SECT2  notype       Static       | .debug$S
    Section length   9C, #relocs    0, #linenums    0, checksum        0
006 00000000 SECT3  notype       Static       | .rdata
    Section length   1A, #relocs    0, #linenums    0, checksum B99D9667
008 00000000 SECT3  notype       Static       | $SG5571
009 00000008 SECT3  notype       Static       | $SG5572
00A 00000000 SECT4  notype       Static       | .text$mn
Compiling an Optimized Build
Specifying the /O2 flag for speed generates optimized code.
I have been toying around with the idea of doing a fluid dynamics or crystal growth simulation using nVidia CUDA. I decided to try out nVidia’s cuda samples to see what their approach looks like, in particular when rendering using OpenGL. I am using Visual Studio 2022 so I simply cloned the cuda samples repo, opened the fluidsGL_vs2022.sln solution, right click on the fluidsGL project, then selected Build.
Build started...
1>------ Build started: Project: fluidsGL, Configuration: Debug x64 ------
1>D:\dev\...\cuda-samples\Samples\5_Domain_Specific\fluidsGL\fluidsGL_vs2022.vcxproj(37,5): error MSB4019: The imported project "C:\Program Files\Microsoft Visual Studio\2022\Enterprise\MSBuild\Microsoft\VC\v170\BuildCustomizations\CUDA 11.6.props" was not found. Confirm that the expression in the Import declaration "C:\Program Files\Microsoft Visual Studio\2022\Enterprise\MSBuild\Microsoft\VC\v170\\BuildCustomizations\CUDA 11.6.props" is correct, and that the file exists on disk.
1>Done building project "fluidsGL_vs2022.vcxproj" -- FAILED.
========== Build: 0 succeeded, 1 failed, 0 up-to-date, 0 skipped ==========
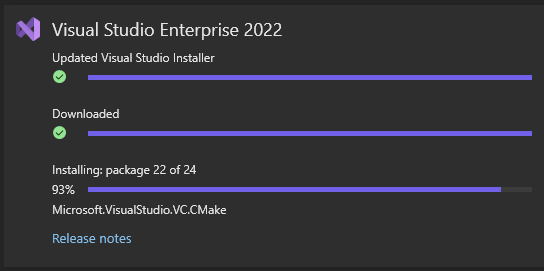
The prerequisites section does mention that the CUDA Toolkit 11.6 is required, so I close VS and install it. I end up with version 11.7 though:
When reopening the fluidsGL solution, I still get the same error about CUDA 11.6.props not being found. A quick look at the directory this file is expected to be in reveals that this is a simple version mismatch problem – see the hard coded version in the fluidsGL.vcxproj file. Instead of fixing every example .vcxproj file to match CUDA 11.7, we can patch the VS folder by running these commands from an admin command prompt:
The code now builds in Visual Studio and I can now oooh, aaaah over the demo. Visual Studio does seem a bit sluggish at opening the entire samples solution though… I get this information about my device in the console window after the demo launches:
GPU Device 0: "Pascal" with compute capability 6.1

CUDA device [Quadro P1000] has 5 Multi-Processors
Elmer is the first codebase that I have dug into that has a substantial (or really any) amount of Fortran code. I used GFortran to build it but went digging around for a clang based compiler. I found llvm-project/flang and since I had been building LLVM earlier this year, I figured it should be straightforward to build flang and perhaps explore it in a debugger.
My first attempt to build flang (on Windows, my primary OS) resulted in many build errors. Unfortunately, I was using a preview Visual Studio build, so I didn’t want to compare the errors with those from a different machine because it wasn’t the same compiler version in use. I decided to use an RTM Visual Studio compiler (VS 17.2.5) to avoid possible compiler bugs present only in VS preview builds since most people would not be using preview VS builds anyway.
Without giving it much thought, my suspicion was that any build failures probably arose from not using the correct C++ version. The source code I was trying to build (commit c0702ac0) states that it uses C++17. I set this in CMake by defining the CXX_STANDARD property. Here is the full cmake command line I used to set up the build.
cd llvm-project
mkdir build
cd build

cmake \
  -G Ninja \
  ../llvm \
  -DCMAKE_BUILD_TYPE=Release \
  -DFLANG_ENABLE_WERROR=On \
  -DLLVM_ENABLE_ASSERTIONS=ON \
  -DLLVM_TARGETS_TO_BUILD=host \
  -DCMAKE_INSTALL_PREFIX=../install
  -DLLVM_LIT_ARGS=-v \
  -DLLVM_ENABLE_PROJECTS="clang;mlir;flang" \
  -DLLVM_ENABLE_RUNTIMES="compiler-rt" \
  -DCXX_STANDARD=17

# Shown here without \ to be executable in cmd.exe
cmake -G Ninja ../llvm -DCMAKE_BUILD_TYPE=Release -DFLANG_ENABLE_WERROR=On -DLLVM_ENABLE_ASSERTIONS=ON -DLLVM_TARGETS_TO_BUILD=host -DCMAKE_INSTALL_PREFIX=../install -DLLVM_LIT_ARGS=-v -DLLVM_ENABLE_PROJECTS="clang;mlir;flang" -DLLVM_ENABLE_RUNTIMES="compiler-rt" -DCXX_STANDARD=17
That took about 2 minutes on my machine after which I ran ninja to start the build
ninja
Unfortunately, the build failed! The first error I encountered was in fold-real.cpp. Here is the command line used to invoke the compiler (shown with newlines to simplify interpretation, see Compiler options listed alphabetically | Microsoft Docs for the complete list of compiler options).
I tried manually creating a repro for this compiler issue by creating a new Visual C++ project in Visual Studio and recreating the structure of the code failing to build. One of the questions I had was how to set conformance mode in a Visual Studio Cmake project. I still haven’t yet figured this out. However, one of the issues I ran into was that my cmake project was building the code without the /permissive- flag! I ended up switching to a regular Visual C++ project (.vcxproj) since I knew how to change the compiler options reliably for such projects. After struggling with recreating the code, I realized that I would make more progress removing code from flang’s fold-real.cpp instead. Here are some of the other searches and concepts I had to look up to understand the code while trying to create a minimal repro of the build failure.
I was eventually able to create a simpler test case showing that the flang code could not build with my RTM compiler.
cl /std:c++17 /permissive- flang-msvc-clang-test.cpp

Microsoft (R) C/C++ Optimizing Compiler Version 19.32.31332 for x64
Copyright (C) Microsoft Corporation.  All rights reserved.

flang-msvc-clang-test.cpp
flang-msvc-clang-test.cpp(159): error C2065: 'T': undeclared identifier
flang-msvc-clang-test.cpp(48): note: see reference to function template instantiation 'auto FoldIntrinsicFunction::<lambda_1>::operator ()<_First>(const _T1 &) const' being compiled
        with
        [
            _First=Expr<Type<TypeCategory::Real,1>>,
            _T1=Expr<Type<TypeCategory::Real,1>>
        ]
flang-msvc-clang-test.cpp(171): note: see reference to function template instantiation 'Expr<Type<TypeCategory::Real,2>> FoldIntrinsicFunction<2>(FoldingContext &,FunctionRef<Type<TypeCategory::Real,2>> &&)' being compiled
flang-msvc-clang-test.cpp(159): error C2923: 'Scalar': 'T' is not a valid template type argument for parameter 'T'
flang-msvc-clang-test.cpp(159): note: see declaration of 'T'
So after all that, the RTM LTS Visual C++ compiler turned out to have a bug. Turns out the Visual C++ folks had already fixed this issue so the way to unblock myself was to switch to the preview Visual Studio build :(! The irony…
Suppressing Warnings
Armed with a preview build that correctly compiled the test case, the next obstacle in the build process was a set of warnings that were treated as errors: C4661 and C4101.
FAILED: tools/flang/lib/Evaluate/CMakeFiles/obj.FortranEvaluate.dir/fold.cpp.obj
C:\...\cl.exe ... -c D:\dev\repos\llvm-project\flang\lib\Evaluate\fold.cpp
D:\dev\repos\llvm-project\flang\include\flang\Evaluate\expression.h(101): error C2220: the following warning is treated as an error
D:\dev\repos\llvm-project\flang\include\flang\Evaluate\expression.h(101): warning C4661: 'std::optional<Fortran::evaluate::DynamicType> Fortran::evaluate::ExpressionBase<Fortran::evaluate::SomeDerived>::GetType(void) const': no suitable definition provided for explicit template instantiation request
...
FAILED: tools/flang/lib/Evaluate/CMakeFiles/obj.FortranEvaluate.dir/fold-complex.cpp.obj
C:\...\cl.exe ... -c D:\dev\repos\llvm-project\flang\lib\Evaluate\fold-complex.cpp
D:\dev\repos\llvm-project\flang\lib\Evaluate\fold-implementation.h(1583): error C2220: the following warning is treated as an error
D:\dev\repos\llvm-project\flang\lib\Evaluate\fold-implementation.h(1583): warning C4101: 'buffer': unreferenced local variable
I tried to suppressed them to keep marching forward:
Defining CXX_FLAGS like that did not work so I end up looking around for how to disable warnings in cmake. This was when I discovered that CMAKE_CXX_STANDARD is not necessary on the command line because flang/CMakeLists.txt already requires C++17. Trying to append the warning disable option /wdXXXX to that file didn’t work either. However, the comment on line 329 made me explore HandleLLVMOptions.cmake. There, I discovered support for setting the number of parallel jobs (via /MP for Visual C++). This file also contained the code that sets up most of the compiler options used when building! Closer to the task at hand is the discover of the LLVM_ENABLE_WARNINGS option and the hard-coded list of MSVC warning flags! I therefore made this change (before running cmake and ninja) to get the warning flags to be respected:
diff --git a/llvm/cmake/modules/HandleLLVMOptions.cmake b/llvm/cmake/modules/HandleLLVMOptions.cmake
index 56d05f5b5fce..589281b232f1 100644
--- a/llvm/cmake/modules/HandleLLVMOptions.cmake
+++ b/llvm/cmake/modules/HandleLLVMOptions.cmake
@@ -648,6 +648,8 @@ if (MSVC)
           # v15.8.8. Re-evaluate the usefulness of this diagnostic when the bug
           # is fixed.
       -wd4709 # Suppress comma operator within array index expression
+      -wd4101  # Suppress ...
+      -wd4661  # Suppress ...

       # Ideally, we'd like this warning to be enabled, but even MSVC 2019 doesn't
       # support the 'aligned' attribute in the way that clang sources requires (for
By this point, I knew that simplifying the function containing the error was the fastest path to a repro. One of the little problems I ran into was how to figure out the type of fptr since it is declared using the auto keyword. I ended up assigning it to a new temporary variable of a different type, e.g. char et voila!
D:\dev\repos\llvm-project\flang\lib\Evaluate\fold-integer.cpp(505): error C2440: 'initializing': cannot convert from 'int (__cdecl Fortran::evaluate::value::Integer<8,true,8,unsigned char,unsigned short>::* )(void) const' to 'char'
I then removed the temporary assignment and explicitly specified this type as the type of fptr:
using T2 = int (__cdecl Fortran::evaluate::value::Integer<8,true,8,unsigned char,unsigned short>::* )(void) const;

T2 fptr{&Scalar<TI>::LEADZ};
The build then failed because the function pointer types are not the same, which was really confusing given that I had just checked the type of fptr.
I switched the type of fptr and got a different error:
D:\dev\repos\llvm-project\flang\include\flang\Evaluate\integer.h(66): error C2607: static assertion failed
D:\dev\repos\llvm-project\flang\lib\Evaluate\fold-integer.cpp(490): note: see reference to class template instantiation 'Fortran::evaluate::value::Integer<16,true,16,unsigned char,unsigned short>' being compiled
Here is a different change I tried:
using T2 = int (__cdecl Fortran::evaluate::value::Integer<8>::* )(void) const;

T2 fptr{&Scalar<TI>::LEADZ};
It was at this point that I realized that it was time to learn a bit more about decay. What is decay and array-to-pointer conversion? | C++ FAQ (64.github.io) had a good explanation of why the term decay is used. Perhaps a reexamination of std::decay – cppreference.com might lead to some insight. I wasn’t sure what Result referred to in the statement using TI = typename std::decay_t<decltype(n)>::Result; One idea I got was to append a number to the typename and examine the compiler error. Here’s the new line 752 of llvm-project/fold-integer.cpp and the resulting compiler error showing that this name cannot be arbitrary.
using TI = typename std::decay_t<decltype(n)>::Result3;


C:\dev\repos\llvm-project\flang\lib\Evaluate\fold-integer.cpp(502): error C2039: 'Result3': is not a member of 'Fortran::evaluate::Expr<Fortran::evaluate::Type<Fortran::common::TypeCategory::Integer,1>>'
template <int KIND>
class Expr<Type<TypeCategory::Integer, KIND>>
    : public ExpressionBase<Type<TypeCategory::Integer, KIND>> {
public:
  using Result = Type<TypeCategory::Integer, KIND>;

...
The problematic lambda is therefore expecting a Scalar<Type<TypeCategory::Integer, KIND>>. Scalar is defined using decay and Type<TypeCategory::Integer, KIND>::Scalar is defined in llvm-project/type.h as the type value::Integer<8 * KIND>. This is when I see the reason for the previous build errors about mismatched Integer sizes no matter which size I picked – the fixed type I was using didn’t allow for the different template instantiations! Note that the problematic lambda is defined as a ScalarFunc.
By this point, I had a self-contained repro of the compiler bug, which ironically, compiled successfully on the RTM C++ compiler so I could use neither the preview nor the RTM to build the flang code.
This compiler invocation gives the same error seen when compiling the flang code:
Microsoft (R) C/C++ Optimizing Compiler Version 19.33.31627.1 for x64
Copyright (C) Microsoft Corporation.  All rights reserved.

flang-msvc-clang-test-02.cpp
flang-msvc-clang-test-02.cpp(193): error C2672: 'invoke': no matching overloaded function found
C:\Program Files\Microsoft Visual Studio\2022\Preview\VC\Tools\MSVC\14.34.31721\include\type_traits(1552): note: could be 'unknown-type std::invoke(_Callable &&,_Ty1 &&,_Types2 &&...) noexcept(<expr>)'
flang-msvc-clang-test-02.cpp(193): note: Failed to specialize function template 'unknown-type std::invoke(_Callable &&,_Ty1 &&,_Types2 &&...) noexcept(<expr>)'
mkdir investigate
cd investigate
git clone https://github.com/openjdk/jdk11u

# Download jtreg 6
curl -Lo jtreg-6+1.tar.gz https://ci.adoptopenjdk.net/view/Dependencies/job/dependency_pipeline/lastSuccessfulBuild/artifact/jtreg/jtreg-6+1.tar.gz

tar xzfv jtreg-6+1.tar.gz

cd jdk11u
We switch the current directory to the root of jdk11u repo so that test paths are relative to the repo root. I will assume that we’re in the jdk11u repo root directory and are using the directory structure generated by the commands above. To see a detailed list of all the jtreg options, run this command:
../jtreg/bin/jtreg -help all
Now let us try to run a jtreg test, specifically AmazonCA.java:
There are some failure messages but it looks like a test ran.
failed to get value for vm.hasJFR
java.lang.UnsatisfiedLinkError: 'boolean sun.hotspot.WhiteBox.isJFRIncludedInVmBuild()'
	at sun.hotspot.WhiteBox.isJFRIncludedInVmBuild(Native Method)
	at requires.VMProps.vmHasJFR(VMProps.java:343)
	at requires.VMProps$SafeMap.put(VMProps.java:72)
	at requires.VMProps.call(VMProps.java:107)
	at requires.VMProps.call(VMProps.java:60)
	at com.sun.javatest.regtest.agent.GetJDKProperties.run(GetJDKProperties.java:80)
	at com.sun.javatest.regtest.agent.GetJDKProperties.main(GetJDKProperties.java:54)
failed to get value for vm.aot.enabled
java.lang.UnsatisfiedLinkError: 'int sun.hotspot.WhiteBox.aotLibrariesCount()'
	at sun.hotspot.WhiteBox.aotLibrariesCount(Native Method)
	at requires.VMProps.vmAotEnabled(VMProps.java:408)
	at requires.VMProps$SafeMap.put(VMProps.java:72)
	at requires.VMProps.call(VMProps.java:112)
	at requires.VMProps.call(VMProps.java:60)
	at com.sun.javatest.regtest.agent.GetJDKProperties.run(GetJDKProperties.java:80)
	at com.sun.javatest.regtest.agent.GetJDKProperties.main(GetJDKProperties.java:54)
.
.
.
Test results: passed: 1
Report written to /Users/saint/repos/java/jdk11u/JTreport/html/report.html
Results written to /Users/saint/repos/java/jdk11u/JTwork
Are these failure messages concerning given that the test passed? Reviewing the test report suggests not. The report keywords mention bug 8233223, which must be Bug ID: JDK-8233223 Add Amazon Root CA certificates (java.com). From the look of things, the java.lang.UnsatisfiedLinkErrors can be safely ignored (for this test anyway). That said, let us dig into these errors to ensure we understand what is happening.
The immediate cause of these errors is the failure to get the values for the SafeMap in VMProps.java. This raises the question of which JDK is being used by jtreg? My MacBook has both JDK11 and JDK17. The default java version is:
java -version
openjdk version "17.0.1" 2021-10-19 LTS
OpenJDK Runtime Environment Microsoft-28056 (build 17.0.1+12-LTS)OpenJDK 64-Bit Server VM Microsoft-28056 (build 17.0.1+12-LTS, mixed mode)
Let’s ensure jtreg is using JDK11 by setting JTREG_JAVA.
JTREG_JAVA=/Library/Java/JavaVirtualMachines/microsoft-11.jdk/Contents/Home

$JTREG_JAVA/bin/java -version

openjdk version "11.0.14" 2022-01-18 LTS
OpenJDK Runtime Environment Microsoft-30257 (build 11.0.14+9-LTS)
OpenJDK 64-Bit Server VM Microsoft-30257 (build 11.0.14+9-LTS, mixed mode)

../jtreg/bin/jtreg test/jdk/security/infra/java/security/cert/CertPathValidator/certification/AmazonCA.java
We still see the same warnings though so let us explicitly use the -jdk option:
We now get an interesting error message indicating that the -jdk option was using the newer JDK17.
Exception while calling user-specified class: requires.VMProps
java.lang.UnsupportedClassVersionError: requires/VMProps has been compiled by a more recent version of the Java Runtime (class file version 61.0), this version of the Java Runtime only recognizes class file versions up to 55.0
	at java.base/java.lang.ClassLoader.defineClass1(Native Method)
	...
	at java.base/java.lang.ClassLoader.loadClass(ClassLoader.java:522)
	at java.base/java.lang.Class.forName0(Native Method)
	at java.base/java.lang.Class.forName(Class.java:315)
	at com.sun.javatest.regtest.agent.GetJDKProperties.run(GetJDKProperties.java:78)
	at com.sun.javatest.regtest.agent.GetJDKProperties.main(GetJDKProperties.java:54)
failed to get JDK properties for /Library/Java/JavaVirtualMachines/microsoft-11.jdk/Contents/Home/bin/java ; exit code 1
Error: failed to get JDK properties for /Library/Java/JavaVirtualMachines/microsoft-11.jdk/Contents/Home/bin/java ; exit code 1
On my machine, I can remove these files as follows:
ls -l /Users/saint/repos/java/jdk11u/JTwork/extraPropDefns/classes/requires

rm -fr /Users/saint/repos/java/jdk11u/JTwork/extraPropDefns/classes/requires
Rerunning the test now results in a single (different) UnsatisfiedLinkError AND a test failure! However, we now have a properly set up environment since we control the JDK version tested by jtreg.
jdk11u % ../jtreg/bin/jtreg -jdk:$JTREG_JAVA test/jdk/security/infra/java/security/cert/CertPathValidator/certification/AmazonCA.java

failed to get value for vm.musl
java.lang.UnsatisfiedLinkError: 'java.lang.String sun.hotspot.WhiteBox.getLibcName()'
	at sun.hotspot.WhiteBox.getLibcName(Native Method)
	at requires.VMProps.isMusl(VMProps.java:514)
	at requires.VMProps$SafeMap.put(VMProps.java:72)
	at requires.VMProps.call(VMProps.java:122)
	at requires.VMProps.call(VMProps.java:60)
	at com.sun.javatest.regtest.agent.GetJDKProperties.run(GetJDKProperties.java:80)
	at com.sun.javatest.regtest.agent.GetJDKProperties.main(GetJDKProperties.java:54)
Test results: failed: 1
Report written to /Users/saint/repos/java/jdk11u/JTreport/html/report.html
Results written to /Users/saint/repos/java/jdk11u/JTwork
Error: Some tests failed or other problems occurred.
Now here’s an interesting question: why doesn’t this approach yield identical result to setting the -jdk flag to this same JTREG_JAVA path?
The outcome of the experiment so far though is that the AmazonCA test appears to fail when run with JDK11 and pass when run with JDK17 (of the respective versions). To convince ourselves that the infrastructure is fine, we can run this test with JDK11 (which is our focus) after exporting JTREG_JAVA.
This test passes, despite the single UnsatisfiedLinkError printed out.
failed to get value for vm.musl
java.lang.UnsatisfiedLinkError: 'java.lang.String sun.hotspot.WhiteBox.getLibcName()'
	at sun.hotspot.WhiteBox.getLibcName(Native Method)
	at requires.VMProps.isMusl(VMProps.java:514)
	at requires.VMProps$SafeMap.put(VMProps.java:72)
	at requires.VMProps.call(VMProps.java:122)
	at requires.VMProps.call(VMProps.java:60)
	at com.sun.javatest.regtest.agent.GetJDKProperties.run(GetJDKProperties.java:80)
	at com.sun.javatest.regtest.agent.GetJDKProperties.main(GetJDKProperties.java:54)
Test results: passed: 1
Report written to /Users/saint/repos/java/jdk11u/JTreport/html/report.html
Results written to /Users/saint/repos/java/jdk11u/JTwork
An Interesting Test
The above experimentation was inspired by AotInvokeDynamic2AotTest.java. The first time I tried to run this test, I used this command line.
We first set of 5 UnsatisfiedLinkError failures in the previous experiment were displayed but no tests were executed.
...
Test results: no tests selected
Report written to /Users/saint/repos/java/jdk11u/JTreport/html/report.html
This was happening while jtreg was using JDK17 and one of the values that could not be get()ed vm.aot.enabled. Could that be why there were no selected tests? Ignoring that rabbit hole for now sine jdk11u is our focus. We can now run the test with JTREG_JAVA exported. The test is now run but fails with this message in JTreport/text/summary.txt:
compiler/aot/calls/fromAot/AotInvokeDynamic2AotTest.java Failed. Execution failed: `main' threw exception: java.lang.RuntimeException: Expected to get exit value of [0]
To see more details about the test failure, use the -verbose flag:
Once this command completes (and fails), a file named AotInvokeDynamic2AotTest.so.o exists on disk. The format of the ld command can be deduced from Linker.java:101. The ld command can then be directly invoked to see the actual failure:
% ld -dylib -o AotInvokeDynamic2AotTest.so AotInvokeDynamic2AotTest.so.o
ld: dynamic main executables must link with libSystem.dylib for architecture x86_64
My post on How to Build Elmer on Windows has a succinct list of instructions but when I first built the Elmer source code (on Windows), I was unsure how to run the binaries. Running ElmerGUI, for example, failed because qt5.dll could not be found. This post details the process I used to figure out how to create a usable Elmer installation.
I started by going through the generated Makefile. It contained targets like install, install/local, and install/strip. I started with install/local, fearing that perhaps these targets would attempt to install the binaries into program files.
Installing only the local directory...
-- Install configuration: "RelWithDebInfo"
-- Installing: C:/dev/repos/fem/install/bin/libopenblas.dll.a
CMake Error at cmake_install.cmake:45 (file):
  file INSTALL cannot find "C:/dev/repos/fem/elmerfem/../bundle_msys2/bin":
  No error.


make: *** [Makefile:142: install/local] Error 1
The error at cmake_install.cmake:45 is from ElmerCPack.cmake. I did not even know about the existence of the CPack tool. Git blame points to commit b9914082 as the source of the failing command. The strange thing about that commit is that there is no mention of what is supposed to create the bundle folders (despite the callout that the change “Relies on selected bundled files selected prior to installation”).
A workaround I tried was to use this define when running cmake: CPACK_BUNDLE_EXTRA_WINDOWS_DLLS:BOOL=FALSE. That avoided the build error but did not result in a usable installation. ElmerGUI’s windows_bundle.cmake needs this to be set to TRUE to package the Qt5 binaries into the install folder. Strangely enough, ElmerGUILogger’s windows_bundle.cmake does not have this logic for Qt5. This is likely because ElmerGUI would already have installed the right files into the bin folder but this looks like a bug.
Another work-around I tried was to manually create the folders expected by the build. The install target then succeeded but the necessary binaries were not copied to the install folder.
This is when I dig around and find that only ElmerGUILogger and ElmerClips include windows_bundle.cmake. Hmm… the latter looks promising but doesn’t look up to date either since it requires Qt4. More exploring of the Makefile – the package target looks interesting but fails because NSIS is not installed.
...
[ 97%] Built target ElmerGUI_autogen
[100%] Built target ElmerGUI
Run CPack packaging tool...
CPack Error: Cannot find NSIS compiler makensis: likely it is not installed, or not in your PATH
CPack Error: Could not read NSIS registry value. This is usually caused by NSIS not being installed. Please install NSIS from http://nsis.sourceforge.net
CPack Error: Cannot initialize the generator NSIS
make: *** [Makefile:71: package] Error 1
I wonder if we couldn’t just use NSIS for the MSYS environment:
$ pacman -Ss nsis
...
mingw64/mingw-w64-x86_64-nsis 3.06.1-1
    Windows installer development tool (mingw-w64)
mingw64/mingw-w64-x86_64-nsis-nsisunz 1.0-2
    NSIS plugin which allows you to extract files from ZIP archives (mingw-w64)
...

$ pacman -S mingw64/mingw-w64-x86_64-nsis
Now we can create an Elmer installer by running make package. Unfortunately, that turns out to be insufficient. My next idea is to compare the binaries from the installed. This turned out to be easier when using ls -R1 to output only the file names and in 1 column only. Some obvious differences are that the build in Program Files has a bin folder containing the Qt and vtk binaries (as well as a stripped gfortran).
The Qt binaries certainly look like the output of windows_bundle.cmake (found this time by a search for “vtk”) but it’s still not clear how this file would be includedin the build. I’m using VSCode to search for “windows_bundle” and only 2 of the 3 references in the codebase were showing up (on my desktop). Looking for “ElmerGUILogger” then revealed yet another reference. Such a waste of time! Not cool VSCode, not cool. It’s included in ElmerGUI/CMakeLists.txt. So I probably only need to define WIN32. But why does the WIN32 code run if I add some statements to that IF block?
Some searching (TODO: put bing searches here) leads to indications that there might be an error in CMake where WIN32 is not defined. Seeing signs that MSYS can be in Cywgin? Trying to get to the bottom of why WIN32 is not respected by CMake, I review ElmerGUI/CMakeLists.txt again. It adds the netgen subdirectory. Interestingly, ElmerGUI/netgen/README points out that install\lib\ElmerGUI\ngcore\libng.a is the unix library and that the win32 extension should be .lib. Biggest sign I’ve seen so far that something is really off. At this point, I remember seeing a .a file in the install folder – and that seemed strange for a lib folder since I expected a DLL. This hypothesis fails though because the working Elmer installation also has the file “C:\Program Files\Elmer 9.0-Release\lib\ElmerGUI\ngcore\libng.a“.
The sure way to verify that the WIN32 include is working is to introduce an error into windows_bundle.cmake, e.g. by change the first IF into the unknown IF2. Even better, notice that the “Qt5 Windows packaging” message is correctly displayed. Perhaps the FIND_FILE command should have a REQUIRED option now that it is supported. Adding that doesn’t fail so reexamine the INSTALL command. Since windows_bundle.cmake uses a relative path for the DESTINATION, it is interpreted relative to the value of the CMAKE_INSTALL_PREFIX variable.
How about zooming into the windows_bundle.cmake file and outputting the list of files installed afterthe install command. The new message says the files were installed. However, they aren’t in the install folder! I need an explanation for this behavior. So let’s open Process Explorer and see which paths are actually used. These requests show up using the Qt5 path filter:
These files exist on disk (despite the Result column in process explorer having the value INVALID DEVICE REQUEST)! For a better understanding of what is happening, I change the bin path used by the install command to dbgcmake since there are multiple bin folders (under install and also in the MinGW installation). So such path shows up in Process Explorer when using a path filter for dbgcmake. This means I shouldn’t be expecting this files to be written by cmake at this point. In fact, running grep -Rin dbgcmake shows that build/ElmerGUI/cmake_install.cmake now contains this snippet (thereby verifying that windows_bundle.cmake is used to generate cmake_install.cmake).
if("x${CMAKE_INSTALL_COMPONENT}x" STREQUAL "xelmerguix" OR NOT CMAKE_INSTALL_COMPONENT)
  file(INSTALL DESTINATION "${CMAKE_INSTALL_PREFIX}/dbgcmake" TYPE FILE FILES
    "D:/dev/Software/msys64/mingw64/bin/Qt5Core.dll"
    "D:/dev/Software/msys64/mingw64/bin/Qt5Gui.dll"
    "D:/dev/Software/msys64/mingw64/bin/Qt5OpenGL.dll"
    "D:/dev/Software/msys64/mingw64/bin/Qt5Script.dll"
    "D:/dev/Software/msys64/mingw64/bin/Qt5Xml.dll"
    "D:/dev/Software/msys64/mingw64/bin/Qt5Svg.dll"
    "D:/dev/Software/msys64/mingw64/bin/Qt5Widgets.dll"
    "D:/dev/Software/msys64/mingw64/bin/Qt5PrintSupport.dll"
    )
endif()
So back to the question of why windows_bundle.cmake is not invoked by default – let us dig into the CMake sources for clues. Renaming it outputs an error for the include statement meaning the file is being included! Sigh… I end up poking around some CMake sources to see where WIN32 is set anyway.:
I immediately notice that the install command of interest is skipped because CPACK_BUNDLE_EXTRA_WINDOWS_DLLS is not set to TRUE! Setting it to FALSE earlier then seeing a build failure gave the impression that it was set to TRUE everywhere (especially given that ElmerCPack.cmake sets it to TRUE) but that happens afterwindows_bundle.cmake has been evaluated! Here’s the final required command line:
There are lessons there about making assumptions but the biggest takeaway for me is the need for (and existence) of tracing capabilities in CMake. Enabling tracing made it so easy to figure out exactly what was broken – the variable did not have the value I expected and I simply needed to define it! Running make install now results in new errors haha!
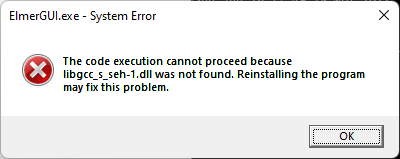
The code execution cannot proceed because libgcc_s_seh-1.dll was not found. Reinstalling the program may fix this problem. This error dialog is then followed by others for qwt-qt5.dll, libstdc++-6.dll, and libdouble-conversion.dll respectively. To see which other binaries are required, manually copy these 4 binaries from d:\dev\Software\msys64\mingw64\bin to install/bin. These are the other missing binaries that show up in error dialogs:
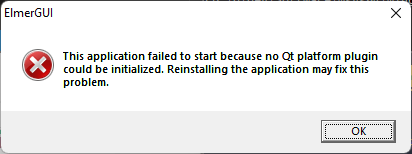
There are so many missing binaries that I wonder if building the other components might be necessary. I first manually copy them from the bin folder to see if ElmerGUI can load but that now fails with the error This application failed to start because no Qt platform plugin could be initialized. Reinstalling the application may fix this problem.
The working installation from the downloaded public Elmer installer has a qwindows.dll in the bin/platforms directory. This file exists on my system as D:\dev\Software\msys64\mingw64\share\qt5\plugins\platforms\qwindows.dll. At this point, I’m really wondering how on earth they are gathering all these files. Hmm, maybe they build using their docker image? Didn’t think of seeing how their docker image is set up. One final try to set up the qwindows.dll first and see what happens.
Lo and behold! ElmerGUI loads successfully! Whether it actually works… well, I will revisit that after I learn how to use Elmer/ElmerGUI :). Actually, turns out ElmerSolver.exe doesn’t start. Here is the fix for the 3 binaries that cause error dialogs:
At this point, ElmerSolver starts up successfully but outputs an error about missing ELMERSOLVER_STARTINFO. This is an error from ElmerSolver.F90 (the Fortran 90 source code). From that code, it looks like the error is because I didn’t specify an input file name and the default file does not exist. This is the same behavior as ElmerSolver.exe from the official Elmer installation.
ELMER SOLVER (v 9.0) STARTED AT: 2022/06/26 21:55:22
ParCommInit:  Initialize #PEs:            1
MAIN:
MAIN: =============================================================
MAIN: ElmerSolver finite element software, Welcome!
MAIN: This program is free software licensed under (L)GPL
MAIN: Copyright 1st April 1995 - , CSC - IT Center for Science Ltd.
MAIN: Webpage http://www.csc.fi/elmer, Email elmeradm@csc.fi
MAIN: Version: 9.0 (Rev: af959fd0, Compiled: 2022-06-26)
MAIN:  Running one task without MPI parallelization.
MAIN:  Running with just one thread per task.
MAIN: =============================================================
ERROR:: ElmerSolver: Unable to find ELMERSOLVER_STARTINFO, can not execute.
STOP 1
Reviewing Docker Files
I was wondering after all this if there was a Windows docker file that had all these steps already baked in. However, the docker directory has only Ubuntu dockerfiles. Perhaps I could create a Windows docker file if I could figure out these dependencies.
Binaries Required by ElmerSolver
The above deployment instructions starts with the binaries required by ElmerGUI but ElmerSolver is the crucial component (since Elmer can be used with the GUI). Here are the binaries grouped such that the ElmerGUI binaries can be excluded if desired.
Deploying the above binaries manually gives a locally runnable build. Unfortunately, it does not fix the build created by CPack when you run make install – that build will not have any of these binaries/dependencies.
The instructions for building the Elmer source code are really simple! I decided to try them on Windows. The Developer Command Prompt is necessary for cmake (as far as I can tell). Note that C, C++, and Fortran compilers are required for building Elmer.
cd \dev\repos
mkdir fem
git clone git://www.github.com/ElmerCSC/elmerfem
mkdir build
cd build
cmake -DWITH_ELMERGUI:BOOL=TRUE -DWITH_MPI:BOOL=FALSE -DCMAKE_INSTALL_PREFIX=../install ../elmerfem
I discovered that a Fortran compiler is required when I got this error on my first build attempt:
-- Building for: Visual Studio 17 2022
-- The Fortran compiler identification is unknown
-- The C compiler identification is MSVC 19.32.31326.0
-- The CXX compiler identification is MSVC 19.32.31326.0
CMake Error at CMakeLists.txt:34 (PROJECT):
  No CMAKE_Fortran_COMPILER could be found.
Line 34 of CMakeLists.txt – PROJECT(Elmer Fortran C CXX) – uses the PROJECT cmake command to set the project name to “Elmer” and specify the programming languages required, hence the build failure above.
Unfortunately, that wasn’t sufficient to address the build failure. Interestingly, someone else ran into this exact same issue at windows – The MinGW gfortran compiler is not able to compile a simple test program – Stack Overflow. Sad times though when StackOverflow does not have an answer! Their solution for specifying a custom compiler is much cleaner – simply define the CMake variable when invoking cmake!
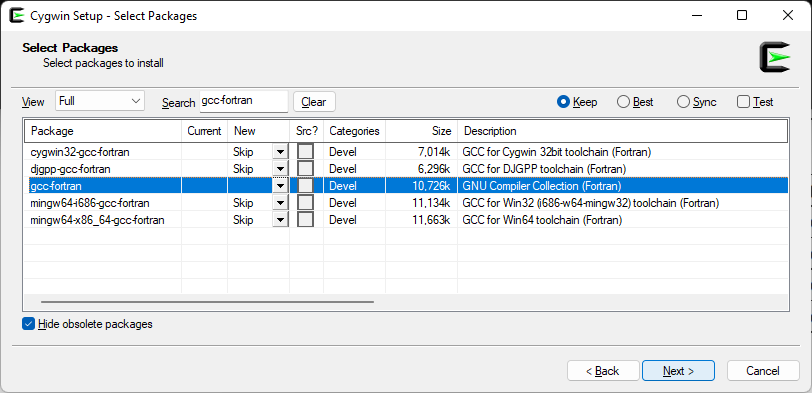
The MinGW-w64 downloads looked promising. Since I already had Cygwin installed, I installed the GFortran package. The path to the GFortran compiler can be retrieved using the Cygwin command cygpath -w `which gfortran` and passed to CMake. That still didn’t work.
At least that showed the mingw Fortran compiler package name mingw64-x86_64-gcc-fortran. Interestingly, that package is marked already installed!
Via MSYS2
Since Cygwin didn’t simply work, I decided to try installing MSYS2 (before resorting to uninstalling the Cygwin gcc-fortran package). The Fortran compiler is installed by MSYS2. Once setup completes, CMake also fails when using the MinGW Fortran compiler!
Since none of the compilers work, let’s take a closer look at the error:
$ cmake -DWITH_ELMERGUI:BOOL=TRUE -DWITH_MPI:BOOL=FALSE -DCMAKE_INSTALL_PREFIX=../install -DCMAKE_Fortran_COMPILER=C:/dev/software/gcc/bin/gfortran.exe ../elmerfem
-- The Fortran compiler identification is unknown
-- Detecting Fortran compiler ABI info
-- Detecting Fortran compiler ABI info - failed
-- Check for working Fortran compiler: C:/dev/software/gcc/bin/gfortran.exe
-- Check for working Fortran compiler: C:/dev/software/gcc/bin/gfortran.exe - broken
CMake Error at C:/Program Files/Microsoft Visual Studio/2022/Preview/Common7/IDE/CommonExtensions/Microsoft/CMake/CMake/share/cmake-3.22/Modules/CMakeTestFortranCompiler.cmake:61 (message):
  The Fortran compiler

    "C:/dev/software/gcc/bin/gfortran.exe"

  is not able to compile a simple test program.

  It fails with the following output:

    Change Dir: D:/dev/repos/fem/build/CMakeFiles/CMakeTmp

    Run Build Command(s):C:/Program Files/Microsoft Visual Studio/2022/Preview/Common7/IDE/devenv.com CMAKE_TRY_COMPILE.sln /build Debug /project cmTC_4528a &&
    Microsoft Visual Studio 2022 Version 17.3.0 Preview 1.0 [...].
    Copyright (C) Microsoft Corp. All rights reserved.

    The operation could not be completed. The parameter is incorrect.

    Use:
    devenv  [solutionfile | projectfile | folder | anyfile.ext]  [switches]
...
To get a sense of what could be going wrong, I opened the folder containing the temporary project CMake is trying to build. Its contents are deleted before CMake terminates. However, the build was slow enough for me to copy all the files into another temp folder to repro this failure. Running the devenv.com command above fails with the same error.
Interestingly, loading the solution in Visual Studio results in an error because one of the projects cannot be loaded! However, that project file has a .vfproj extension (which seems specific to the Intel Fortran compiler, e.g. as described at Cannot open vfproj file in visual studio 2017 – Intel Communities).
Looks like it’s the CMakeTestFortranCompiler.cmake file that is generating Intel Fortran projects. The first check that file is:
if(CMAKE_Fortran_COMPILER_FORCED)
  # The compiler configuration was forced by the user.
  # Assume the user has configured all compiler information.
  set(CMAKE_Fortran_COMPILER_WORKS TRUE)
  return()
endif()
The CMAKE_Fortran_COMPILER_FORCED define can be used to bail out of the custom configuration so define it when invoking cmake:
We now get a new error! Finally making some progress!
cmake -DWITH_ELMERGUI:BOOL=TRUE -DWITH_MPI:BOOL=FALSE -DCMAKE_INSTALL_PREFIX=../install -DCMAKE_Fortran_COMPILER=D:/dev/Software/msys64/mingw64/bin/gfortran.exe -DCMAKE_Fortran_COMPILER_FORCED:BOOL=TRUE ../elmerfem
-- The Fortran compiler identification is unknown
CMake Deprecation Warning at cmake/Modules/FindMKL.cmake:2 (CMAKE_MINIMUM_REQUIRED):
  Compatibility with CMake < 2.8.12 will be removed from a future version of
  CMake.

  Update the VERSION argument <min> value or use a ...<max> suffix to tell
  CMake that the project does not need compatibility with older versions.
Call Stack (most recent call first):
  CMakeLists.txt:308 (FIND_PACKAGE)


-- ------------------------------------------------
-- Looking for Fortran sgemm
-- Looking for Fortran sgemm - not found
-- Looking for pthread.h
-- Looking for pthread.h - not found
-- Found Threads: TRUE
CMake Error at C:/Program Files/Microsoft Visual Studio/2022/Preview/Common7/IDE/CommonExtensions/Microsoft/CMake/CMake/share/cmake-3.22/Modules/FindPackageHandleStandardArgs.cmake:230 (message):
  Could NOT find BLAS (missing: BLAS_LIBRARIES)
Call Stack (most recent call first):
  C:/Program Files/Microsoft Visual Studio/2022/Preview/Common7/IDE/CommonExtensions/Microsoft/CMake/CMake/share/cmake-3.22/Modules/FindPackageHandleStandardArgs.cmake:594 (_FPHSA_FAILURE_MESSAGE)
  C:/Program Files/Microsoft Visual Studio/2022/Preview/Common7/IDE/CommonExtensions/Microsoft/CMake/CMake/share/cmake-3.22/Modules/FindBLAS.cmake:1337 (find_package_handle_standard_args)
  CMakeLists.txt:433 (FIND_PACKAGE)


-- Configuring incomplete, errors occurred!
See also "D:/dev/repos/fem/build/CMakeFiles/CMakeOutput.log".
See also "D:/dev/repos/fem/build/CMakeFiles/CMakeError.log".
This finally gets us past the missing package issues and on to more Fortran compiler errors!
-- Found LAPACK: D:/dev/Software/msys64/mingw64/lib
-- Checking whether D:/dev/Software/msys64/mingw64/bin/gfortran.exe supports PROCEDURE POINTER
-- Checking whether D:/dev/Software/msys64/mingw64/bin/gfortran.exe supports PROCEDURE POINTER -- no
CMake Error at CMakeLists.txt:477 (MESSAGE):
  Fortran compiler does not seem to support the PROCEDURE statement.
Support for PROCEDURE Statements
CMakeLists.txt:475 is this line INCLUDE(testProcedurePointer). The included script tests the Fortran compiler but does not explain why the test fails. To see the details, append the string : ${OUTPUT} to the end of the string “Checking whether ${CMAKE_Fortran_COMPILER} supports PROCEDURE POINTER — no” (just before the closing quote). The error message now contains additional information – the same error from earlier! Opening the solution in Visual Studio confirms that yet another unsupported .vfproj has been generated.
Change Dir: D:/dev/repos/fem/build/CMakeFiles/CMakeTmp

Run Build Command(s):C:/Program Files/Microsoft Visual Studio/2022/Preview/Common7/IDE/devenv.com CMAKE_TRY_COMPILE.sln /build Debug /project cmTC_77a33 &&
Microsoft Visual Studio 2022 Version 17.3.0 Preview 1.0 [...].
Copyright (C) Microsoft Corp. All rights reserved.

The operation could not be completed. The parameter is incorrect.

Use:
devenv  [solutionfile | projectfile | folder | anyfile.ext]  [switches]
<Updated VS, unfortunately changing the CMake version>. This is the CMakeLists.txt generated for the solution:
That does not work though (in my developer command prompt)
CMake Error: CMake was unable to find a build program corresponding to "MinGW Makefiles".  CMAKE_MAKE_PROGRAM is not set.  You probably need to select a different build tool.
CMake Error: CMake was unable to find a build program corresponding to "MinGW Makefiles".  CMAKE_MAKE_PROGRAM is not set.  You probably need to select a different build tool.
CMake Error: CMAKE_C_COMPILER not set, after EnableLanguage
CMake Error: CMAKE_CXX_COMPILER not set, after EnableLanguage
-- Configuring incomplete, errors occurred!
Looks like I need to try this process in MSYS2.
Custom Generator in MSYS
Running which cmake in MSYS did not find cmake so here’s the version I installed.
$ pacman -Ss cmake
...
mingw64/mingw-w64-x86_64-cmake 3.23.2-1
    A cross-platform open-source make system (mingw-w64)
...
$ pacman -S mingw64/mingw-w64-x86_64-cmake
This doesn’t result in being able to run cmake.exe (even though it exists on disk in D:\dev\Software\msys64\mingw64\bin). Time to hit the docs again: msys2 cmake – Search (bing.com) -> Using CMake in MSYS2 – MSYS2. No red flags there… How about a search for the exact error message: msys bash: cmake: command not found – Search (bing.com) -> c++ – CMake is not found when running through make – Stack Overflow. Aha! The answer there about launching MSYS2 using mingw32.exe leads me to inquire about how I’m launching MSYS2. Turns out I’m launching using the last shortcut below (which launches “D:\dev\Software\msys64\msys2_shell.cmd -msys“) instead of MinGW x64.lnk (which launches “D:\dev\Software\msys64\msys2_shell.cmd -mingw64“). Sure enough, which cmake now shows /mingw64/bin/cmake.
Retrying the command line now makes progress! Notice the Fortran compiler is successfully detected (and the GNU C++ compiler is also selected).
$ cmake -G "MinGW Makefiles" -DWITH_ELMERGUI:BOOL=TRUE -DWITH_MPI:BOOL=FALSE -DCMAKE_INSTALL_PREFIX=../install -DCMAKE_Fortran_COMPILER=D:/dev/Software/msys64/mingw64/bin/gfortran.exe -DCMAKE_Fortran_COMPILER_FORCED:BOOL=TRUE -DBLAS_LIBRARIES=D:/dev/Software/msys64/mingw64/lib -DLAPACK_LIBRARIES=D:/dev/Software/msys64/mingw64/lib ../elmerfem
-- The Fortran compiler identification is GNU 12.1.0
-- The C compiler identification is GNU 12.1.0
-- The CXX compiler identification is GNU 12.1.0
...
The build fails but things are very promising now. The error is because Qt is missing:
--   Building ElmerGUI
-- ------------------------------------------------
CMake Deprecation Warning at ElmerGUI/CMakeLists.txt:1 (CMAKE_MINIMUM_REQUIRED):
  Compatibility with CMake < 2.8.12 will be removed from a future version of
  CMake.

  Update the VERSION argument <min> value or use a ...<max> suffix to tell
  CMake that the project does not need compatibility with older versions.


CMake Warning at ElmerGUI/CMakeLists.txt:19 (find_package):
  By not providing "FindQt5.cmake" in CMAKE_MODULE_PATH this project has
  asked CMake to find a package configuration file provided by "Qt5", but
  CMake did not find one.

  Could not find a package configuration file provided by "Qt5" with any of
  the following names:

    Qt5Config.cmake
    qt5-config.cmake

  Add the installation prefix of "Qt5" to CMAKE_PREFIX_PATH or set "Qt5_DIR"
  to a directory containing one of the above files.  If "Qt5" provides a
  separate development package or SDK, be sure it has been installed.


-- ------------------------------------------------
CMake Error at D:/dev/Software/msys64/mingw64/share/cmake/Modules/FindQt4.cmake:1314 (message):
  Found unsuitable Qt version "" from NOTFOUND, this code requires Qt 4.x
Call Stack (most recent call first):
  ElmerGUI/CMakeLists.txt:42 (FIND_PACKAGE)
Installing Qt5 does not address the build failure. The new error message:
--   Building ElmerGUI
-- ------------------------------------------------
CMake Deprecation Warning at ElmerGUI/CMakeLists.txt:1 (CMAKE_MINIMUM_REQUIRED):
  Compatibility with CMake < 2.8.12 will be removed from a future version of
  CMake.

  Update the VERSION argument <min> value or use a ...<max> suffix to tell
  CMake that the project does not need compatibility with older versions.


-- ------------------------------------------------
-- Qt5 Windows packaging
--   [ElmerGUI] Qt5:               1
--   [ElmerGUI] Qt5 Libraries: Qt5::OpenGL Qt5::Xml Qt5::Script Qt5::Gui Qt5::Core
-- ------------------------------------------------
CMake Warning (dev) at D:/dev/Software/msys64/mingw64/share/cmake/Modules/FindPackageHandleStandardArgs.cmake:438 (message):
  The package name passed to `find_package_handle_standard_args` (OpenGL)
  does not match the name of the calling package (Qwt).  This can lead to
  problems in calling code that expects `find_package` result variables
  (e.g., `_FOUND`) to follow a certain pattern.
Call Stack (most recent call first):
  D:/dev/Software/msys64/mingw64/share/cmake/Modules/FindOpenGL.cmake:443 (FIND_PACKAGE_HANDLE_STANDARD_ARGS)
  ElmerGUI/cmake/Modules/FindQwt.cmake:10 (INCLUDE)
  ElmerGUI/CMakeLists.txt:61 (FIND_PACKAGE)
This warning is for project developers.  Use -Wno-dev to suppress it.

-- Found OpenGL: opengl32
CMake Warning (dev) at D:/dev/Software/msys64/mingw64/share/cmake/Modules/FindPackageHandleStandardArgs.cmake:438 (message):
  The package name passed to `find_package_handle_standard_args` (Qt3) does
  not match the name of the calling package (Qwt).  This can lead to problems
  in calling code that expects `find_package` result variables (e.g.,
  `_FOUND`) to follow a certain pattern.
Call Stack (most recent call first):
  D:/dev/Software/msys64/mingw64/share/cmake/Modules/FindQt3.cmake:213 (FIND_PACKAGE_HANDLE_STANDARD_ARGS)
  D:/dev/Software/msys64/mingw64/share/cmake/Modules/FindQt.cmake:160 (include)
  ElmerGUI/cmake/Modules/FindQwt.cmake:11 (INCLUDE)
  ElmerGUI/CMakeLists.txt:61 (FIND_PACKAGE)
This warning is for project developers.  Use -Wno-dev to suppress it.

-- Could NOT find Qt3 (missing: QT_QT_LIBRARY QT_INCLUDE_DIR)
CMake was unable to find desired Qt version: 3. Set advanced values QT_QMAKE_EXECUTABLE and QT3_QGLOBAL_H_FILE.
--   [ElmerGUI] Qwt:             FALSE
--   [ElmerGUI] QWT_LIBRARY:     QWT_LIBRARY-NOTFOUND
--   [ElmerGUI] QWT_INCLUDE_DIR: QWT_INCLUDE_DIR-NOTFOUND
-- ------------------------------------------------
CMake Warning (dev) at D:/dev/Software/msys64/mingw64/lib/cmake/Qt5Core/Qt5CoreMacros.cmake:44 (message):
  qt5_use_modules is not part of the official API, and might be removed in Qt
  6.
Call Stack (most recent call first):
  D:/dev/Software/msys64/mingw64/lib/cmake/Qt5Core/Qt5CoreMacros.cmake:431 (_qt5_warn_deprecated)
  ElmerGUI/Application/CMakeLists.txt:216 (QT5_USE_MODULES)
This warning is for project developers.  Use -Wno-dev to suppress it.

-- ------------------------------------------------
--   BLAS library:   D:/dev/Software/msys64/mingw64/lib
--   LAPACK library: D:/dev/Software/msys64/mingw64/lib
-- ------------------------------------------------
--   Fortran compiler:        D:/dev/Software/msys64/mingw64/bin/gfortran.exe
--   Fortran flags:            -fallow-argument-mismatch -O2 -g -DNDEBUG
-- ------------------------------------------------
--   C compiler:              D:/dev/Software/msys64/mingw64/bin/cc.exe
--   C flags:                  -O2 -g -DNDEBUG
-- ------------------------------------------------
--   CXX compiler:            D:/dev/Software/msys64/mingw64/bin/c++.exe
--   CXX flags:                -O2 -g -DNDEBUG
-- ------------------------------------------------
-- ------------------------------------------------
--   Package filename: elmerfem-9.0--20220612_Windows-AMD64
--   Patch version: 9.0-
CMake Error at cpack/ElmerCPack.cmake:99 (INSTALL):
  INSTALL FILES given directory "D:/dev/Software/msys64/mingw64/lib" to
  install.
Call Stack (most recent call first):
  CMakeLists.txt:660 (INCLUDE)


-- Configuring incomplete, errors occurred!
See also "D:/dev/repos/fem/build/CMakeFiles/CMakeOutput.log".
See also "D:/dev/repos/fem/build/CMakeFiles/CMakeError.log".
Does this need Qt3? The ElmerGUI documentation says Qt4 (4.8 or higher). FindQt.cmake:160 (in bold above) appears to indicate that only Qt versions 3 and 4 are supported in MinGW. The mix of warnings and “could not find” makes it hard to know exactly what is wrong. The last error, for example, appears to be about the installation files directory. So is there anything wrong with Qt? I’ll assume not.
The cmake docs on installing files doesn’t point to anything peculiar in this scenario but this is a hint that my LAPACK_LIBRARIES variable is most likely wrong. Let’s drop it altogether:
# Clean up old make files
# rm -fr *

cmake -G "MinGW Makefiles" -DWITH_ELMERGUI:BOOL=TRUE -DWITH_MPI:BOOL=FALSE -DCMAKE_INSTALL_PREFIX=../install -DCMAKE_Fortran_COMPILER=D:/dev/Software/msys64/mingw64/bin/gfortran.exe -DCMAKE_Fortran_COMPILER_FORCED:BOOL=TRUE -DBLAS_LIBRARIES=D:/dev/Software/msys64/mingw64/lib ../elmerfem
The build still fails but right before the error, notice the LAPACK library now has a DLL instead of a directory (below)!
So now it makes sense to drop the BLAS_LIBRARIES definition as well!
# Clean up old make files
# rm -fr *

cmake -G "MinGW Makefiles" -DWITH_ELMERGUI:BOOL=TRUE -DWITH_MPI:BOOL=FALSE -DCMAKE_INSTALL_PREFIX=../install -DCMAKE_Fortran_COMPILER=D:/dev/Software/msys64/mingw64/bin/gfortran.exe -DCMAKE_Fortran_COMPILER_FORCED:BOOL=TRUE ../elmerfem
This build step now succeeds as indicated by the selection of libopenblas.dll.a as the BLAS and LAPACK library.
-- ------------------------------------------------
--   BLAS library:   D:/dev/Software/msys64/mingw64/lib/libopenblas.dll.a
--   LAPACK library: D:/dev/Software/msys64/mingw64/lib/libopenblas.dll.a
-- ------------------------------------------------
--   Fortran compiler:        D:/dev/Software/msys64/mingw64/bin/gfortran.exe
--   Fortran flags:            -fallow-argument-mismatch -O2 -g -DNDEBUG
-- ------------------------------------------------
--   C compiler:              D:/dev/Software/msys64/mingw64/bin/cc.exe
--   C flags:                  -O2 -g -DNDEBUG
-- ------------------------------------------------
--   CXX compiler:            D:/dev/Software/msys64/mingw64/bin/c++.exe
--   CXX flags:                -O2 -g -DNDEBUG
-- ------------------------------------------------
-- ------------------------------------------------
--   Package filename: elmerfem-9.0--20220612_Windows-AMD64
--   Patch version: 9.0-
-- Configuring done
CMake Error: The following variables are used in this project, but they are set to NOTFOUND.
Please set them or make sure they are set and tested correctly in the CMake files:
QWT_INCLUDE_DIR (ADVANCED)
   used as include directory in directory D:/dev/repos/fem/elmerfem/ElmerGUI/Application
   ...
   used as include directory in directory D:/dev/repos/fem/elmerfem/ElmerGUI/Application
QWT_LIBRARY (ADVANCED)
    linked by target "ElmerGUI" in directory D:/dev/repos/fem/elmerfem/ElmerGUI/Application
...
Looks like I now need to define QWT_INCLUDE_DIR and QWT_LIBRARY. Hmm, I don’t think I even installed QWT.
$ pacman -S mingw64/mingw-w64-x86_64-qwt-qt5
resolving dependencies...
looking for conflicting packages...

Packages (1) mingw-w64-x86_64-qwt-qt5-6.2.0-5

Total Download Size:    29.17 MiB
Total Installed Size:  175.53 MiB

:: Proceed with installation? [Y/n] y
:: Retrieving packages...
 mingw-w64-x86_64-qwt-qt5-6.2.0-5-any                                                                                  29.2 MiB  1136 KiB/s 00:26 [###...###] 100%
(1/1) checking keys in keyring                                                                                                                    [###...###] 100%
(1/1) checking package integrity                                                                                                                  [###...###] 100%
(1/1) loading package files                                                                                                                       [###...###] 100%
(1/1) checking for file conflicts                                                                                                                 [###...###] 100%
(1/1) checking available disk space                                                                                                               [###...###] 100%
:: Processing package changes...
(1/1) installing mingw-w64-x86_64-qwt-qt5                                                                                                         [#########################################################################################] 100%
Optional dependencies for mingw-w64-x86_64-qwt-qt5
    mingw-w64-x86_64-qt5-tools [installed]
Now that QWT is installed, we can set the include directory as follows:
CMake finally succeeds! The output ends with these lines:
-- Generating done
-- Build files have been written to: D:/dev/repos/fem/build
The generated Makefile has targets such as ElmerGUI, elmersolver, AdvectionDiffusion, FluxSolver, etc. The strange thing is that it has a line that sets SHELL = cmd.exe and so a Windows command prompt is launched when you run make.
#==================================================================
# Target rules for targets named ElmerGUI

# Build rule for target.
ElmerGUI: cmake_check_build_system
	$(MAKE) $(MAKESILENT) -f CMakeFiles\Makefile2 ElmerGUI
.PHONY : ElmerGUI

# fast build rule for target.
ElmerGUI/fast:
	$(MAKE) $(MAKESILENT) -f ElmerGUI\Application\CMakeFiles\ElmerGUI.dir\build.make ElmerGUI/Application/CMakeFiles/ElmerGUI.dir/build
.PHONY : ElmerGUI/fast
Now we see the expected SHELL = /bin/sh and running make actually causes code to start building! What a journey! I will write another post with simplified instructions for how to build Elmer (on Windows).
$ make
[  0%] Building C object matc/src/CMakeFiles/matc.dir/c3d.c.obj
[  0%] Building C object matc/src/CMakeFiles/matc.dir/clip.c.obj
[  0%] Building C object matc/src/CMakeFiles/matc.dir/dri_ps.c.obj
[  0%] Building C object matc/src/CMakeFiles/matc.dir/eig.c.obj
...
It has been a while since I wrote graphics/rendering code. The bugs are very different from those I typically write/fix since so I thought I might as well share the types of issues I dealt with. Here are some of the pitfalls I encountered:
Not checking all OpenGL API results. Continuing execution when vertex/fragment shader compilation failed, for example, wastes a ton of time debugging downstream failures.
Assuming successful shader compilation means that you can assign values to every shader uniform you declared! If the uniform is not actually used to generate the shader’s output, the compiler (which I learned lives in the graphics driver) can eliminate the uniform, thereby causing attempts to set it to fail.
Using glVertexAttribPointer instead of glVertexAttribIPointer to pass integer IDs needed by a fragment shader. Wasted so much time on this because I was feeling schedule pressure and didn’t carefully read the documentation. Since I set the normalized parameter to GL_FALSE, the IDs were being converted into floats directly without normalization. TODO: study this behavior now to see exactly which floats ended up in the shader.
Passing a count of 0 to glDrawArrays. The count argument specifies the number of indices to be rendered. Took me a while to figure out why nothing was showing up after some refactoring that I did. Turns out the number of vertices in the class I created was 0. An assertion here would have saved a ton of time.
Mismatched vertex attribute formats. Spiky rendered output instead of a shape like a cube/sphere makes this one rather easy to detect. In my case, I was using 2 structs and one had an extra ID field that ended up being vertex data when the other type of struct was passed to the rendering code.
Passing GL_TEXTURE0 to a sampler2D shader instead of 0! This was a typo that I didn’t catch in course slides.
When storing vertex shader data into a buffer texture, the OpenGL APIs were used to create and bind the buffer: glCreateBuffers, glNamedBufferStorage, glCreateTextures, glTextureBuffer, glBindImageTexture. A snippet of the vertex shader code to write into the buffer is shown below. Unfortunately, the shader compilation failed with this error: 0(69) : error C1115: unable to find compatible overloaded function “imageStore(struct image1D4x32_bindless, int, struct DebugData)”.
I needed up having to define a const int numVec4sPerStruct = 6; and call imageStore for each member of the struct, e.g. imageStore(bufferTexture, gl_VertexID * numVec4sPerStruct + 1, debugData.vPosition);. See related discussions here and here.
Invalid Shader Data in Buffers
There were all 0s in the output written into the texture/shader storage buffers. I tried using imageBuffer instead of image1D to avoid getting all zeros when reading the texture image buffer. The code looked correct but I couldn’t explain why zeros were being read back despite the rendered output looking correct. To figure out why this could be happening, I initialized the texture memory to a known value (integer value -1, which turns out to be a NaN when interpreted as a float). This made it easier to explain the random crap that was being displayed (hint from stack overflow) since it made it obvious that many memory locations were not being written to. Here is a snippet of the fragment shader:
Initializing the storage to all 0xFF bytes made it possible to conclude that the wrong data was being written to the host, more specifically that the wrong locations were being written to! Who knew structs and alignment were a thing (TODO: link to alignment discussion in GLSL spec)! The host needed to interpret the shader storage using this struct:
struct FragmentData
{
    unsigned int uniqueFragmentId;
    unsigned int fourBytesForAlignment1;
    TextureCoord2f texCoords;
    VertexCoord4f glFragCoord;
    unsigned int faceId;
    unsigned int fourBytesForAlignment2;
    unsigned int fourBytesForAlignment3;
    unsigned int fourBytesForAlignment4;
};
Also see discussion in GLSL spec about std430 vs std140 for shader block storage!
C++ Bugs
Some of the bugs I introduced were also plain old C++ bugs (not OpenGL specific), e.g.
Uninitialized variables (the fovy float had a NaN value).
Copy/pasting code and missing a key fact that both Gouraud and Phong shading code paths were calling the Gouraud shader (even though the scene state output in the console showed the state had been correctly updated to Phong). That’s what you get for copy pasting and not having tests…
Wrong array indexing logic. In the bug below (commit 3cfe07aea6914a91), I was multiplying the indices by elementSize but that is wrong because lines 2-5 from the bottom already have a built in multiplication by the element size. Noticed this from the disassembly.
int VolumeDataset3D::GetIndexFromSliceAndCol(uint32_t slice, uint32_t column)
{
    const int sizeOf1Row = width * sizeof(uint8_t);

    int index = slice * sizeOf1Row + column;

    return index;
}

const int elementSize = sizeof(VertexDataPositionedByte);

    for (uint32_t slice = 0; slice < depth - 1; slice++)
    {
        for (uint32_t col = 0; col < width - 1; col++)
        {
            int index = elementSize * GetIndexFromSliceAndCol(slice, col);
            int rightIndex = elementSize * GetIndexFromSliceAndCol(slice, col + 1);
            int diagIndex = elementSize * GetIndexFromSliceAndCol(slice + 1, col + 1);
            int bottomIndex = elementSize * GetIndexFromSliceAndCol(slice + 1, col);

            VertexDataPositionedByte cellData[4] =
            {
                ((VertexDataPositionedByte*)vertexData2D.data)[bottomIndex],
                ((VertexDataPositionedByte*)vertexData2D.data)[diagIndex],
                ((VertexDataPositionedByte*)vertexData2D.data)[rightIndex],
                ((VertexDataPositionedByte*)vertexData2D.data)[index],
            };
I ran into (currently unexplained) crashes in both the Intel and nVidia OpenGL drivers (I used Windows only). There were also crashes (on a specific commit) from a nullref/access violation on my HP desktop but not on my Surface Pro. Found out later that the desktop was actually right to crash but the difference in behavior was certainly troubling.