Once I had finished Setting up my First 3D Printer, I wanted to design and print custom models. The Anycubic Slicer Next software can only open 3mf files. Being new to this space means that I had never even heard of this format before. Here are some useful resources for learning more about it:
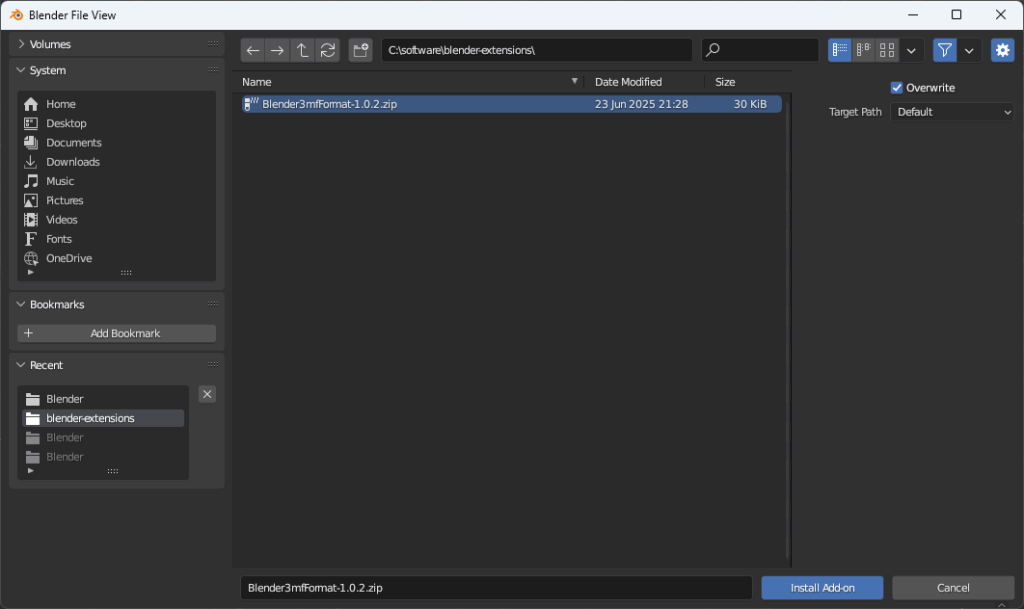
Download the latest release from the releases page. This is a .zip archive.
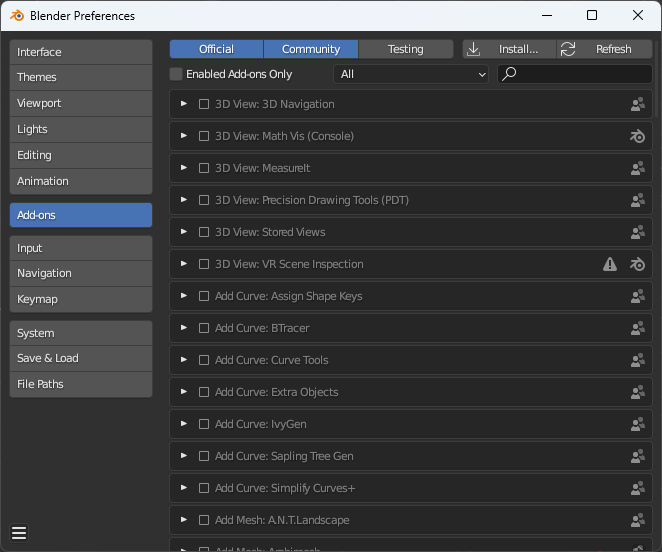
In Blender, go to Edit -> Preferences and open the Add-ons tab on the left.
Click on the Install… button at the top. Navigate to the .zip you downloaded.
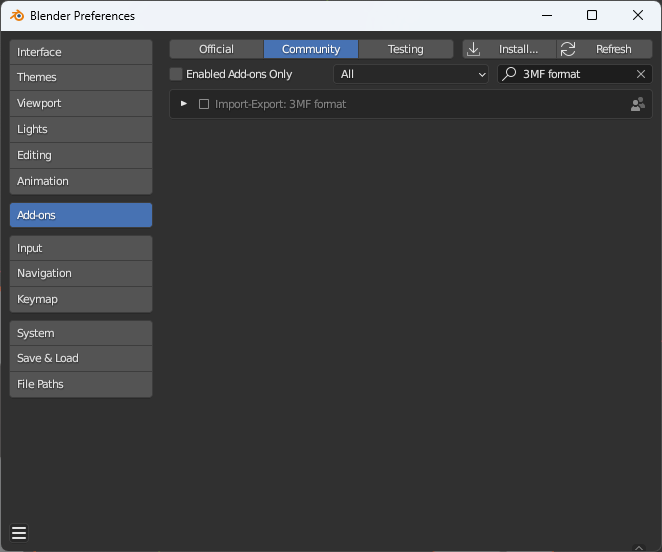
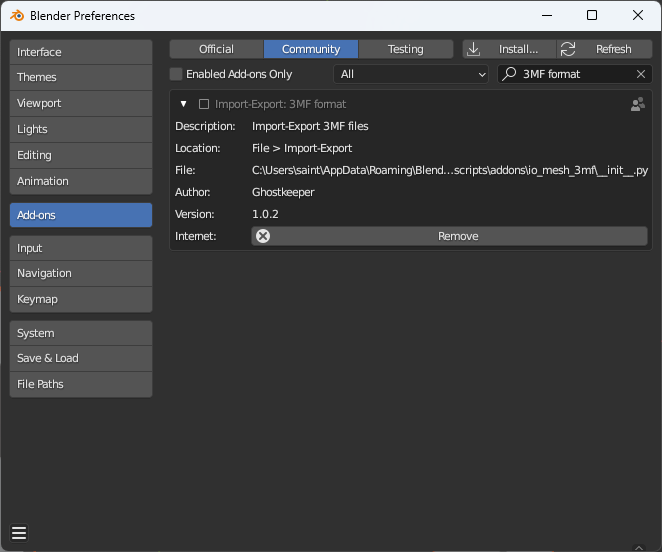
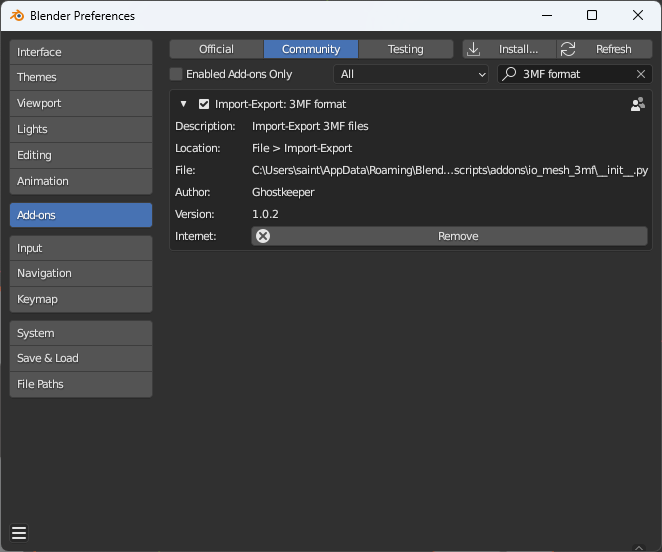
Under the “Community” category, find the add-on called “Import-Export: 3MF format”. Make sure that it’s enabled. (Note: If searching with the search box, exclude the “Import-Export” text since this is the category, not part of the add-on name. Just search for “3MF” instead.)
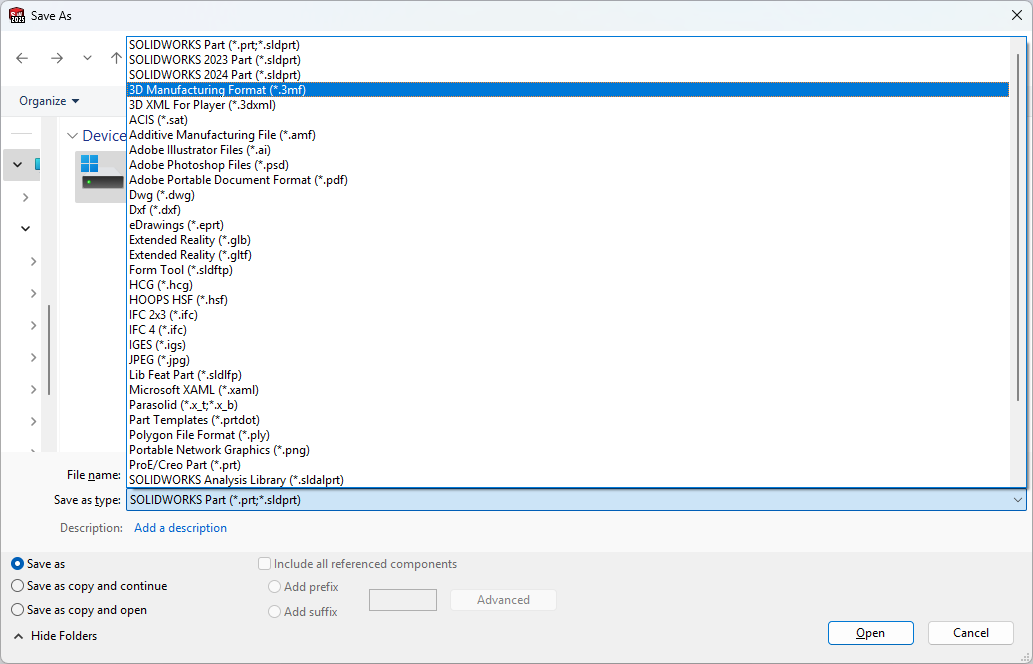
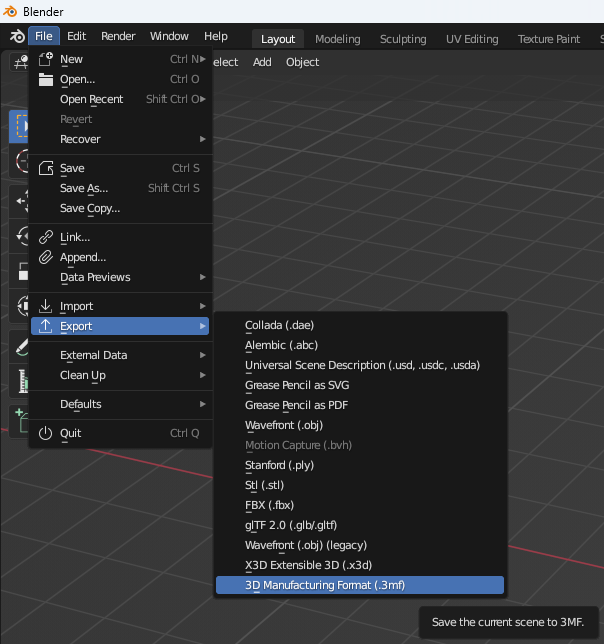
As promised on the plugins page, the export option is now available:
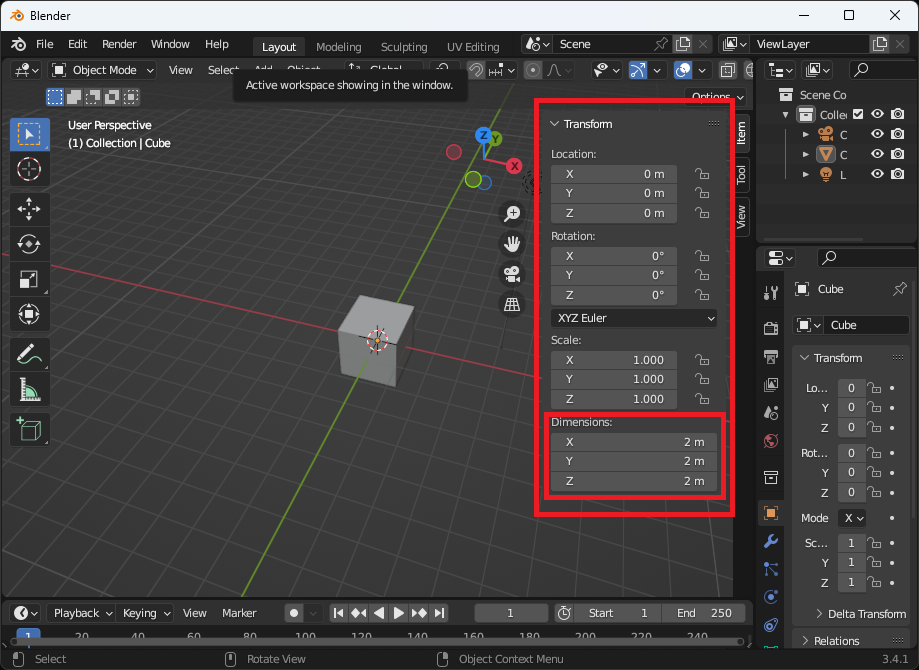
Note that there is a “Scale” option on the export dialog. I just ensured my dimensions were real world dimensions. Here is the simple blender model I made in the Anycubic Slicer Next software. I was able to successfully print it.
Anycubic Slicer Next with a 3mf exported from Blender
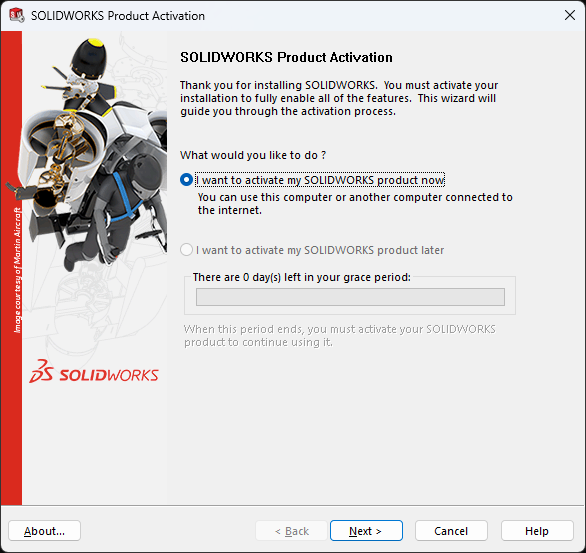
I installed SOLIDWORKS 2023 Student Edition on my desktop about 2 years ago but did not renew the license after it expired last year. Having just set up a 3D printer, I decided to renew my SOLIDWORKS license to make new models I could print. Since I bought the latest version (2025) from SOLIDWORKS for Students | SOLIDWORKS. I uninstalled SOLIDWORKS 2023 and installed SOLIDWORKS 2025 SP2.0. However, I could not start SOLIDWORKS 2025! It failed with this error:
---------------------------
SOLIDWORKS Product Activation
---------------------------
The current computer identifier (0) does not match the previously used computer identifier (1). You can continue, but you might have activation or deactivation issues in the future.

Please contact you support representative for support.
---------------------------
OK
---------------------------
The OK button then leads to another dialog with this message:
[Window Title]
SOLIDWORKS

[Content]
This Student Edition has expired.

Please browse to the following web location to find out about the new version of SOLIDWORKS Student Edition:

www.solidworks.com/goEDU

[OK]
These is the first set of instructions I got (slightly paraphrased):
Go to the FlexNet Folder (C:\ProgramData\FLEXnet) and rename all ‘SW_D’ files to something like ‘SW_D_old’. Launch SOLIDWORKS again and test the behavior. By default, the “ProgramData” folder is hidden. Either you can activate the “Show hidden folders” option in the “Folder” options, or you can directly enter C:\ProgramData in the address bar to access this folder.
If the above steps do not help, try the steps below
Go to Control Panel\All Control Panel Items\Programs and Features
Search for SOLIDWORKS <version> then right click on it and click ‘Change’
The SOLIDWORKS installation manager will pop up. Click on ‘Repair your installation’.
Once repair is complete, launch SOLIDWORKS and test the behavior.
If the issue still persists, please share the Installation Manager logs on the 3DSupport App for investigation. To go to the Installation log folder, you can type %appdata% at Start > RUN and press Enter, and it will open the “Roaming” folder. In the “Roaming” folder, go to the “SOLIDWORKS” folder. Under the “SOLIDWORKS” folder, you will find a folder named “Installation log.” Zip this complete folder and provide it for investigation.
These steps didn’t work so I uploaded my installation logs. The next set of instructions addressed the problem. Here they are (slightly paraphrased):
To resolve this issue, I recommend uninstalling all SOLIDWORKS versions currently present on your system. Once that is done, then perform the installation again and be sure to enter your new license number [1234…] manually on the serial number page in the “3D Design > SOLIDWORKS” checkbox. If you have purchased the Student Edition, then your new serial number will be present in the post-purchase email. Please follow these installation steps:
Uninstall all SOLIDWORKS versions currently present on your system. Please follow these steps:
Go to Control Panel\All Control Panel Items\Programs and Features
Search for SOLIDWORKS (Version) then right click on it and select ‘Uninstall’.
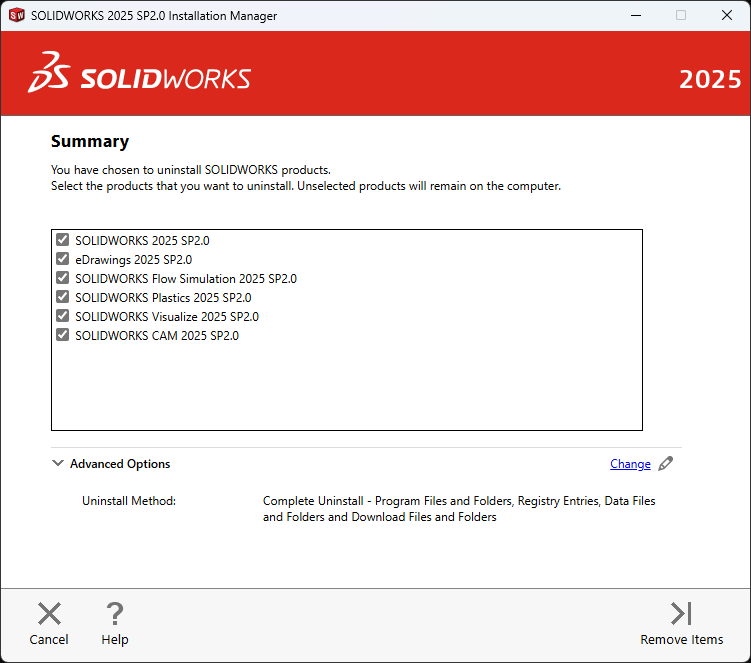
In the Installation Manager window, under ‘Advanced Options’, select ‘Change’.
By default, the ‘Program files and Folders’ will be selected. Select the remaining items (‘Registry Entries’ and ‘Data Files and Folders’) as well.
Click ‘Back to Summary’.
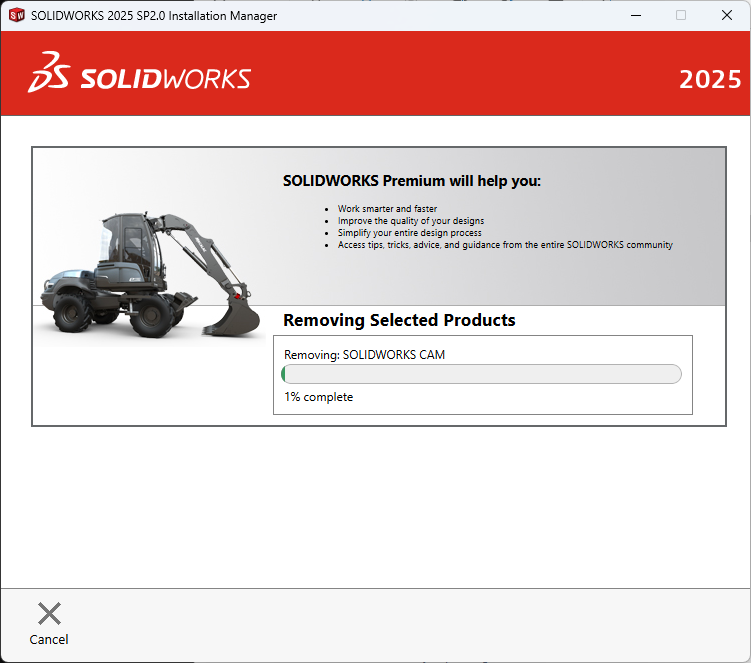
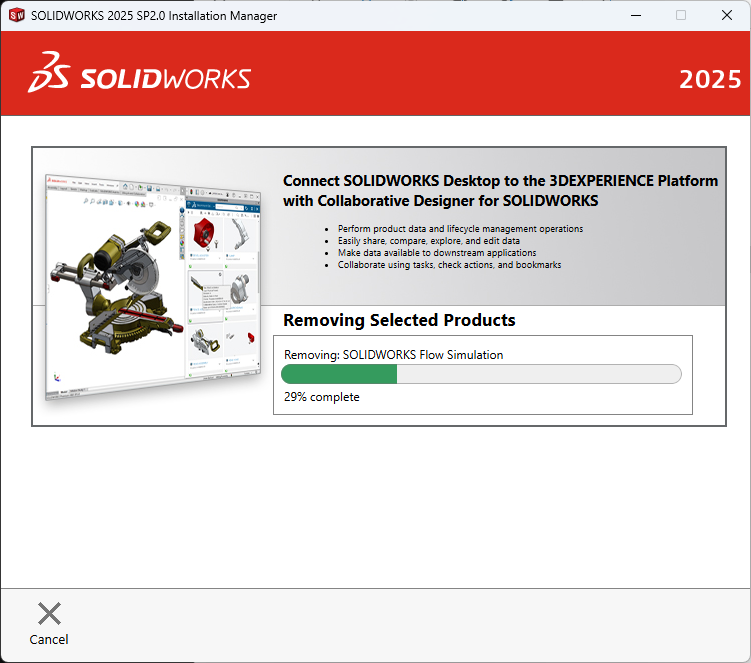
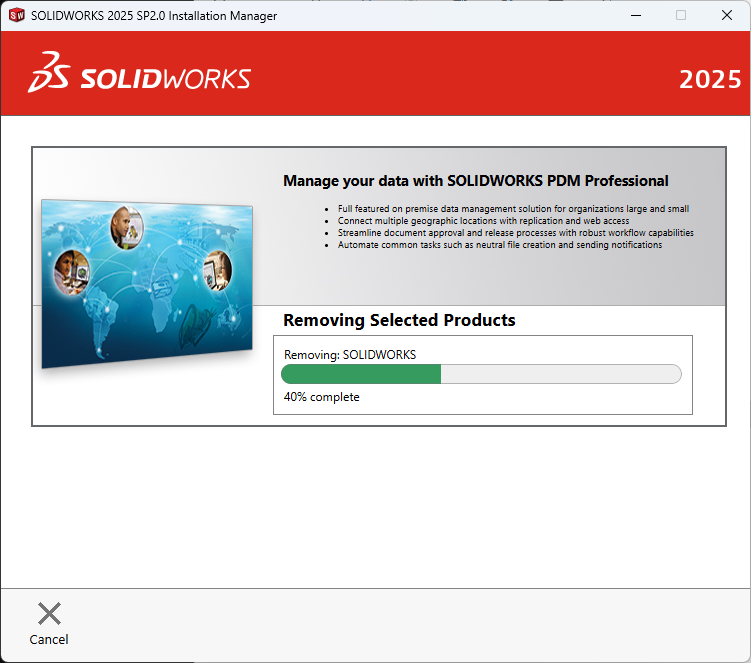
Click on ‘Remove Items’ and let Installation Manager complete the uninstallation.
Once uninstallation is complete, restart your system.
Download the setup file from: www.solidworks.com/SEK
Right-click on the setup file and select ‘Run as administrator’.
On Welcome page > Select ‘Install on this computer’ and click ‘Next’.
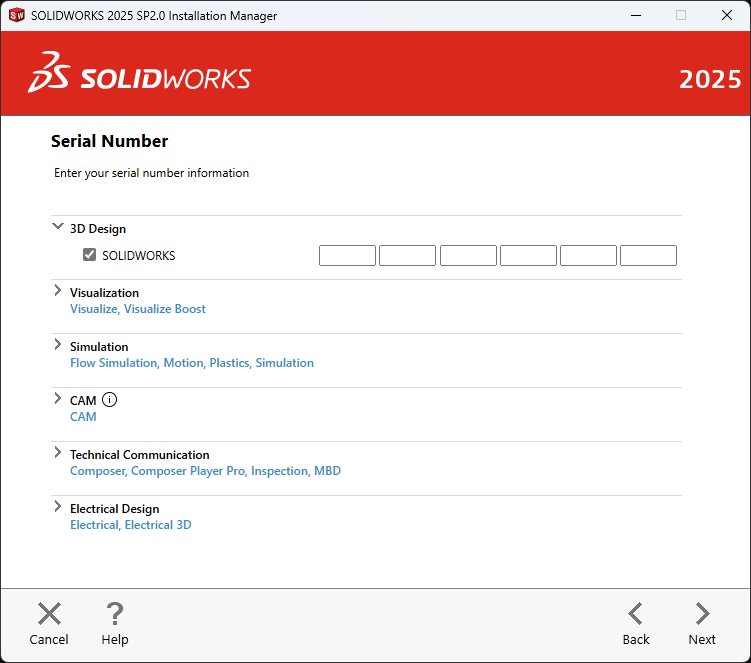
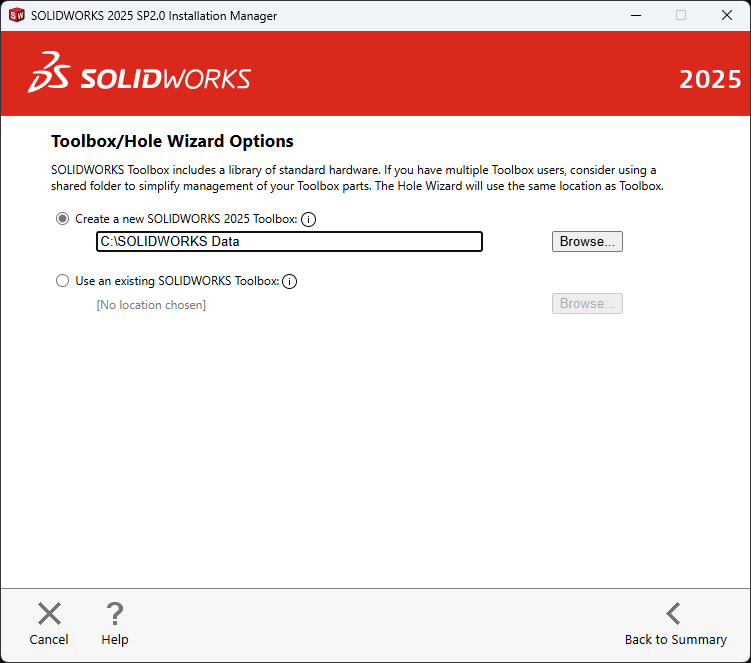
On the Serial Number screen, enter your latest serial number [1234…] manually in the 3D Design > SOLIDWORKS checkbox only. Please leave all the other product’s [like composer, Visual, simulation, etc..] serial number checkboxes blank and unchecked. See the attached image for your reference.
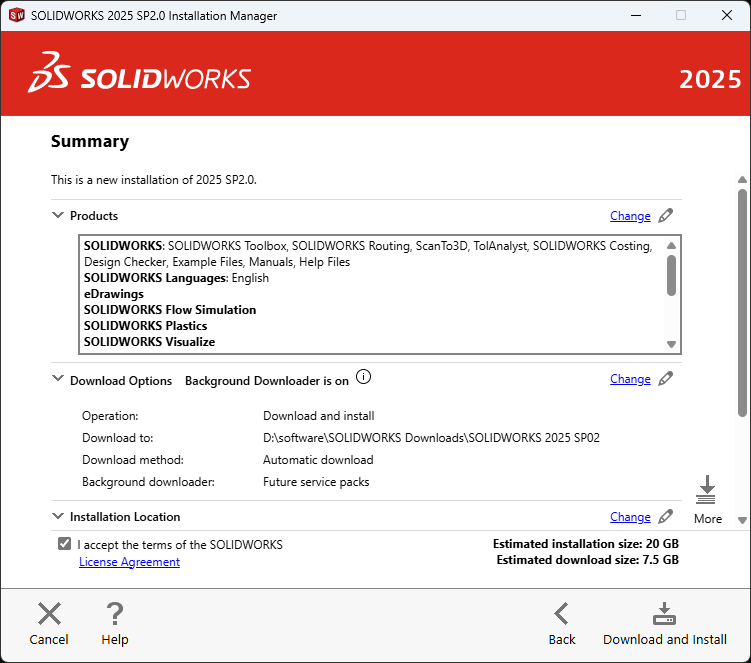
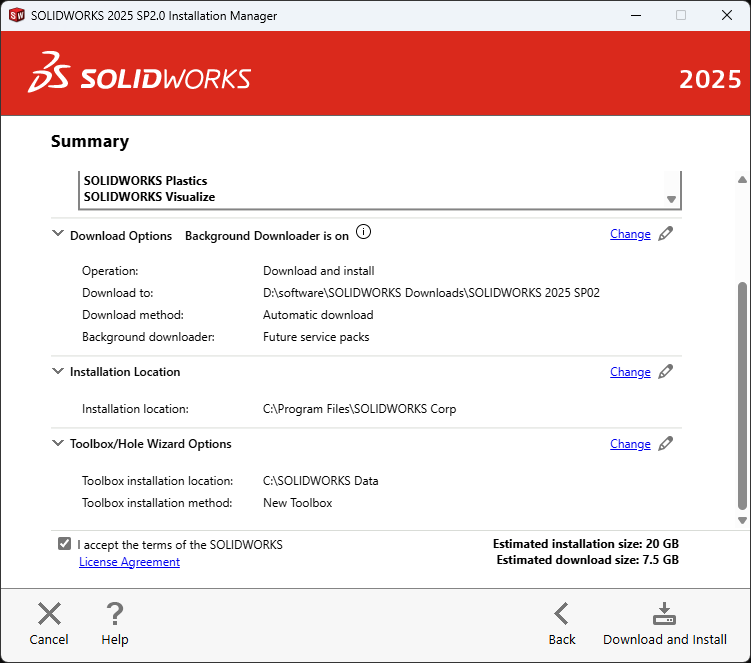
On the Summary screen > Under Products, click ‘change’ > untick the unwanted
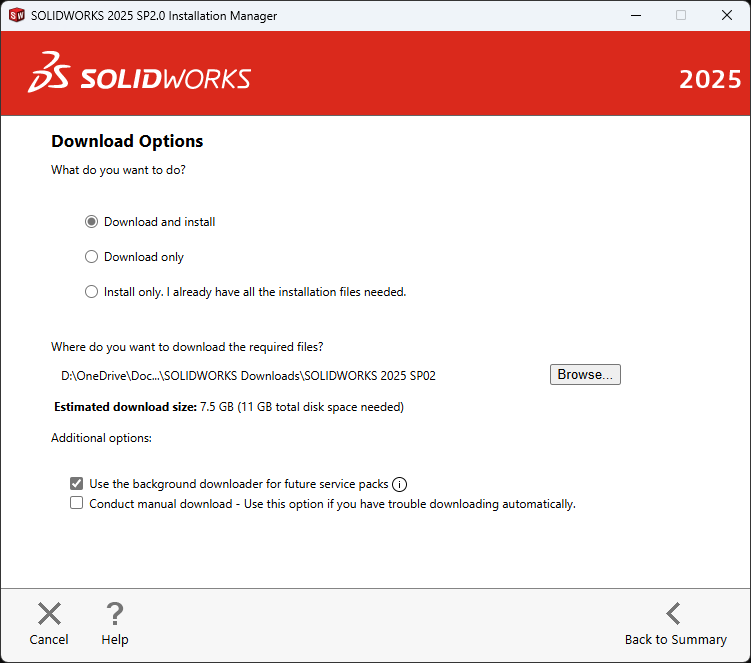
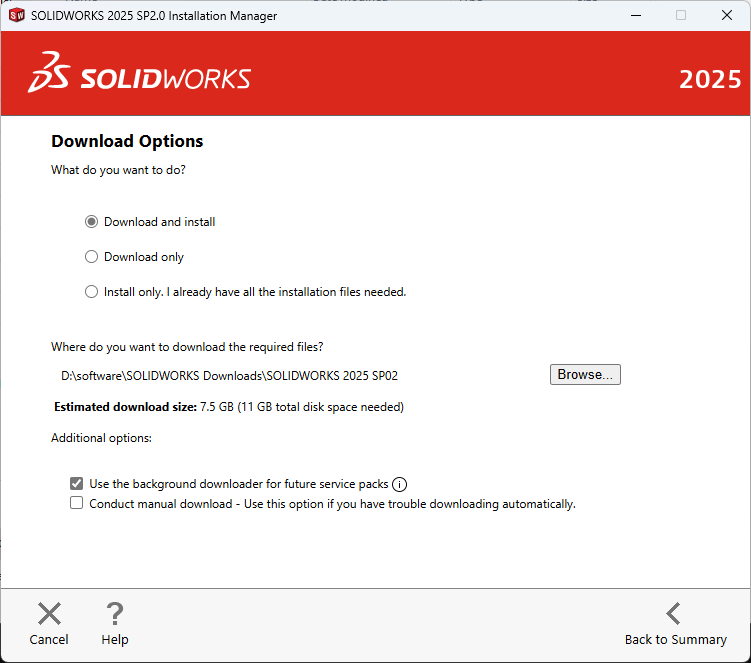
On the Summary screen > Download Option, click ‘change” > select ‘Download and Install’.
On the Summary screen, click ‘Install Now’.
Uninstalling SOLIDWORKS 2025
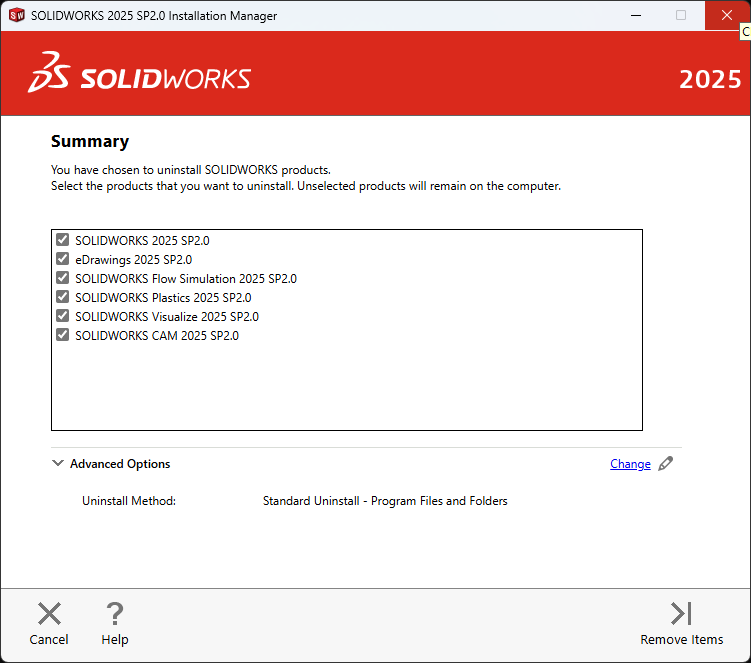
The first time I uninstalled SOLIDWORKS 2025, I didn’t adjust the “Advanced Options”:
After uninstalling it, the SOLIDWORKS Login Manager was still listed as installed in the control panel. I uninstalled it as well then later realized that I missed other products from Dassault Systemes.
I entered the correct serial number on the installation this time. I also noticed that the install path is in C:\dev (which also has SOLIDWORKS 2023 files). I didn’t remember how I created that directory the last time I installed SOLIDWORKS (nothing else would automatically go into my \dev directory). After all this, the same error message is displayed when trying to start SOLIDWORKS. This was because I skipped the most important steps in the uninstallation. I paid careful attention to the options the next time I uninstalled it! Before uninstalling it, I poked around and found that I the license is in HKEY_LOCAL_MACHINE\SOFTWARE\SolidWorks\Licenses\Serial Numbers. The slideshow below shows the advanced options that need to be selected for a full uninstall.
These are the files and folders that were to be removed on my desktop:
Program Files and Folder:
C:\Program Files\SOLIDWORKS Corp\SOLIDWORKS CAM\
C:\Program Files\SOLIDWORKS Corp\SOLIDWORKS Visualize\
C:\Program Files\SOLIDWORKS Corp\SOLIDWORKS Plastics\
C:\Program Files\SOLIDWORKS Corp\SOLIDWORKS Flow Simulation\
C:\Program Files\SOLIDWORKS Corp\eDrawings\
C:\Program Files\SOLIDWORKS Corp\SOLIDWORKS\

Registry Entries:
HKCU\Software\SolidWorks
HKLM\Software\Wow6432Node\SolidWorks
HKLM\Software\SolidWorks
HKCU\Software\SRAC
HKLM\Software\SRAC
HKCU\Software\eDrawings
HKLM\Software\eDrawings

Data Files and Folder:
C:\software\SOLIDWORKS Data (2)
C:\ProgramData\SolidWorks
C:\ProgramData\COSMOS Applications
C:\Users\Public\Documents\SolidWorks
C:\ProgramData\DassaultSystemes

Download Files and Folder:
C:\dev\Downloads\SolidWorksFiles\SOLIDWORKS 2023 SP02.1
C:\dev\Downloads\SolidWorksFiles\SOLIDWORKS 2025 SP02
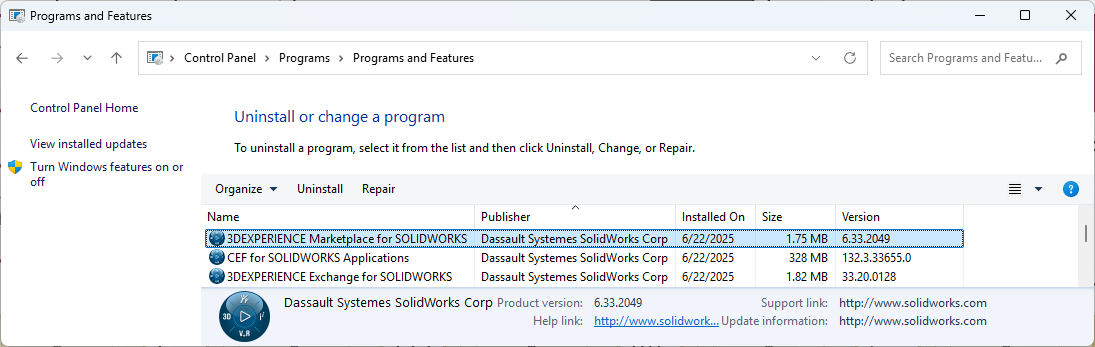
After uninstallation completed, I decided to inspect the registry (using the reg query command) to see what was left. 6 of the 7 registry entries returned “ERROR: The system was unable to find the specified registry key or value.” Only the HKEY_LOCAL_MACHINE\SOFTWARE\SolidWorks key still contained data.
C:\>reg query "HKEY_LOCAL_MACHINE\SOFTWARE\SolidWorks" /s

HKEY_LOCAL_MACHINE\SOFTWARE\SolidWorks\AddIns

HKEY_LOCAL_MACHINE\SOFTWARE\SolidWorks\AddIns\{219180B0-7183-4FE2-B167-4E2BFE534004}
    (Default)    REG_DWORD    0x1
    Description    REG_SZ    Access to digital manufacturers worldwide, sourceable 3D components, and more. v6.33.2049
    Title    REG_SZ    3DEXPERIENCE Marketplace
    Icon Path    REG_SZ    C:\Program Files\Common Files\SOLIDWORKS Shared\3DEXPERIENCE Marketplace\I_3DEXPERIENCEPlatform_16.png

HKEY_LOCAL_MACHINE\SOFTWARE\SolidWorks\AddIns\{fb5ac345-200b-44d2-9ffa-69b7d44fc36f}
    (Default)    REG_DWORD    0x0
    Description    REG_SZ    Work with a package of content from a 3DEXPERIENCE source, such as SOLIDWORKS Connected or the Design with SOLIDWORKS app.
    Title    REG_SZ    3DEXPERIENCE Exchange
    Icon Path    REG_SZ    C:\Program Files\Common Files\SOLIDWORKS Shared\3DEXPERIENCE Exchange\Resources\3dexperience_exchange-20px.png
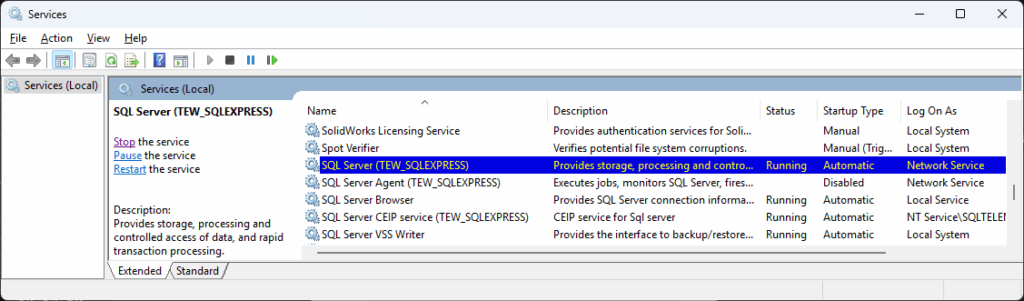
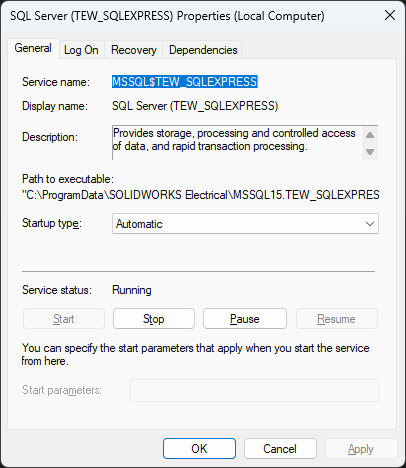
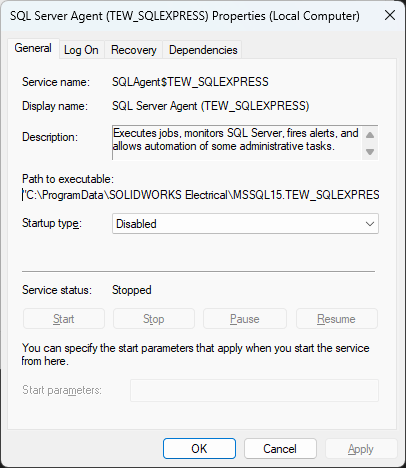
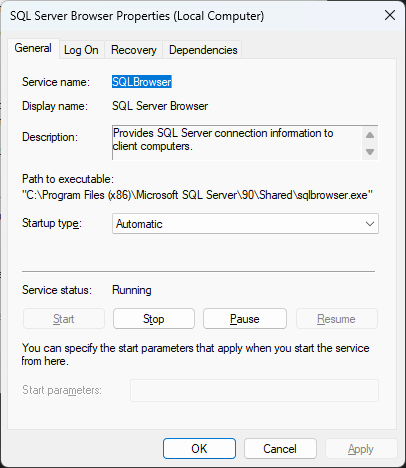
The path “C:\Program Files\SOLIDWORKS Corp” now contained 0 files but still contained 2 folders: “SOLIDWORKS Electrical” and “eDrawings” (which looked harmless). The other directories had been removed. There was still a “C:\ProgramData\SOLIDWORKS Electrical” directory though. I could not remove it because “C:\ProgramData\SOLIDWORKS Electrical\MSSQL15.TEW_SQLEXPRESS\MSSQL\Binn\batchparser.dll” was open in the SQL Server (TEW_SQLEXPRESS) service. The path to its executable was "C:\ProgramData\SOLIDWORKS Electrical\MSSQL15.TEW_SQLEXPRESS\MSSQL\Binn\sqlservr.exe" -sTEW_SQLEXPRESS. The disabled agent’s path was "C:\ProgramData\SOLIDWORKS Electrical\MSSQL15.TEW_SQLEXPRESS\MSSQL\Binn\SQLAGENT.EXE" -i TEW_SQLEXPRESS and the CEIP service executable path was "C:\ProgramData\SOLIDWORKS Electrical\MSSQL15.TEW_SQLEXPRESS\MSSQL\Binn\sqlceip.exe" -Service TEW_SQLEXPRESS. See the properties of these services below.
I stopped the SQL Server (TEW_SQLEXPRESS) and SQL Server CEIP service (TEW_SQLEXPRESS) services. I could now delete the “C:\ProgramData\SOLIDWORKS Electrical” directory. Notice that there was also a SolidWorks Licensing Service but it was stopped. The path to its executable was "C:\Program Files (x86)\Common Files\SolidWorks Shared\Service\SolidWorksLicensing.exe" and it was the only file under the “SolidWorks Shared” directory. I deleted it (even though this left the service entry). I didn’t recall how I set up the 2023 version but I have setup files in C:\dev\Downloads\SolidWorks so I just manually deleted that entire folder.
Installing SOLIDWORKS 2025
After the full uninstall described above, there was no serial number prepopulated into the installer this time! The default Download to path was in my documents folder, which is on OneDrive. Aha, this must be why I had changed it to C:\dev\Downloads\SolidWorks – no need to store a couple of GBs of installers on OneDrive.
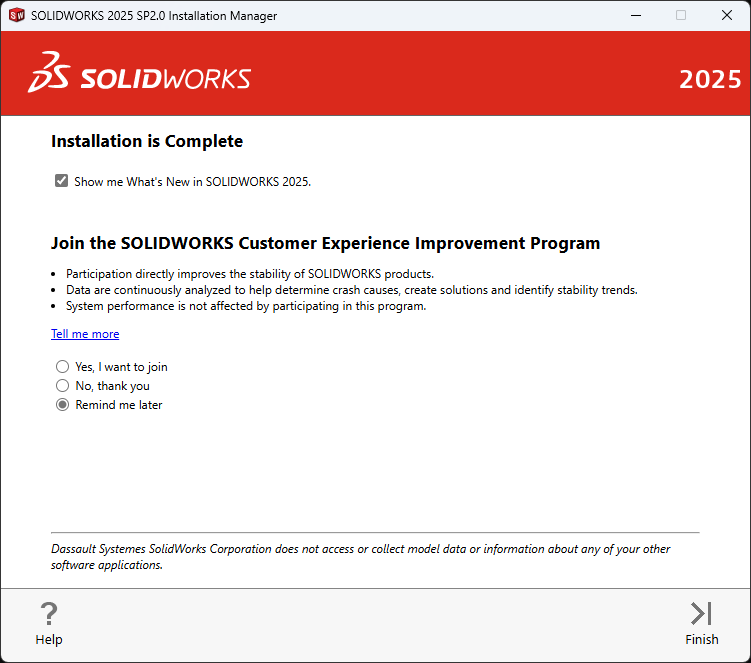
Once installation completed, all I needed to do is enter my email and click “next” to activate the product.
SOLIDWORKS 2025 now started up successfully! The root cause of all my problems was that I didn’t do a full uninstall of SOLIDWORKS 2023!
I’ve had an interest in 3D modeling since my high school days. This was most likely informed by my curiosity about how computer games and animations are made. I recently downloaded Blender to start toying with and hopefully teach my kids and I some animation skills. I settled on Blender (instead of 3DS Max, which was the first such product I used) because it is free. There are also some decent Blender tutorials on YouTube. Here’s the channel I started watching:
Building the Source Code
I decided to dig into the sources and see how easy it is to build Blender on Windows. Thankfully, there are detailed instructions – Building Blender/Windows – Blender Developer Wiki. The subversion client is the only one I don’t have installed on my desktop. Weird that they zipped the MSI for a 3% compression ratio (saving 211 KB on a 7232 KB MSI.
17:19:55.47 D:\dev\repos\other\blender> make update
Warning: Python not found, there is likely an issue with the library folder
No explicit msvc version requested, autodetecting version.
**********************************************************************
** Visual Studio 2019 Developer Command Prompt v16.11.19
** Copyright (c) 2021 Microsoft Corporation
**********************************************************************
[vcvarsall.bat] Environment initialized for: 'x64'
Compiler Detection successful, detected VS2019

The required external libraries in "D:\dev\repos\other\blender\..\lib\win64_vc15" are missing

Would you like to download them? (y/n)y

Downloading win64_vc15 libraries, please wait.

A    D:\dev\repos\other\lib\win64_vc15\openpgl
A    D:\dev\repos\other\lib\win64_vc15\openpgl\lib
A    D:\dev\repos\other\lib\win64_vc15\openpgl\lib\cmake
A    D:\dev\repos\other\lib\win64_vc15\openpgl\lib\cmake\openpgl-0.3.1
A    D:\dev\repos\other\lib\win64_vc15\openpgl\include
...
A    D:\dev\repos\other\lib\win64_vc15\vulkan\share\vulkan\registry\vkconventions.py
A    D:\dev\repos\other\lib\win64_vc15\vulkan\share\vulkan\registry\validusage.json
A    D:\dev\repos\other\lib\win64_vc15\wintab\include\wintab.h
 U   D:\dev\repos\other\lib\win64_vc15
Checked out revision 63049.
python not found, required for this operation

19:10:47.57 D:\dev\repos\other\blender>
Here’s the command line used to download the libraries:
Run make update again since it failed the first time because python was not found but it has now been checked out into the lib folder. Once that completes, run make to build Blender. Interestingly, it fails because it can’t find CMake yet it said to open a plain cmd prompt. I work around this by switching to the VS 2019 Developer Command Prompt instead of updating my PATH and that unblocks the build.
21:08:42.26 D:\dev\repos\other\blender> make

No explicit msvc version requested, autodetecting version.
**********************************************************************
** Visual Studio 2019 Developer Command Prompt v16.11.19
** Copyright (c) 2021 Microsoft Corporation
**********************************************************************
[vcvarsall.bat] Environment initialized for: 'x64'
Compiler Detection successful, detected VS2019
Building blender with VS2019 for x64 in D:\dev\repos\other\blender\..\build_windows_x64_vc16_Release
-- Selecting Windows SDK version 10.0.22572.0 to target Windows 10.0.22621.
-- The C compiler identification is MSVC 19.29.30146.0
-- The CXX compiler identification is MSVC 19.29.30146.0
...
  -- Installing: D:/dev/repos/other/build_windows_x64_vc16_Release/bin/Release/3.4/datafiles/usd/usdVolImaging/resources
  -- Installing: D:/dev/repos/other/build_windows_x64_vc16_Release/bin/Release/3.4/datafiles/usd/usdVolImaging/resources/plugInfo.json
21:35:47.14 D:\dev\repos\other\blender>
This is a really smooth experience (compared to ahem, zlib). I’m amazed it built and generated a local install folder in less than half an hour. I could launch build_windows_x64_vc16_Release\bin\Release\blender.exe, open the About Blender menu and see version 3.4.0 Alpha from hash 206dead86058. The release notes – Reference/Release Notes/3.4 – Blender Developer Wiki – are also quite useful, especially the Developer Intro!
I have been toying around with the idea of doing a fluid dynamics or crystal growth simulation using nVidia CUDA. I decided to try out nVidia’s cuda samples to see what their approach looks like, in particular when rendering using OpenGL. I am using Visual Studio 2022 so I simply cloned the cuda samples repo, opened the fluidsGL_vs2022.sln solution, right click on the fluidsGL project, then selected Build.
Build started...
1>------ Build started: Project: fluidsGL, Configuration: Debug x64 ------
1>D:\dev\...\cuda-samples\Samples\5_Domain_Specific\fluidsGL\fluidsGL_vs2022.vcxproj(37,5): error MSB4019: The imported project "C:\Program Files\Microsoft Visual Studio\2022\Enterprise\MSBuild\Microsoft\VC\v170\BuildCustomizations\CUDA 11.6.props" was not found. Confirm that the expression in the Import declaration "C:\Program Files\Microsoft Visual Studio\2022\Enterprise\MSBuild\Microsoft\VC\v170\\BuildCustomizations\CUDA 11.6.props" is correct, and that the file exists on disk.
1>Done building project "fluidsGL_vs2022.vcxproj" -- FAILED.
========== Build: 0 succeeded, 1 failed, 0 up-to-date, 0 skipped ==========
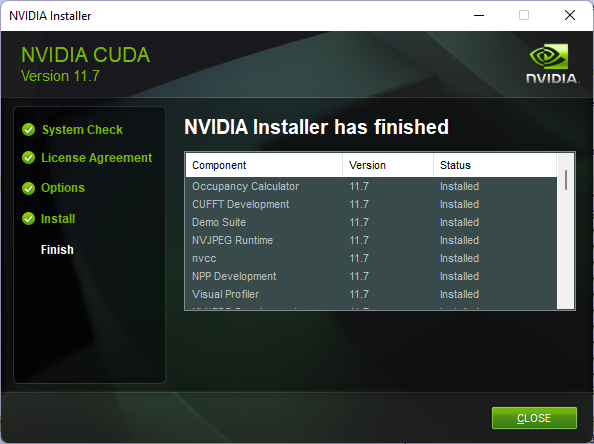
The prerequisites section does mention that the CUDA Toolkit 11.6 is required, so I close VS and install it. I end up with version 11.7 though:
When reopening the fluidsGL solution, I still get the same error about CUDA 11.6.props not being found. A quick look at the directory this file is expected to be in reveals that this is a simple version mismatch problem – see the hard coded version in the fluidsGL.vcxproj file. Instead of fixing every example .vcxproj file to match CUDA 11.7, we can patch the VS folder by running these commands from an admin command prompt:
The code now builds in Visual Studio and I can now oooh, aaaah over the demo. Visual Studio does seem a bit sluggish at opening the entire samples solution though… I get this information about my device in the console window after the demo launches:
GPU Device 0: "Pascal" with compute capability 6.1

CUDA device [Quadro P1000] has 5 Multi-Processors
To build Gmsh on Windows, launch MSYS via the “MSYS2 MinGW x64” shortcut then run these commands:
git clone https://gitlab.onelab.info/gmsh/gmsh.git
cd gmsh
mkdir build
cd build
cmake .. -G "MSYS Makefiles" -DENABLE_FLTK:BOOL=TRUE -DCMAKE_INSTALL_PREFIX=../install

make install
Background
The build instructions for the Gmsh repo require the make command to build the code. The build instructions do not seem particularly specific for Windows. At the very least, they imply a Cygwin environment. I ended up using the environment I configured for building Elmer. Interestingly, the Ninja system is selected (not Visual Studio).
git clone https://gitlab.onelab.info/gmsh/gmsh.git
cd gmsh
mkdir build
cd build
cmake .. -DCMAKE_INSTALL_PREFIX=../install
-- Building for: Ninja
-- The CXX compiler identification is GNU 12.1.0
-- The C compiler identification is GNU 12.1.0
...
Compiler for Shipped Gmsh
Out of curiosity, I used a text editor to open the gmsh.exe binary I downloaded. I was curious to see if I could determine which compiler was used to generate it. The data in gmsh.exe was so much richer than I could have expected – there is information about not just the compiler, but also the compilation flags! Granted, I’m not yet 100% sure that this metadata is describing the gmsh.exe binary.
General Information:
-------------------
                   HDF5 Version: 1.10.5
                  Configured on: Mon May 17 05:00:08 PDT 2021
                  Configured by: geuzaine@DESKTOP-BH6899J
                    Host system: x86_64-unknown-cygwin
              Uname information: CYGWIN_NT-10.0 DESKTOP-BH6899J 3.2.0(0.340/5/3) 2021-03-29 08:42 x86_64 Cygwin
                       Byte sex: little-endian
             Installation point: /usr/local

Compiling Options:
------------------
                     Build Mode: production
              Debugging Symbols: no
                        Asserts: no
                      Profiling: no
             Optimization Level: high

Linking Options:
----------------
                      Libraries: static
  Statically Linked Executables:
                        LDFLAGS:
                     H5_LDFLAGS:
                     AM_LDFLAGS:
                Extra libraries: -lm
                       Archiver: ar
                       AR_FLAGS: cr
                         Ranlib: ranlib

Languages:
----------
                              C: yes
                     C Compiler: /usr/bin/x86_64-w64-mingw32-gcc ( x86_64-w64-mingw32-gcc (GCC) 10.2.0)
                       CPPFLAGS:
                    H5_CPPFLAGS:   -DNDEBUG -UH5_DEBUG_API
                    AM_CPPFLAGS: -D_FILE_OFFSET_BITS=64
                        C Flags:
                     H5 C Flags:   -pedantic -Wall -Wextra -Wbad-function-cast -Wc++-compat -Wcast-align -Wcast-qual -Wconversion -Wdeclaration-after-statement -Wdisabled-optimization -Wfloat-equal -Wformat=2 -Winit-self -Winvalid-pch -Wmissing-declarations -Wmissing-include-dirs -Wmissing-prototypes -Wnested-externs -Wold-style-definition -Wpacked -Wpointer-arith -Wredundant-decls -Wshadow -Wstrict-prototypes -Wswitch-default -Wswitch-enum -Wundef -Wunused-macros -Wunsafe-loop-optimizations -Wwrite-strings -finline-functions -s -Wno-inline -Wno-aggregate-return -Wno-missing-format-attribute -Wno-missing-noreturn -O
                     AM C Flags:
               Shared C Library: no
               Static C Library: yes


                        Fortran: no

                            C++: no

                           Java: no


Features:
---------
                   Parallel HDF5: no
Parallel Filtered Dataset Writes: no
              Large Parallel I/O: no
              High-level library: yes
                    Threadsafety: no
             Default API mapping: v110
  With deprecated public symbols: yes
          I/O filters (external):
                             MPE: no
                      Direct VFD: no
                         dmalloc: no
  Packages w/ extra debug output: none
                     API tracing: no
            Using memory checker: no
 Memory allocation sanity checks: no
          Function stack tracing: no
       Strict file format checks: no
    Optimization instrumentation: no
Preceding this info was the substring SUMMARY OF THE HDF5 CONFIGURATION. It’s only now that I’m learning about HDF. Reviewing the cmake output also shows that cmake searched for HDF5 (output from CMakeLists.txt):
...
-- Could NOT find HDF5 (missing: HDF5_LIBRARIES HDF5_INCLUDE_DIRS) (found version "")
-- HDF5 not found
...
Finding Program Entry Point via GDB
Which GUI does Gmsh use? This was the simple question I wanted to answer. Looking around the tree I wasn’t sure where the program entry point was. Ended up searching for the regex main([^)] and there are still so many results (looks like benchmarks). Hmm, I could just launch it under the debugger and see which main function is being invoked. Finding instructions for this took longer than I expected (because I ignored the GDB manual). I eventually stumbled into debugging – GDB is not stopping at the first machine code instruction with break _start or info files Entry point address – Stack Overflow, which had the very useful info file command for showing the program’s entry point.
gdb gmsh.exe
GNU gdb (GDB) 12.1
Copyright (C) 2022 Free Software Foundation, Inc.
...
For help, type "help".
Type "apropos word" to search for commands related to "word"...
Reading symbols from gmsh.exe...
(gdb) b main
Function "main" not defined.
...
(gdb) b winmain
Function "winmain" not defined.
...
(gdb) step 1
The program is not being run.
(gdb) info file
Symbols from "D:\dev\repos\other\gmsh\build\gmsh.exe".
Local exec file:
        `D:\dev\repos\other\gmsh\build\gmsh.exe', file type pei-x86-64.
         Entry point: 0x100014f0
        0x0000000010001000 - 0x0000000010d73100 is .text
        0x0000000010d74000 - 0x0000000010dcb700 is .data
...
(gdb) b 0x100014f0
Function "0x100014f0" not defined.
Make breakpoint pending on future shared library load? (y or [n]) [answered N; input not from terminal]
(gdb) b *0x100014f0
Breakpoint 1 at 0x100014f0: file C:/M/mingw-w64-crt-git/src/mingw-w64/mingw-w64-crt/crt/crtexe.c, line 196.
Running the program runs it to termination but by this point in time, I had already found what I was pretty sure was the program’s entry point (by browsing the sources in VSCode). Sure enough, relaunching gdb is now seamless:
(gdb) b wmain
Breakpoint 1 at 0x10001550: file D:/dev/repos/other/gmsh/src/common/Main.cpp, line 34.
(gdb) b GmshMainBatch
Breakpoint 2 at 0x10002fc0: file D:/dev/repos/other/gmsh/src/common/GmshGlobal.cpp, line 486.
(gdb) c
Continuing.

Thread 1 hit Breakpoint 2, GmshMainBatch (argc=1, argv=0x209707c5a90) at D:/dev/repos/other/gmsh/src/common/GmshGlobal.cpp:486
486     {
The GDB User Manual has a section on Starting your Program, which mentions that the starti command “does the equivalent of setting a temporary breakpoint at the first instruction of a program’s execution and then invoking the ‘run’ command.” This is probably closest to what I’ve been looking for.
Building with FLTK
In the midst of the chaos of trying to find the program’s entry point, I read a little bit about FLTK and discovered that it’s the GUI system Gmsh is using. Here’s the new cmake command to build the GUI-enabled Gmsh.
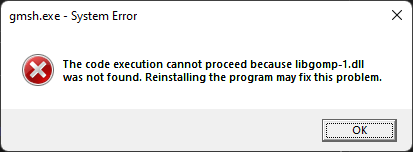
Not only is the newly built gmsh.exe binary is a whooping 674MB, it also can’t start:
Unable to start gmsh.exe because libgomp-1.dll is missing
Same error is displayed for libgomp-10.dll when you click OK. Well, let’s try the install target – presumably that should create a usable installation:
$ make install
make: *** No rule to make target 'install'.  Stop.
Turns out there is no makefile in my build folder – I used ninja! As per the ninja manual, this command should list all available targets:
ninja -t targets all
After verifying that there is indeed an install target, run it using ninja:
ninja install
This is not sufficient to address the resulting missing DLL errors – perhaps additional components need to be statically linked into the produced binary. A work-around for now:
Running gmesh now outputs the program’s usage info and exits. Still need to try it on some examples to ensure it works. There is also the unresolved question of why the GUI didn’t pop up.
Building using Makefiles
Since I used ninja for everything so far, I decided to use the makefiles generator and see what happens.
cmake .. -G "MSYS Makefiles" -DENABLE_FLTK:BOOL=TRUE -DCMAKE_INSTALL_PREFIX=../install

make install
There is no “Building for Ninja” line at the beginning of the cmake output. This time, the newly built gmsh.exe can run without the other DLLs I manually had to copy. Why doesn’t the GUI show up? Read the cmake output carefully:
-- Could NOT find FLTK (missing: FLTK_LIBRARIES FLTK_INCLUDE_DIR)
$ pacman -Ss fltk
...
mingw64/mingw-w64-x86_64-fltk 1.3.7-2
    C++ user interface toolkit (mingw-w64)
...

$ pacman -S --noconfirm --needed mingw64/mingw-w64-x86_64-fltk
Now running cmake finds FLTK:
-- Found FLTK: D:/dev/Software/msys64/mingw64/lib/libfltk_images.a;D:/dev/Software/msys64/mingw64/lib/libfltk_gl.a;opengl32;D:/dev/Software/msys64/mingw64/lib/libfltk.a
-- Found Fltk
And that’s it! Launching Gmsh from the install folder now launches the GUI application.
Outstanding Questions
Why does using the Makefiles generator produce a build that doesn’t require additional DLLs?