My post on How to Build Elmer on Windows has a succinct list of instructions but when I first built the Elmer source code (on Windows), I was unsure how to run the binaries. Running ElmerGUI, for example, failed because qt5.dll could not be found. This post details the process I used to figure out how to create a usable Elmer installation.
I started by going through the generated Makefile. It contained targets like install, install/local, and install/strip. I started with install/local, fearing that perhaps these targets would attempt to install the binaries into program files.
Installing only the local directory...
-- Install configuration: "RelWithDebInfo"
-- Installing: C:/dev/repos/fem/install/bin/libopenblas.dll.a
CMake Error at cmake_install.cmake:45 (file):
  file INSTALL cannot find "C:/dev/repos/fem/elmerfem/../bundle_msys2/bin":
  No error.


make: *** [Makefile:142: install/local] Error 1
The error at cmake_install.cmake:45 is from ElmerCPack.cmake. I did not even know about the existence of the CPack tool. Git blame points to commit b9914082 as the source of the failing command. The strange thing about that commit is that there is no mention of what is supposed to create the bundle folders (despite the callout that the change “Relies on selected bundled files selected prior to installation”).
A workaround I tried was to use this define when running cmake: CPACK_BUNDLE_EXTRA_WINDOWS_DLLS:BOOL=FALSE. That avoided the build error but did not result in a usable installation. ElmerGUI’s windows_bundle.cmake needs this to be set to TRUE to package the Qt5 binaries into the install folder. Strangely enough, ElmerGUILogger’s windows_bundle.cmake does not have this logic for Qt5. This is likely because ElmerGUI would already have installed the right files into the bin folder but this looks like a bug.
Another work-around I tried was to manually create the folders expected by the build. The install target then succeeded but the necessary binaries were not copied to the install folder.
This is when I dig around and find that only ElmerGUILogger and ElmerClips include windows_bundle.cmake. Hmm… the latter looks promising but doesn’t look up to date either since it requires Qt4. More exploring of the Makefile – the package target looks interesting but fails because NSIS is not installed.
...
[ 97%] Built target ElmerGUI_autogen
[100%] Built target ElmerGUI
Run CPack packaging tool...
CPack Error: Cannot find NSIS compiler makensis: likely it is not installed, or not in your PATH
CPack Error: Could not read NSIS registry value. This is usually caused by NSIS not being installed. Please install NSIS from http://nsis.sourceforge.net
CPack Error: Cannot initialize the generator NSIS
make: *** [Makefile:71: package] Error 1
I wonder if we couldn’t just use NSIS for the MSYS environment:
$ pacman -Ss nsis
...
mingw64/mingw-w64-x86_64-nsis 3.06.1-1
Windows installer development tool (mingw-w64)
mingw64/mingw-w64-x86_64-nsis-nsisunz 1.0-2
NSIS plugin which allows you to extract files from ZIP archives (mingw-w64)
...
$ pacman -S mingw64/mingw-w64-x86_64-nsis
Now we can create an Elmer installer by running make package. Unfortunately, that turns out to be insufficient. My next idea is to compare the binaries from the installed. This turned out to be easier when using ls -R1 to output only the file names and in 1 column only. Some obvious differences are that the build in Program Files has a bin folder containing the Qt and vtk binaries (as well as a stripped gfortran).
The Qt binaries certainly look like the output of windows_bundle.cmake (found this time by a search for “vtk”) but it’s still not clear how this file would be includedin the build. I’m using VSCode to search for “windows_bundle” and only 2 of the 3 references in the codebase were showing up (on my desktop). Looking for “ElmerGUILogger” then revealed yet another reference. Such a waste of time! Not cool VSCode, not cool. It’s included in ElmerGUI/CMakeLists.txt. So I probably only need to define WIN32. But why does the WIN32 code run if I add some statements to that IF block?
Some searching (TODO: put bing searches here) leads to indications that there might be an error in CMake where WIN32 is not defined. Seeing signs that MSYS can be in Cywgin? Trying to get to the bottom of why WIN32 is not respected by CMake, I review ElmerGUI/CMakeLists.txt again. It adds the netgen subdirectory. Interestingly, ElmerGUI/netgen/README points out that install\lib\ElmerGUI\ngcore\libng.a is the unix library and that the win32 extension should be .lib. Biggest sign I’ve seen so far that something is really off. At this point, I remember seeing a .a file in the install folder – and that seemed strange for a lib folder since I expected a DLL. This hypothesis fails though because the working Elmer installation also has the file “C:\Program Files\Elmer 9.0-Release\lib\ElmerGUI\ngcore\libng.a“.
The sure way to verify that the WIN32 include is working is to introduce an error into windows_bundle.cmake, e.g. by change the first IF into the unknown IF2. Even better, notice that the “Qt5 Windows packaging” message is correctly displayed. Perhaps the FIND_FILE command should have a REQUIRED option now that it is supported. Adding that doesn’t fail so reexamine the INSTALL command. Since windows_bundle.cmake uses a relative path for the DESTINATION, it is interpreted relative to the value of the CMAKE_INSTALL_PREFIX variable.
How about zooming into the windows_bundle.cmake file and outputting the list of files installed afterthe install command. The new message says the files were installed. However, they aren’t in the install folder! I need an explanation for this behavior. So let’s open Process Explorer and see which paths are actually used. These requests show up using the Qt5 path filter:
These files exist on disk (despite the Result column in process explorer having the value INVALID DEVICE REQUEST)! For a better understanding of what is happening, I change the bin path used by the install command to dbgcmake since there are multiple bin folders (under install and also in the MinGW installation). So such path shows up in Process Explorer when using a path filter for dbgcmake. This means I shouldn’t be expecting this files to be written by cmake at this point. In fact, running grep -Rin dbgcmake shows that build/ElmerGUI/cmake_install.cmake now contains this snippet (thereby verifying that windows_bundle.cmake is used to generate cmake_install.cmake).
if("x${CMAKE_INSTALL_COMPONENT}x" STREQUAL "xelmerguix" OR NOT CMAKE_INSTALL_COMPONENT)
file(INSTALL DESTINATION "${CMAKE_INSTALL_PREFIX}/dbgcmake" TYPE FILE FILES
"D:/dev/Software/msys64/mingw64/bin/Qt5Core.dll"
"D:/dev/Software/msys64/mingw64/bin/Qt5Gui.dll"
"D:/dev/Software/msys64/mingw64/bin/Qt5OpenGL.dll"
"D:/dev/Software/msys64/mingw64/bin/Qt5Script.dll"
"D:/dev/Software/msys64/mingw64/bin/Qt5Xml.dll"
"D:/dev/Software/msys64/mingw64/bin/Qt5Svg.dll"
"D:/dev/Software/msys64/mingw64/bin/Qt5Widgets.dll"
"D:/dev/Software/msys64/mingw64/bin/Qt5PrintSupport.dll"
)
endif()
So back to the question of why windows_bundle.cmake is not invoked by default – let us dig into the CMake sources for clues. Renaming it outputs an error for the include statement meaning the file is being included! Sigh… I end up poking around some CMake sources to see where WIN32 is set anyway.:
I immediately notice that the install command of interest is skipped because CPACK_BUNDLE_EXTRA_WINDOWS_DLLS is not set to TRUE! Setting it to FALSE earlier then seeing a build failure gave the impression that it was set to TRUE everywhere (especially given that ElmerCPack.cmake sets it to TRUE) but that happens afterwindows_bundle.cmake has been evaluated! Here’s the final required command line:
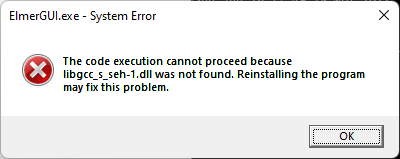
There are lessons there about making assumptions but the biggest takeaway for me is the need for (and existence) of tracing capabilities in CMake. Enabling tracing made it so easy to figure out exactly what was broken – the variable did not have the value I expected and I simply needed to define it! Running make install now results in new errors haha!
The code execution cannot proceed because libgcc_s_seh-1.dll was not found. Reinstalling the program may fix this problem. This error dialog is then followed by others for qwt-qt5.dll, libstdc++-6.dll, and libdouble-conversion.dll respectively. To see which other binaries are required, manually copy these 4 binaries from d:\dev\Software\msys64\mingw64\bin to install/bin. These are the other missing binaries that show up in error dialogs:
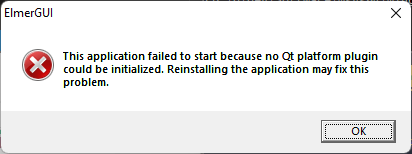
There are so many missing binaries that I wonder if building the other components might be necessary. I first manually copy them from the bin folder to see if ElmerGUI can load but that now fails with the error This application failed to start because no Qt platform plugin could be initialized. Reinstalling the application may fix this problem.
The working installation from the downloaded public Elmer installer has a qwindows.dll in the bin/platforms directory. This file exists on my system as D:\dev\Software\msys64\mingw64\share\qt5\plugins\platforms\qwindows.dll. At this point, I’m really wondering how on earth they are gathering all these files. Hmm, maybe they build using their docker image? Didn’t think of seeing how their docker image is set up. One final try to set up the qwindows.dll first and see what happens.
Lo and behold! ElmerGUI loads successfully! Whether it actually works… well, I will revisit that after I learn how to use Elmer/ElmerGUI :). Actually, turns out ElmerSolver.exe doesn’t start. Here is the fix for the 3 binaries that cause error dialogs:
At this point, ElmerSolver starts up successfully but outputs an error about missing ELMERSOLVER_STARTINFO. This is an error from ElmerSolver.F90 (the Fortran 90 source code). From that code, it looks like the error is because I didn’t specify an input file name and the default file does not exist. This is the same behavior as ElmerSolver.exe from the official Elmer installation.
ELMER SOLVER (v 9.0) STARTED AT: 2022/06/26 21:55:22
ParCommInit: Initialize #PEs: 1
MAIN:
MAIN: =============================================================
MAIN: ElmerSolver finite element software, Welcome!
MAIN: This program is free software licensed under (L)GPL
MAIN: Copyright 1st April 1995 - , CSC - IT Center for Science Ltd.
MAIN: Webpage http://www.csc.fi/elmer, Email elmeradm@csc.fi
MAIN: Version: 9.0 (Rev: af959fd0, Compiled: 2022-06-26)
MAIN: Running one task without MPI parallelization.
MAIN: Running with just one thread per task.
MAIN: =============================================================
ERROR:: ElmerSolver: Unable to find ELMERSOLVER_STARTINFO, can not execute.
STOP 1
Reviewing Docker Files
I was wondering after all this if there was a Windows docker file that had all these steps already baked in. However, the docker directory has only Ubuntu dockerfiles. Perhaps I could create a Windows docker file if I could figure out these dependencies.
Binaries Required by ElmerSolver
The above deployment instructions starts with the binaries required by ElmerGUI but ElmerSolver is the crucial component (since Elmer can be used with the GUI). Here are the binaries grouped such that the ElmerGUI binaries can be excluded if desired.
Deploying the above binaries manually gives a locally runnable build. Unfortunately, it does not fix the build created by CPack when you run make install – that build will not have any of these binaries/dependencies.
I was reading about diffusion coefficients for common dopants when the diffusivity of Boron in crystalline Si was compared to that in amorphous Si. Decided to dig into the differences between the crystalline and amorphous materials. These are the resources I used.
Fertig’s video piqued my curiosity about how we determine these structures, hence his other crystallography video on x-ray diffraction. It introduces Bragg’s law.
As of this post, neither the build instructions on Elmer’s webpage nor the Elmer GitHub repo include instructions for how to build Elmer on Windows. Here is a succinct set of instructions (discovered in the previous post, which detailed the stumbling around that led me a solution).
Clone the Elmer source code.
cd \repos
mkdir fem
cd fem
git clone git://www.github.com/ElmerCSC/elmerfem
Switch to the parent directory of the elmer repo using cd /repos/fem. Note that the elmer repo directory will have siblings such as build and install, so the separate parent directory (fem in this example) simplifies the directory organization.
Create the required directories and switch to the build directory.
# create folders required for building a local install
mkdir -p bundle_msys2/bin
mkdir -p bundle_qt5/bin
mkdir -p platforms
mkdir build
cd build
Deploy the prerequisite binaries for Elmer (Solver, Mesh2D, and GUI):
Build Elmer. When cmake completes, a message will be displayed confirming that generation is done and that build files have been written to the build/ directory. Run make to start compiling the source code or make install to compile the sources then create a local installation in the install/ directory. Note that there are some folders (created using mkdir -p below) that don’t appear to be used in a local build but the build still expects them to exist. You can also specify a debug build by adding the -DCMAKE_BUILD_TYPE=Debug define.
Diffusion is a key step in wafer processing for microprocessor manufacturing. Fick’s laws are therefore an important component in understanding diffusion. Fortunately, there are great resources online for an overview of Fick’s law. I started with the Khan Academy video on Fick’s law of diffusion (embedded below). It was informative but did not go into the level of detail I had hoped for.
Some digging around led to a series of lectures from the Mechanical Engineering’s Fertig Research Group at the University of Wyoming. This video on the mathematics of diffusion (Fick’s 1st law) was the level of detail I was hoping for and was therefore a good supplement to the Khan Academy diffusion overview.
And here’s the video on Fick’s 2nd law (again showing how to derive it and some brief comments about PDEs). I wonder if there is some accessible visualization that could be done of various solutions to the diffusion PDE.
The instructions for building the Elmer source code are really simple! I decided to try them on Windows. The Developer Command Prompt is necessary for cmake (as far as I can tell). Note that C, C++, and Fortran compilers are required for building Elmer.
cd \dev\repos
mkdir fem
git clone git://www.github.com/ElmerCSC/elmerfem
mkdir build
cd build
cmake -DWITH_ELMERGUI:BOOL=TRUE -DWITH_MPI:BOOL=FALSE -DCMAKE_INSTALL_PREFIX=../install ../elmerfem
I discovered that a Fortran compiler is required when I got this error on my first build attempt:
-- Building for: Visual Studio 17 2022
-- The Fortran compiler identification is unknown
-- The C compiler identification is MSVC 19.32.31326.0
-- The CXX compiler identification is MSVC 19.32.31326.0
CMake Error at CMakeLists.txt:34 (PROJECT):
  No CMAKE_Fortran_COMPILER could be found.
Line 34 of CMakeLists.txt – PROJECT(Elmer Fortran C CXX) – uses the PROJECT cmake command to set the project name to “Elmer” and specify the programming languages required, hence the build failure above.
Unfortunately, that wasn’t sufficient to address the build failure. Interestingly, someone else ran into this exact same issue at windows – The MinGW gfortran compiler is not able to compile a simple test program – Stack Overflow. Sad times though when StackOverflow does not have an answer! Their solution for specifying a custom compiler is much cleaner – simply define the CMake variable when invoking cmake!
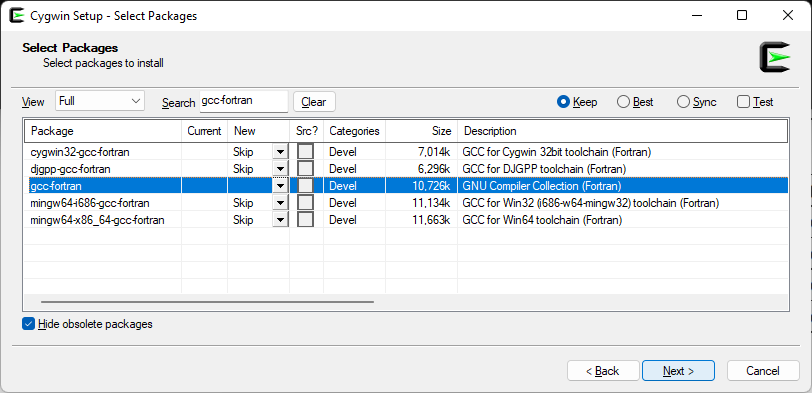
The MinGW-w64 downloads looked promising. Since I already had Cygwin installed, I installed the GFortran package. The path to the GFortran compiler can be retrieved using the Cygwin command cygpath -w `which gfortran` and passed to CMake. That still didn’t work.
At least that showed the mingw Fortran compiler package name mingw64-x86_64-gcc-fortran. Interestingly, that package is marked already installed!
Via MSYS2
Since Cygwin didn’t simply work, I decided to try installing MSYS2 (before resorting to uninstalling the Cygwin gcc-fortran package). The Fortran compiler is installed by MSYS2. Once setup completes, CMake also fails when using the MinGW Fortran compiler!
Since none of the compilers work, let’s take a closer look at the error:
$ cmake -DWITH_ELMERGUI:BOOL=TRUE -DWITH_MPI:BOOL=FALSE -DCMAKE_INSTALL_PREFIX=../install -DCMAKE_Fortran_COMPILER=C:/dev/software/gcc/bin/gfortran.exe ../elmerfem
-- The Fortran compiler identification is unknown
-- Detecting Fortran compiler ABI info
-- Detecting Fortran compiler ABI info - failed
-- Check for working Fortran compiler: C:/dev/software/gcc/bin/gfortran.exe
-- Check for working Fortran compiler: C:/dev/software/gcc/bin/gfortran.exe - broken
CMake Error at C:/Program Files/Microsoft Visual Studio/2022/Preview/Common7/IDE/CommonExtensions/Microsoft/CMake/CMake/share/cmake-3.22/Modules/CMakeTestFortranCompiler.cmake:61 (message):
  The Fortran compiler

    "C:/dev/software/gcc/bin/gfortran.exe"

  is not able to compile a simple test program.

  It fails with the following output:

    Change Dir: D:/dev/repos/fem/build/CMakeFiles/CMakeTmp

    Run Build Command(s):C:/Program Files/Microsoft Visual Studio/2022/Preview/Common7/IDE/devenv.com CMAKE_TRY_COMPILE.sln /build Debug /project cmTC_4528a &&
    Microsoft Visual Studio 2022 Version 17.3.0 Preview 1.0 [...].
    Copyright (C) Microsoft Corp. All rights reserved.

    The operation could not be completed. The parameter is incorrect.

    Use:
    devenv  [solutionfile | projectfile | folder | anyfile.ext]  [switches]
...
To get a sense of what could be going wrong, I opened the folder containing the temporary project CMake is trying to build. Its contents are deleted before CMake terminates. However, the build was slow enough for me to copy all the files into another temp folder to repro this failure. Running the devenv.com command above fails with the same error.
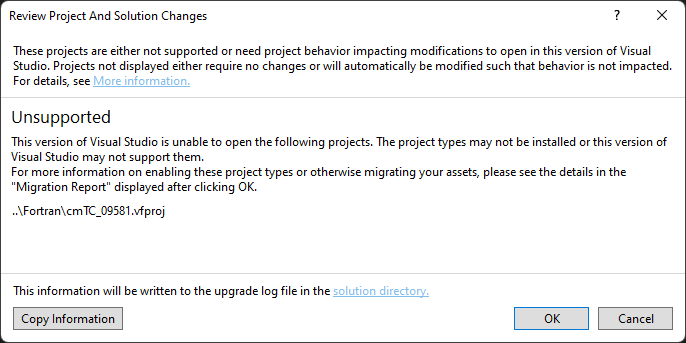
Interestingly, loading the solution in Visual Studio results in an error because one of the projects cannot be loaded! However, that project file has a .vfproj extension (which seems specific to the Intel Fortran compiler, e.g. as described at Cannot open vfproj file in visual studio 2017 – Intel Communities).
Looks like it’s the CMakeTestFortranCompiler.cmake file that is generating Intel Fortran projects. The first check that file is:
if(CMAKE_Fortran_COMPILER_FORCED)
  # The compiler configuration was forced by the user.
  # Assume the user has configured all compiler information.
  set(CMAKE_Fortran_COMPILER_WORKS TRUE)
  return()
endif()
The CMAKE_Fortran_COMPILER_FORCED define can be used to bail out of the custom configuration so define it when invoking cmake:
We now get a new error! Finally making some progress!
cmake -DWITH_ELMERGUI:BOOL=TRUE -DWITH_MPI:BOOL=FALSE -DCMAKE_INSTALL_PREFIX=../install -DCMAKE_Fortran_COMPILER=D:/dev/Software/msys64/mingw64/bin/gfortran.exe -DCMAKE_Fortran_COMPILER_FORCED:BOOL=TRUE ../elmerfem
-- The Fortran compiler identification is unknown
CMake Deprecation Warning at cmake/Modules/FindMKL.cmake:2 (CMAKE_MINIMUM_REQUIRED):
  Compatibility with CMake < 2.8.12 will be removed from a future version of
  CMake.

  Update the VERSION argument <min> value or use a ...<max> suffix to tell
  CMake that the project does not need compatibility with older versions.
Call Stack (most recent call first):
  CMakeLists.txt:308 (FIND_PACKAGE)


-- ------------------------------------------------
-- Looking for Fortran sgemm
-- Looking for Fortran sgemm - not found
-- Looking for pthread.h
-- Looking for pthread.h - not found
-- Found Threads: TRUE
CMake Error at C:/Program Files/Microsoft Visual Studio/2022/Preview/Common7/IDE/CommonExtensions/Microsoft/CMake/CMake/share/cmake-3.22/Modules/FindPackageHandleStandardArgs.cmake:230 (message):
  Could NOT find BLAS (missing: BLAS_LIBRARIES)
Call Stack (most recent call first):
  C:/Program Files/Microsoft Visual Studio/2022/Preview/Common7/IDE/CommonExtensions/Microsoft/CMake/CMake/share/cmake-3.22/Modules/FindPackageHandleStandardArgs.cmake:594 (_FPHSA_FAILURE_MESSAGE)
  C:/Program Files/Microsoft Visual Studio/2022/Preview/Common7/IDE/CommonExtensions/Microsoft/CMake/CMake/share/cmake-3.22/Modules/FindBLAS.cmake:1337 (find_package_handle_standard_args)
  CMakeLists.txt:433 (FIND_PACKAGE)


-- Configuring incomplete, errors occurred!
See also "D:/dev/repos/fem/build/CMakeFiles/CMakeOutput.log".
See also "D:/dev/repos/fem/build/CMakeFiles/CMakeError.log".
This finally gets us past the missing package issues and on to more Fortran compiler errors!
-- Found LAPACK: D:/dev/Software/msys64/mingw64/lib
-- Checking whether D:/dev/Software/msys64/mingw64/bin/gfortran.exe supports PROCEDURE POINTER
-- Checking whether D:/dev/Software/msys64/mingw64/bin/gfortran.exe supports PROCEDURE POINTER -- no
CMake Error at CMakeLists.txt:477 (MESSAGE):
  Fortran compiler does not seem to support the PROCEDURE statement.
Support for PROCEDURE Statements
CMakeLists.txt:475 is this line INCLUDE(testProcedurePointer). The included script tests the Fortran compiler but does not explain why the test fails. To see the details, append the string : ${OUTPUT} to the end of the string “Checking whether ${CMAKE_Fortran_COMPILER} supports PROCEDURE POINTER — no” (just before the closing quote). The error message now contains additional information – the same error from earlier! Opening the solution in Visual Studio confirms that yet another unsupported .vfproj has been generated.
Change Dir: D:/dev/repos/fem/build/CMakeFiles/CMakeTmp

Run Build Command(s):C:/Program Files/Microsoft Visual Studio/2022/Preview/Common7/IDE/devenv.com CMAKE_TRY_COMPILE.sln /build Debug /project cmTC_77a33 &&
Microsoft Visual Studio 2022 Version 17.3.0 Preview 1.0 [...].
Copyright (C) Microsoft Corp. All rights reserved.

The operation could not be completed. The parameter is incorrect.

Use:
devenv  [solutionfile | projectfile | folder | anyfile.ext]  [switches]
<Updated VS, unfortunately changing the CMake version>. This is the CMakeLists.txt generated for the solution:
That does not work though (in my developer command prompt)
CMake Error: CMake was unable to find a build program corresponding to "MinGW Makefiles".  CMAKE_MAKE_PROGRAM is not set.  You probably need to select a different build tool.
CMake Error: CMake was unable to find a build program corresponding to "MinGW Makefiles".  CMAKE_MAKE_PROGRAM is not set.  You probably need to select a different build tool.
CMake Error: CMAKE_C_COMPILER not set, after EnableLanguage
CMake Error: CMAKE_CXX_COMPILER not set, after EnableLanguage
-- Configuring incomplete, errors occurred!
Looks like I need to try this process in MSYS2.
Custom Generator in MSYS
Running which cmake in MSYS did not find cmake so here’s the version I installed.
$ pacman -Ss cmake
...
mingw64/mingw-w64-x86_64-cmake 3.23.2-1
    A cross-platform open-source make system (mingw-w64)
...
$ pacman -S mingw64/mingw-w64-x86_64-cmake
This doesn’t result in being able to run cmake.exe (even though it exists on disk in D:\dev\Software\msys64\mingw64\bin). Time to hit the docs again: msys2 cmake – Search (bing.com) -> Using CMake in MSYS2 – MSYS2. No red flags there… How about a search for the exact error message: msys bash: cmake: command not found – Search (bing.com) -> c++ – CMake is not found when running through make – Stack Overflow. Aha! The answer there about launching MSYS2 using mingw32.exe leads me to inquire about how I’m launching MSYS2. Turns out I’m launching using the last shortcut below (which launches “D:\dev\Software\msys64\msys2_shell.cmd -msys“) instead of MinGW x64.lnk (which launches “D:\dev\Software\msys64\msys2_shell.cmd -mingw64“). Sure enough, which cmake now shows /mingw64/bin/cmake.
Retrying the command line now makes progress! Notice the Fortran compiler is successfully detected (and the GNU C++ compiler is also selected).
$ cmake -G "MinGW Makefiles" -DWITH_ELMERGUI:BOOL=TRUE -DWITH_MPI:BOOL=FALSE -DCMAKE_INSTALL_PREFIX=../install -DCMAKE_Fortran_COMPILER=D:/dev/Software/msys64/mingw64/bin/gfortran.exe -DCMAKE_Fortran_COMPILER_FORCED:BOOL=TRUE -DBLAS_LIBRARIES=D:/dev/Software/msys64/mingw64/lib -DLAPACK_LIBRARIES=D:/dev/Software/msys64/mingw64/lib ../elmerfem
-- The Fortran compiler identification is GNU 12.1.0
-- The C compiler identification is GNU 12.1.0
-- The CXX compiler identification is GNU 12.1.0
...
The build fails but things are very promising now. The error is because Qt is missing:
--   Building ElmerGUI
-- ------------------------------------------------
CMake Deprecation Warning at ElmerGUI/CMakeLists.txt:1 (CMAKE_MINIMUM_REQUIRED):
  Compatibility with CMake < 2.8.12 will be removed from a future version of
  CMake.

  Update the VERSION argument <min> value or use a ...<max> suffix to tell
  CMake that the project does not need compatibility with older versions.


CMake Warning at ElmerGUI/CMakeLists.txt:19 (find_package):
  By not providing "FindQt5.cmake" in CMAKE_MODULE_PATH this project has
  asked CMake to find a package configuration file provided by "Qt5", but
  CMake did not find one.

  Could not find a package configuration file provided by "Qt5" with any of
  the following names:

    Qt5Config.cmake
    qt5-config.cmake

  Add the installation prefix of "Qt5" to CMAKE_PREFIX_PATH or set "Qt5_DIR"
  to a directory containing one of the above files.  If "Qt5" provides a
  separate development package or SDK, be sure it has been installed.


-- ------------------------------------------------
CMake Error at D:/dev/Software/msys64/mingw64/share/cmake/Modules/FindQt4.cmake:1314 (message):
  Found unsuitable Qt version "" from NOTFOUND, this code requires Qt 4.x
Call Stack (most recent call first):
  ElmerGUI/CMakeLists.txt:42 (FIND_PACKAGE)
Installing Qt5 does not address the build failure. The new error message:
--   Building ElmerGUI
-- ------------------------------------------------
CMake Deprecation Warning at ElmerGUI/CMakeLists.txt:1 (CMAKE_MINIMUM_REQUIRED):
  Compatibility with CMake < 2.8.12 will be removed from a future version of
  CMake.

  Update the VERSION argument <min> value or use a ...<max> suffix to tell
  CMake that the project does not need compatibility with older versions.


-- ------------------------------------------------
-- Qt5 Windows packaging
--   [ElmerGUI] Qt5:               1
--   [ElmerGUI] Qt5 Libraries: Qt5::OpenGL Qt5::Xml Qt5::Script Qt5::Gui Qt5::Core
-- ------------------------------------------------
CMake Warning (dev) at D:/dev/Software/msys64/mingw64/share/cmake/Modules/FindPackageHandleStandardArgs.cmake:438 (message):
  The package name passed to `find_package_handle_standard_args` (OpenGL)
  does not match the name of the calling package (Qwt).  This can lead to
  problems in calling code that expects `find_package` result variables
  (e.g., `_FOUND`) to follow a certain pattern.
Call Stack (most recent call first):
  D:/dev/Software/msys64/mingw64/share/cmake/Modules/FindOpenGL.cmake:443 (FIND_PACKAGE_HANDLE_STANDARD_ARGS)
  ElmerGUI/cmake/Modules/FindQwt.cmake:10 (INCLUDE)
  ElmerGUI/CMakeLists.txt:61 (FIND_PACKAGE)
This warning is for project developers.  Use -Wno-dev to suppress it.

-- Found OpenGL: opengl32
CMake Warning (dev) at D:/dev/Software/msys64/mingw64/share/cmake/Modules/FindPackageHandleStandardArgs.cmake:438 (message):
  The package name passed to `find_package_handle_standard_args` (Qt3) does
  not match the name of the calling package (Qwt).  This can lead to problems
  in calling code that expects `find_package` result variables (e.g.,
  `_FOUND`) to follow a certain pattern.
Call Stack (most recent call first):
  D:/dev/Software/msys64/mingw64/share/cmake/Modules/FindQt3.cmake:213 (FIND_PACKAGE_HANDLE_STANDARD_ARGS)
  D:/dev/Software/msys64/mingw64/share/cmake/Modules/FindQt.cmake:160 (include)
  ElmerGUI/cmake/Modules/FindQwt.cmake:11 (INCLUDE)
  ElmerGUI/CMakeLists.txt:61 (FIND_PACKAGE)
This warning is for project developers.  Use -Wno-dev to suppress it.

-- Could NOT find Qt3 (missing: QT_QT_LIBRARY QT_INCLUDE_DIR)
CMake was unable to find desired Qt version: 3. Set advanced values QT_QMAKE_EXECUTABLE and QT3_QGLOBAL_H_FILE.
--   [ElmerGUI] Qwt:             FALSE
--   [ElmerGUI] QWT_LIBRARY:     QWT_LIBRARY-NOTFOUND
--   [ElmerGUI] QWT_INCLUDE_DIR: QWT_INCLUDE_DIR-NOTFOUND
-- ------------------------------------------------
CMake Warning (dev) at D:/dev/Software/msys64/mingw64/lib/cmake/Qt5Core/Qt5CoreMacros.cmake:44 (message):
  qt5_use_modules is not part of the official API, and might be removed in Qt
  6.
Call Stack (most recent call first):
  D:/dev/Software/msys64/mingw64/lib/cmake/Qt5Core/Qt5CoreMacros.cmake:431 (_qt5_warn_deprecated)
  ElmerGUI/Application/CMakeLists.txt:216 (QT5_USE_MODULES)
This warning is for project developers.  Use -Wno-dev to suppress it.

-- ------------------------------------------------
--   BLAS library:   D:/dev/Software/msys64/mingw64/lib
--   LAPACK library: D:/dev/Software/msys64/mingw64/lib
-- ------------------------------------------------
--   Fortran compiler:        D:/dev/Software/msys64/mingw64/bin/gfortran.exe
--   Fortran flags:            -fallow-argument-mismatch -O2 -g -DNDEBUG
-- ------------------------------------------------
--   C compiler:              D:/dev/Software/msys64/mingw64/bin/cc.exe
--   C flags:                  -O2 -g -DNDEBUG
-- ------------------------------------------------
--   CXX compiler:            D:/dev/Software/msys64/mingw64/bin/c++.exe
--   CXX flags:                -O2 -g -DNDEBUG
-- ------------------------------------------------
-- ------------------------------------------------
--   Package filename: elmerfem-9.0--20220612_Windows-AMD64
--   Patch version: 9.0-
CMake Error at cpack/ElmerCPack.cmake:99 (INSTALL):
  INSTALL FILES given directory "D:/dev/Software/msys64/mingw64/lib" to
  install.
Call Stack (most recent call first):
  CMakeLists.txt:660 (INCLUDE)


-- Configuring incomplete, errors occurred!
See also "D:/dev/repos/fem/build/CMakeFiles/CMakeOutput.log".
See also "D:/dev/repos/fem/build/CMakeFiles/CMakeError.log".
Does this need Qt3? The ElmerGUI documentation says Qt4 (4.8 or higher). FindQt.cmake:160 (in bold above) appears to indicate that only Qt versions 3 and 4 are supported in MinGW. The mix of warnings and “could not find” makes it hard to know exactly what is wrong. The last error, for example, appears to be about the installation files directory. So is there anything wrong with Qt? I’ll assume not.
The cmake docs on installing files doesn’t point to anything peculiar in this scenario but this is a hint that my LAPACK_LIBRARIES variable is most likely wrong. Let’s drop it altogether:
# Clean up old make files
# rm -fr *

cmake -G "MinGW Makefiles" -DWITH_ELMERGUI:BOOL=TRUE -DWITH_MPI:BOOL=FALSE -DCMAKE_INSTALL_PREFIX=../install -DCMAKE_Fortran_COMPILER=D:/dev/Software/msys64/mingw64/bin/gfortran.exe -DCMAKE_Fortran_COMPILER_FORCED:BOOL=TRUE -DBLAS_LIBRARIES=D:/dev/Software/msys64/mingw64/lib ../elmerfem
The build still fails but right before the error, notice the LAPACK library now has a DLL instead of a directory (below)!
So now it makes sense to drop the BLAS_LIBRARIES definition as well!
# Clean up old make files
# rm -fr *

cmake -G "MinGW Makefiles" -DWITH_ELMERGUI:BOOL=TRUE -DWITH_MPI:BOOL=FALSE -DCMAKE_INSTALL_PREFIX=../install -DCMAKE_Fortran_COMPILER=D:/dev/Software/msys64/mingw64/bin/gfortran.exe -DCMAKE_Fortran_COMPILER_FORCED:BOOL=TRUE ../elmerfem
This build step now succeeds as indicated by the selection of libopenblas.dll.a as the BLAS and LAPACK library.
-- ------------------------------------------------
--   BLAS library:   D:/dev/Software/msys64/mingw64/lib/libopenblas.dll.a
--   LAPACK library: D:/dev/Software/msys64/mingw64/lib/libopenblas.dll.a
-- ------------------------------------------------
--   Fortran compiler:        D:/dev/Software/msys64/mingw64/bin/gfortran.exe
--   Fortran flags:            -fallow-argument-mismatch -O2 -g -DNDEBUG
-- ------------------------------------------------
--   C compiler:              D:/dev/Software/msys64/mingw64/bin/cc.exe
--   C flags:                  -O2 -g -DNDEBUG
-- ------------------------------------------------
--   CXX compiler:            D:/dev/Software/msys64/mingw64/bin/c++.exe
--   CXX flags:                -O2 -g -DNDEBUG
-- ------------------------------------------------
-- ------------------------------------------------
--   Package filename: elmerfem-9.0--20220612_Windows-AMD64
--   Patch version: 9.0-
-- Configuring done
CMake Error: The following variables are used in this project, but they are set to NOTFOUND.
Please set them or make sure they are set and tested correctly in the CMake files:
QWT_INCLUDE_DIR (ADVANCED)
   used as include directory in directory D:/dev/repos/fem/elmerfem/ElmerGUI/Application
   ...
   used as include directory in directory D:/dev/repos/fem/elmerfem/ElmerGUI/Application
QWT_LIBRARY (ADVANCED)
    linked by target "ElmerGUI" in directory D:/dev/repos/fem/elmerfem/ElmerGUI/Application
...
Looks like I now need to define QWT_INCLUDE_DIR and QWT_LIBRARY. Hmm, I don’t think I even installed QWT.
$ pacman -S mingw64/mingw-w64-x86_64-qwt-qt5
resolving dependencies...
looking for conflicting packages...

Packages (1) mingw-w64-x86_64-qwt-qt5-6.2.0-5

Total Download Size:    29.17 MiB
Total Installed Size:  175.53 MiB

:: Proceed with installation? [Y/n] y
:: Retrieving packages...
 mingw-w64-x86_64-qwt-qt5-6.2.0-5-any                                                                                  29.2 MiB  1136 KiB/s 00:26 [###...###] 100%
(1/1) checking keys in keyring                                                                                                                    [###...###] 100%
(1/1) checking package integrity                                                                                                                  [###...###] 100%
(1/1) loading package files                                                                                                                       [###...###] 100%
(1/1) checking for file conflicts                                                                                                                 [###...###] 100%
(1/1) checking available disk space                                                                                                               [###...###] 100%
:: Processing package changes...
(1/1) installing mingw-w64-x86_64-qwt-qt5                                                                                                         [#########################################################################################] 100%
Optional dependencies for mingw-w64-x86_64-qwt-qt5
    mingw-w64-x86_64-qt5-tools [installed]
Now that QWT is installed, we can set the include directory as follows:
CMake finally succeeds! The output ends with these lines:
-- Generating done
-- Build files have been written to: D:/dev/repos/fem/build
The generated Makefile has targets such as ElmerGUI, elmersolver, AdvectionDiffusion, FluxSolver, etc. The strange thing is that it has a line that sets SHELL = cmd.exe and so a Windows command prompt is launched when you run make.
#==================================================================
# Target rules for targets named ElmerGUI

# Build rule for target.
ElmerGUI: cmake_check_build_system
	$(MAKE) $(MAKESILENT) -f CMakeFiles\Makefile2 ElmerGUI
.PHONY : ElmerGUI

# fast build rule for target.
ElmerGUI/fast:
	$(MAKE) $(MAKESILENT) -f ElmerGUI\Application\CMakeFiles\ElmerGUI.dir\build.make ElmerGUI/Application/CMakeFiles/ElmerGUI.dir/build
.PHONY : ElmerGUI/fast
Now we see the expected SHELL = /bin/sh and running make actually causes code to start building! What a journey! I will write another post with simplified instructions for how to build Elmer (on Windows).
$ make
[  0%] Building C object matc/src/CMakeFiles/matc.dir/c3d.c.obj
[  0%] Building C object matc/src/CMakeFiles/matc.dir/clip.c.obj
[  0%] Building C object matc/src/CMakeFiles/matc.dir/dri_ps.c.obj
[  0%] Building C object matc/src/CMakeFiles/matc.dir/eig.c.obj
...
After learning about Czoralski crystal growth last month, I saw a mention of simulating this growth process and realized that this simulation would be a great candidate for a high performance computing project. A search for such code on GitHub.com revealed arvedes’ simple example for transient Czochralski growth simulation with Elmer. I’d never heard of this program before but it is open source and on GitHub as the elmerfem repo! Since I am a total newbie to finite element analysis, I found a video to introduce me to the field.
As for Elmer, there is a decent (as far as I can tell) set of webinars on YouTube ranging from an Introduction to Elmer to how to use Elmer in various scientific applications. Looks like a promising place to begin exploring this tool to see what it can do and how it has been used.
Crystal defects play an important role in semiconductor fabrication. One type of defect is a Frenkel defect. Understanding such defects involves determining the vacancy concentration as given by Arrhenius function. I reviewed several videos to help me understand this equation:
Background Concepts
I took a detour to remind myself about activation energy, electron volts, and Boltzmann’s constant (all of which feature when studying Arrhenius function).
Line Defects
Another type of crystal defect is a line defect, e.g. edge dislocation. These videos contain additional information about edge dislocations.
Area Defects
A stacking fault is an extra plane of atoms. Some resources about stack faults:
Gettering is a process by which impurities and defects diffuse through the crystal (controlling where defects occur). This can be used to improve yield in semiconductor manufacturing as explained in this video:
The previous post outlined my introduction to materials science with interest stemming from applications in microfabrication. Reading section 2.2 of Fabrication Engineering at the Micro- and Nanoscale left me curious for more information about crystal structures. A YouTube search for “face centered cubic structure” led me to the videos below, which proved sufficient for gaining a basic understanding of crystal structures.
These are also discussed in section 2.2 of the text and are explained in these videos. Interestingly, neither of the videos mentioned the fact that the plane notation also denotes a vector (from the origin) that is perpendicular to that plane!
An important concept when working with materials is how to represent their properties. Phase diagrams are often used for this. I have found watching lectures to be an easier way of getting into a field as new (to me) as microfabrication. This Intro to Phase Diagrams {Texas A&M: Intro to Materials} video, for example, was an easier introduction to the topic than the notes in the microfabrication book I was reading.
This video was also my first introduction to the types of issues studied in the materials science space. The next topic in the microfabrication book I was reading was crystallography. I wanted to get an overview of the area before delving into the microfabrication aspect of crystallography. A YouTube search led me to this Lecture – Intro to Crystallography from my alma mater (interestingly, from the materials science department again)!
After watching these videos, I did a quick search for material science in the Amazon books section, hoping to see the types of topics people study in this field. Materials Science and Engineering: An Introduction looks like a great candidate (cost aside)! Looks like this is an area folks in semiconductor manufacturing need to have a handle on… More to come on crystallography as it pertains to semiconductors.